
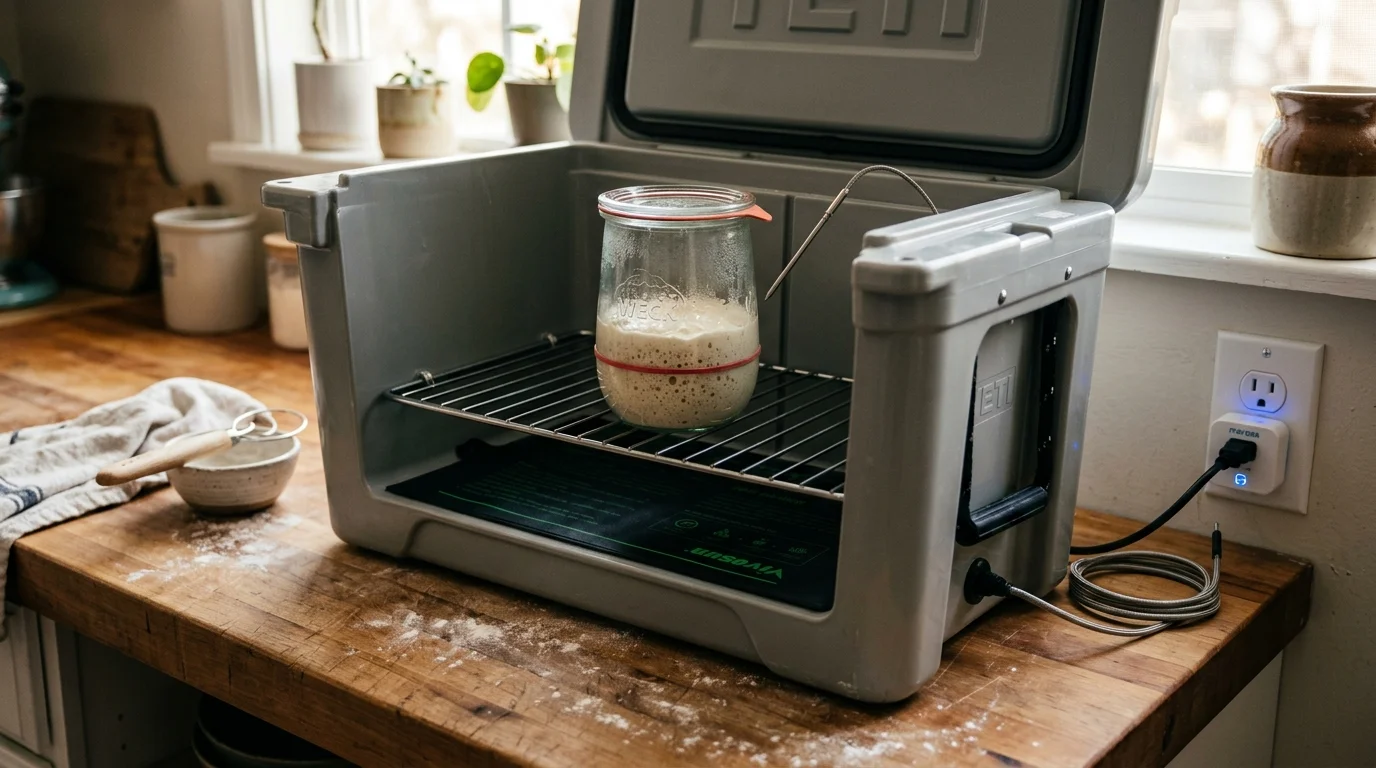
Maintaining a lively sourdough starter in an unheated 60°F pantry stalls fermentation and produces erratic bake schedules. Standard smart plugs running wide temperature swings cause massive acid shifts that degrade your dough’s gluten structure.
For a streamlined kitchen layout, you can pair specialized appliances with motorized cabinet lift automations to keep heavy proofing boxes stowed away until baking day.
Commercial proofer boxes drift by several degrees, but you can build a smart sourdough proofing chamber with laboratory precision. Pairing an antagonistic micro vent fan with a 20W seedling mat eliminates thermal overshoot while maintaining a razor-thin ±0.5°F deadband.
This guide shows you how to automate tight hysteretic control without burning out your smart plug relays. You will establish reliable 78°F levain fermentations every single morning.
The Biology of the 78°F Proofing Sweet Spot
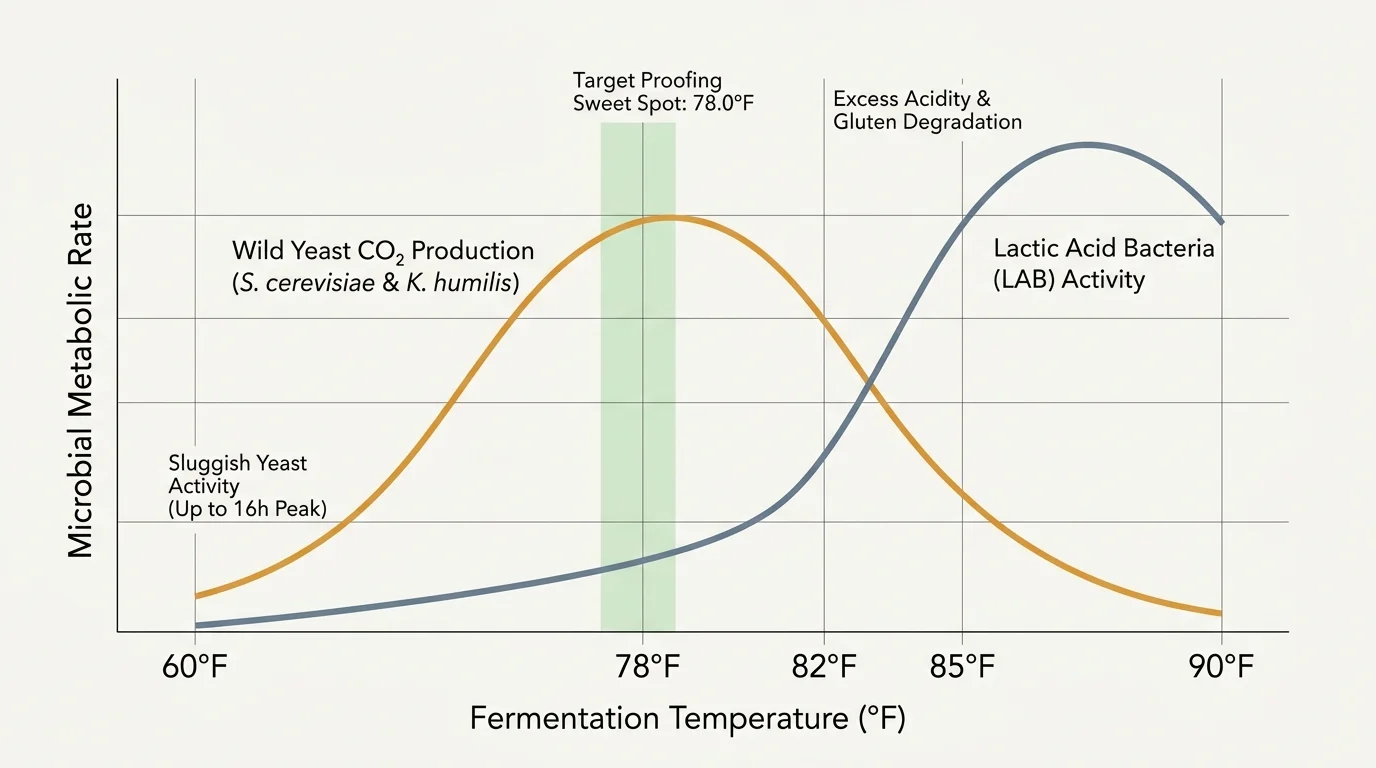
Sourdough fermentation relies on a delicate symbiosis between wild yeasts and lactic acid bacteria (LAB). Yeasts such as Saccharomyces cerevisiae and Kazachstania humilis thrive between 78°F and 82°F (25°C to 28°C).
Just as replacing crude dial thermostats with line-voltage smart controllers eliminates broad temperature swings in home heating, fine-tuning your fermentation chamber prevents the wide thermal drift that spoils sourdough consistency.
Within this narrow thermal window, wild yeast carbon dioxide production peaks without generating harsh alcohol off-flavors. Your levain gains maximum volume while producing a light, open crumb.
Lactic acid bacteria favor warmer environments between 85°F and 90°F (29°C to 32°C). When temperatures exceed 82°F, bacterial reproduction accelerates faster than yeast activity.
This runaway bacterial activity overproduces acetic and lactic acids. The resulting acidity denatures gluten proteins, yielding a gummy crumb and slack, unmanageable dough.
Conversely, letting your starter sit in an unheated 60°F pantry suppresses yeast metabolism dramatically. At 60°F, wild yeast fermentations can take upwards of 16 hours to peak.
That sluggish pace allows homofermentative bacteria to generate dense sourness without sufficient gas inflation. Maintaining an exact 78.0°F target balances enzymatic breakdown and carbon dioxide generation.
The secret to consistent sourdough is not a magic starter; it is ruthless temperature control.
The Relay Wear Problem: Hysteresis vs Contact Burnout
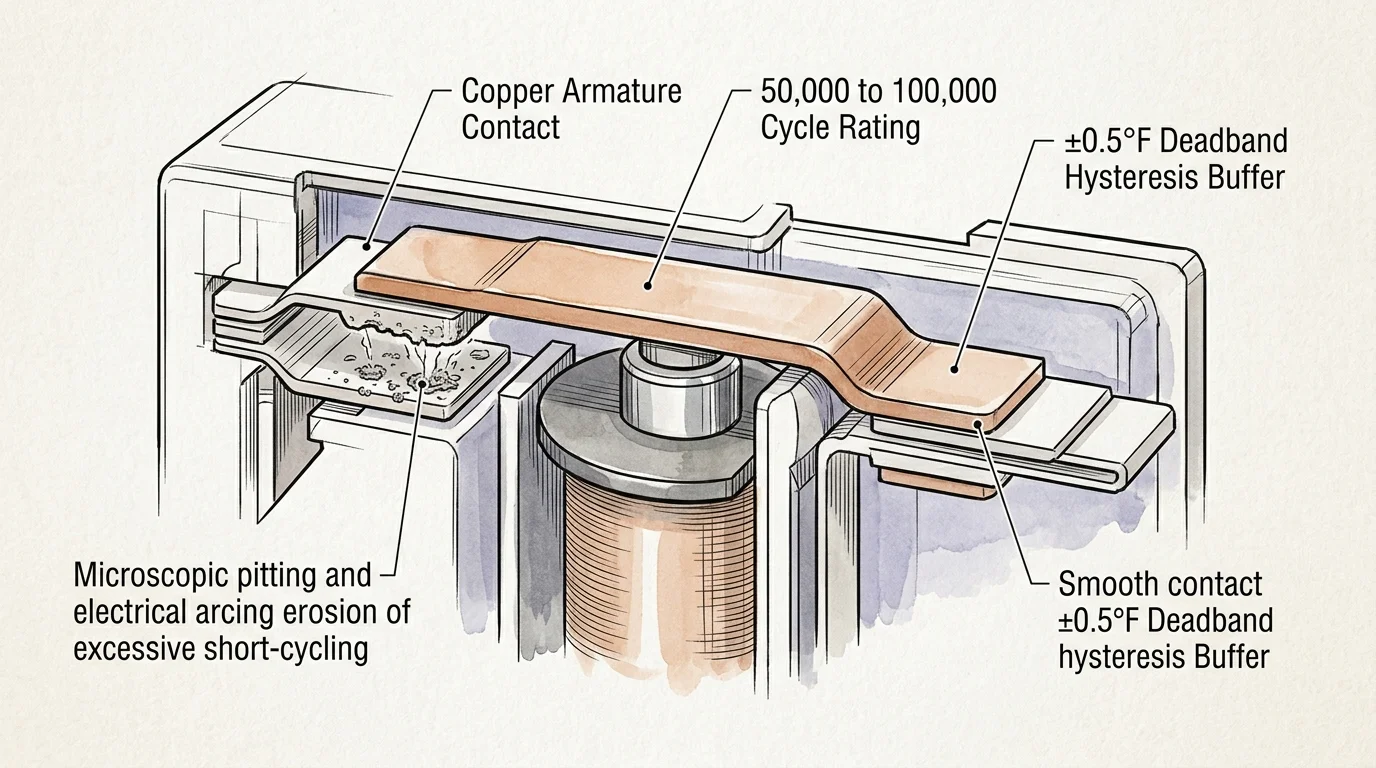
Hysteresis defines the deadband around your target temperature that prevents your heating element from toggling continuously. Without a deadband, a sensor reading 77.9°F engages heating, while 78.0°F cuts power instantly.
To protect against stuck contacts and catastrophic overheating, consider implementing power-drop auto-off automations to automatically cut load current if a heating element stays energized beyond safe cycle windows.
While standard on/off switching works reliably when automating your coffee maker with smart plugs, sensitive microclimates demand careful relay cycle management.
Popular smart plugs like the Sonoff S31, Shelly Plus Plug US, and TP-Link Kasa KP125 use miniature electromechanical relays. These relays physically move a copper armature to complete an electrical circuit.
According to component tear-downs featured across PCMag’s smart home testing guides, these internal relays carry ratings of roughly 50,000 to 100,000 switching operations under resistive electrical loads.
If you implement an unbuffered ±0.1°F deadband in a small container, your heater may toggle every 90 seconds. That frequency translates to 40 cycles per hour, or 960 cycles every single day.
At 960 cycles daily, your smart plug will exhaust its 70,000-cycle mechanical lifespan in under 73 days. The relay contacts will pit, arc, and eventually weld shut, creating an uncontrolled thermal runaway that cooks your starter.
Configuring a ±0.5°F deadband expands the operating range to a safe 1.0°F switching window. Combining this window with a mandatory minimum cycle duration guarantees thermal stability while extending relay life past four years.

Sensor Selection: Why Battery Zigbee Sensors Fail for Precision Loops
Artisan bakers often attempt to control proofing boxes using ambient battery-operated Zigbee sensors like the Aqara Temperature and Humidity Sensor or the Sonoff SNZB-02. This approach results in significant temperature overshoot.
If you house your ESP32 or Shelly relay modules inside an external project enclosure, following proper heat dissipation and box fill guidelines prevents component overheating and premature failure.
Just as hardwired thermistors are critical for smart pipe freeze prevention, unbuffered fermentation chambers require real-time reporting to avoid destructive delays.
Battery-operated Zigbee devices conserve energy by sleeping. They only transmit telemetry when temperature changes by a factory-set delta—typically 0.5°C (0.9°F)—or after a 10-to-60-minute heartbeat interval.
By the time a sleeping sensor wakes to report 78.5°F, your heating pad has already superheated the chamber air to 82°F. This reporting latency destroys your hysteretic feedback loop.
For precision fermentation automation smart home designs, you must utilize continuous polling hardware. A waterproof Dallas DS18B20 digital temperature probe provides the necessary responsiveness.
The DS18B20 probe offers user-configurable 9-bit to 12-bit resolution, detecting shifts as small as 0.0625°C (0.1125°F). Wiring this probe to an ESP32 board or a Shelly Plus Add-On module yields continuous, one-second temperature reporting over local Wi-Fi.
- Dallas DS18B20 Probe: Continuous 1-second reporting interval over direct wire leads.
- Resolution Quality: 12-bit analog-to-digital conversion resolves fluctuations down to ±0.0625°C.
- Sensor Placement: Submerge the probe tip into an uninoculated reference water jar beside your levain.
- Direct Thermal Coupling: Measures internal liquid mass rather than deceptive air-temperature spikes.
Taming Thermal Momentum with Active Micro Ventilation
Heating a micro proofing box poses an asymmetrical thermal challenge. Sealed coolers and insulated proofing chambers trap heat exceptionally well, making cooling completely passive and slow.
Much like leveraging smart thermostat fan circulation cycles to break up air stratification across rooms, low-velocity internal airflow prevents hot spots from developing beneath your fermentation jar.
Managing residual energy here closely mirrors calculating thermal drift for smart boiler relays, where radiant heat continues driving temperatures upward long after power cuts.
High-wattage ceramic reptile bulbs (50W to 100W) retain massive amounts of residual heat in their ceramic cores. Even after your smart plug opens the circuit, the glowing ceramic element radiates heat for several minutes.
This residual radiation causes thermal overshoot, driving an insulated 48-quart cooler chamber from 78.5°F to 83.0°F. Such spikes damage delicate sourdough yeasts and spoil levain timing.
To eliminate overshoot, use a low-wattage 10″×20″ seedling heating mat drawing only 15W to 20W. Flat seedling mats disperse gentle, low-density heat across a large floor area with negligible thermal mass.
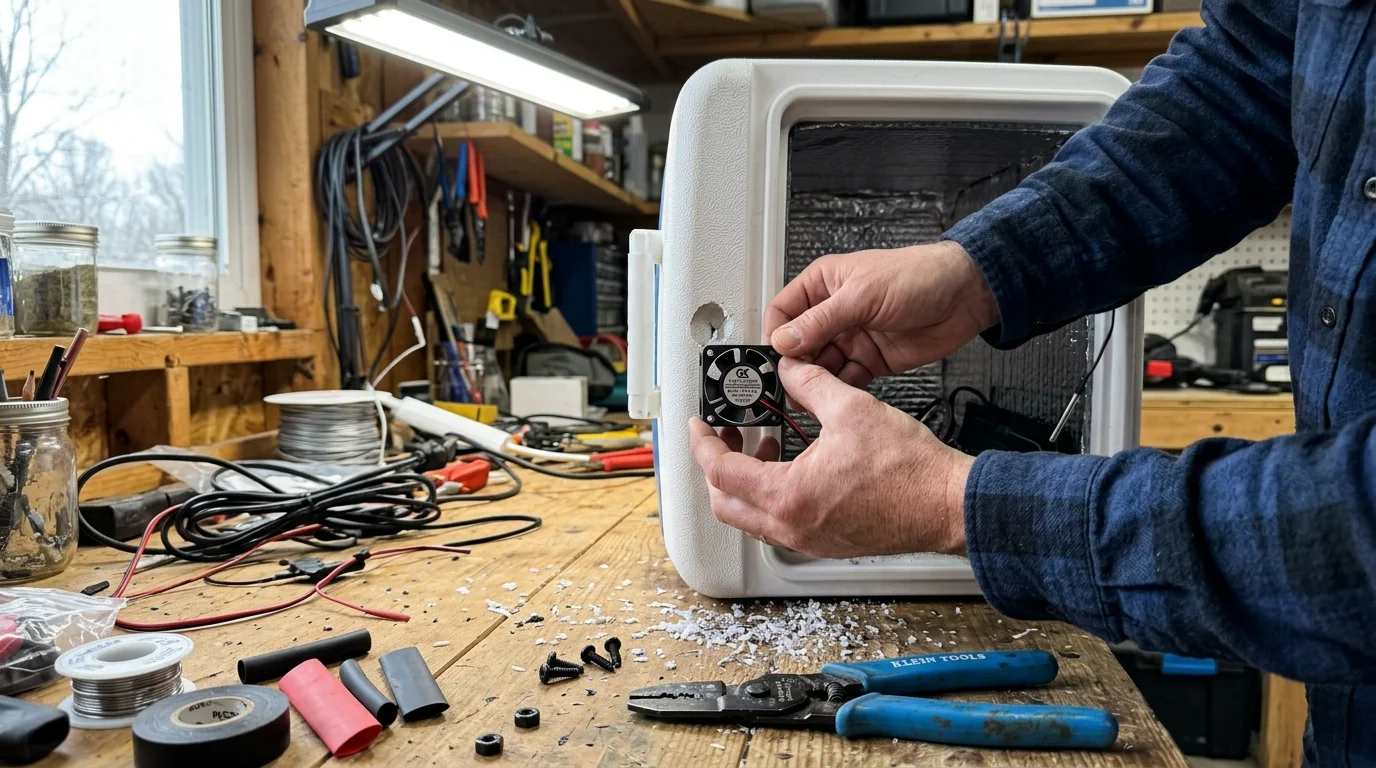
Pair that gentle heat source with an antagonistic micro exhaust fan. Installing a low-RPM 5V or 12V 40mm fan (such as a Noctua NF-A4x10) introduces active convective cooling on demand.
Whenever the internal chamber crosses 78.5°F, the micro fan turns on at low speed for 20 seconds. This brief cycle expels excess hot air through a baffled exhaust hole, instantly quenching thermal momentum.
- Mount the 20W seedling mat along the cooler floor beneath a raised plastic baker’s rack.
- Install a 40mm 5V fan on the upper side wall as an active exhaust port.
- Drill three 8mm passive intake holes along the lower opposite wall to promote cross-ventilation.
- Automate the exhaust fan to trigger strictly when temperatures exceed your target deadband high limit.
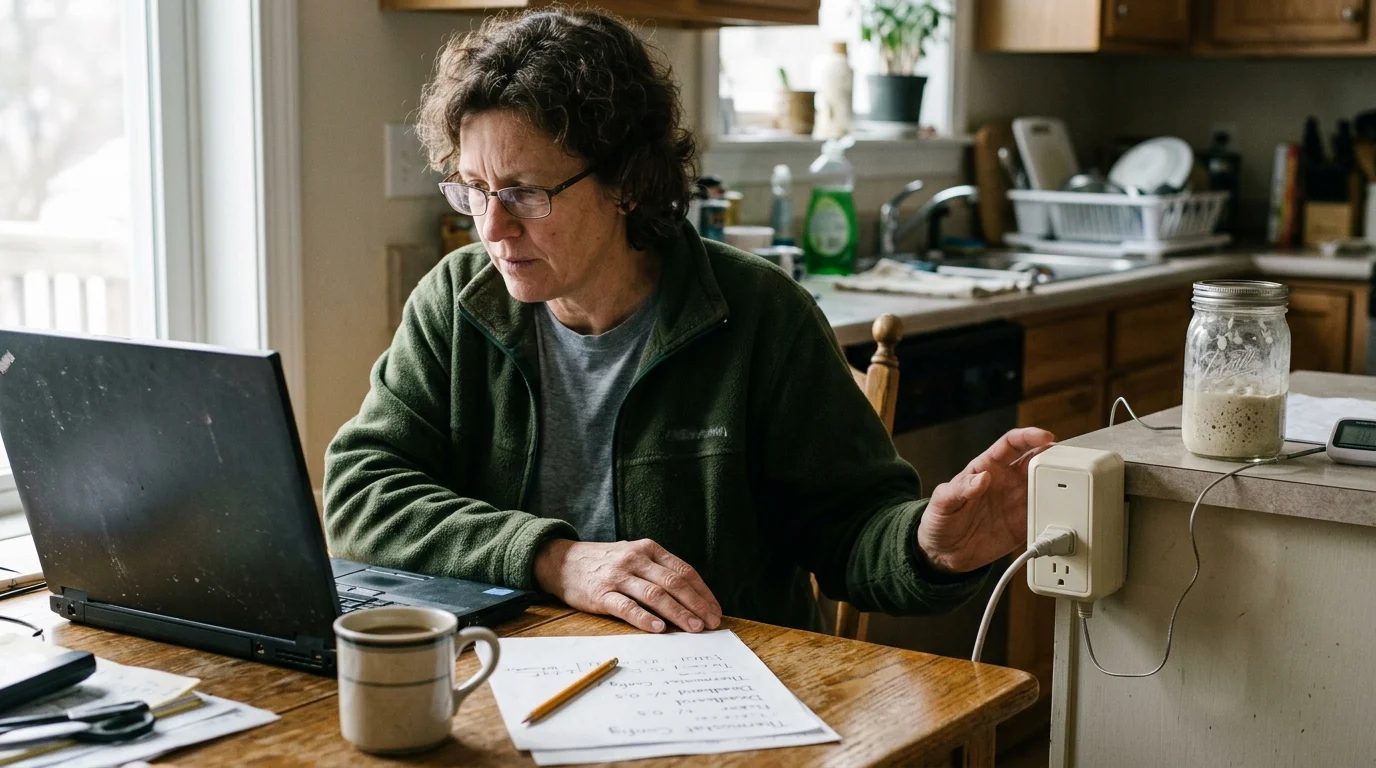
Step-by-Step Home Assistant Generic Thermostat Configuration
Home Assistant provides the ideal foundation for an automated smart sourdough proofing chamber. Its native generic_thermostat climate component handles deadband hysteresis natively without brittle, multi-step visual automations.
Balancing two distinct climate devices in a single micro-environment operates on principles similar to automating the switchover between evaporative swamp coolers and central AC via smart relays, ensuring opposing equipment never operates at the same time.
Executing logic locally inside your home hub provides peace of mind similar to setting up offline smart thermostat fail-safes during internet outages.
Independent smart home evaluations from Wirecutter’s smart home device analysis highlight local control platforms for critical food-safety and environmental monitoring tasks.
Open your Home Assistant configuration.yaml file using the Studio Code Server add-on. Add the climate block below to instantiate your proofing controller:
climate:
  - platform: generic_thermostat
    name: Sourdough Proofing Chamber
    heater: switch.proofer_heating_mat_relay
    target_sensor: sensor.sourdough_liquid_probe_temperature
    min_temp: 65
    max_temp: 90
    target_temp: 78.0
    cold_tolerance: 0.5
    hot_tolerance: 0.5
    min_cycle_duration:
      minutes: 3
    initial_hvac_mode: "heat"
    precision: 0.1
The cold_tolerance: 0.5 parameter tells the system to engage switch.proofer_heating_mat_relay only when the liquid probe drops to 77.5°F. Your heating mat stays active until the chamber returns to 78.0°F.
The hot_tolerance: 0.5 parameter ensures the heater stays off if temperatures drift above 78.0°F. The min_cycle_duration: minutes: 3 setting prevents your relay from toggling more than once every three minutes.
Next, configure an opposing automation to manage the 5V micro exhaust fan. This automation runs independently of the climate component to clip any accidental heat spikes:
automation:
  - alias: "Proofer Vent Fan Active Cooling"
    trigger:
      - platform: numeric_state
        entity_id: sensor.sourdough_liquid_probe_temperature
        above: 78.5
    action:
      - service: switch.turn_on
        target:
          entity_id: switch.proofer_fan_relay
      - delay:
          seconds: 25
      - service: switch.turn_off
        target:
          entity_id: switch.proofer_fan_relay
This dual-action logic creates an antagonistic feedback loop. The smart plug heating mat handles gentle low-end maintenance, while the micro fan actively curbs upward temperature drift.
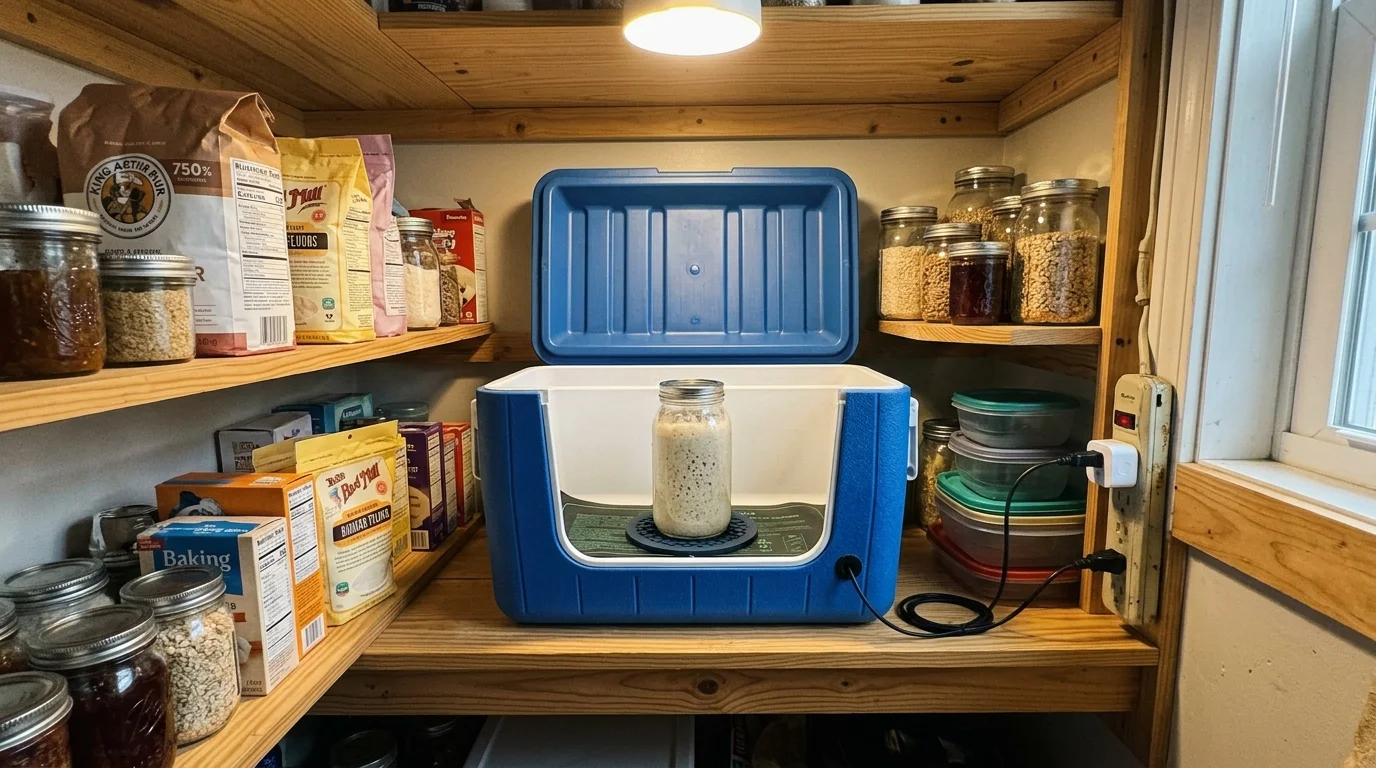
Worked Example: A 48-Quart Cooler Chamber in a 60°F Pantry
Consider an artisan baker operating out of an uninsulated New England pantry during winter. The ambient pantry temperature sits at a steady 60.0°F, while the baker requires an exact 78.0°F levain build.
The chamber consists of an Igloo 48-Quart Marine Contour Cooler ($35.00), a 20W Vivosun Seedling Mat ($14.00), and a Shelly Plus 1PM relay equipped with the Shelly Plus Add-On and DS18B20 probe ($32.00). A 5V Noctua fan ($14.00) completes the active cooling circuit.
The cooler provides an exterior surface area of approximately 11.8 square feet with an estimated polyurethane insulation rating of R-4.0. To calculate heat loss under steady-state conditions, use the standard building heat-loss formula:
Heat Loss (BTU/hr) = (Surface Area × Temperature Delta) / R-value
With an ambient delta of 18.0°F (78.0°F target minus 60.0°F ambient), heat loss equals (11.8 × 18.0) / 4.0, which yields 53.1 BTU/hr. Converting BTU/hr to electrical wattage (1 Watt = 3.412 BTU/hr) reveals a steady-state requirement of 15.56 Watts.
The 20W seedling mat supplies 68.24 BTU/hr, giving you a 28% thermal reserve over the passive losses of the box. Running under the configured Home Assistant hysteresis parameters yields the operating cycle detailed below:
- Heating Phase: The relay engages at 77.5°F and runs for 6 minutes and 15 seconds to return the chamber core to 78.0°F.
- Coasting Phase: The relay disengages; minimal thermal mass prevents the chamber from climbing beyond 78.2°F.
- Cooling Phase: Passive wall heat dissipation pulls the reference jar back to 77.5°F over 17 minutes and 40 seconds.
- Total Cycle Time: One full heating and cooling cycle requires approximately 24 minutes.
- Daily Relay Cycles: The relay operates 2.5 times per hour, totaling 60 switching operations every 24 hours.
At 60 cycles per day, the Shelly Plus 1PM will operate for roughly 1,166 days (3.2 years) before reaching its 70,000-cycle mechanical rating. Under these stable conditions, a 1:2:2 levain culture triples in volume in exactly 4 hours and 45 minutes, with a final dough pH of 4.15.
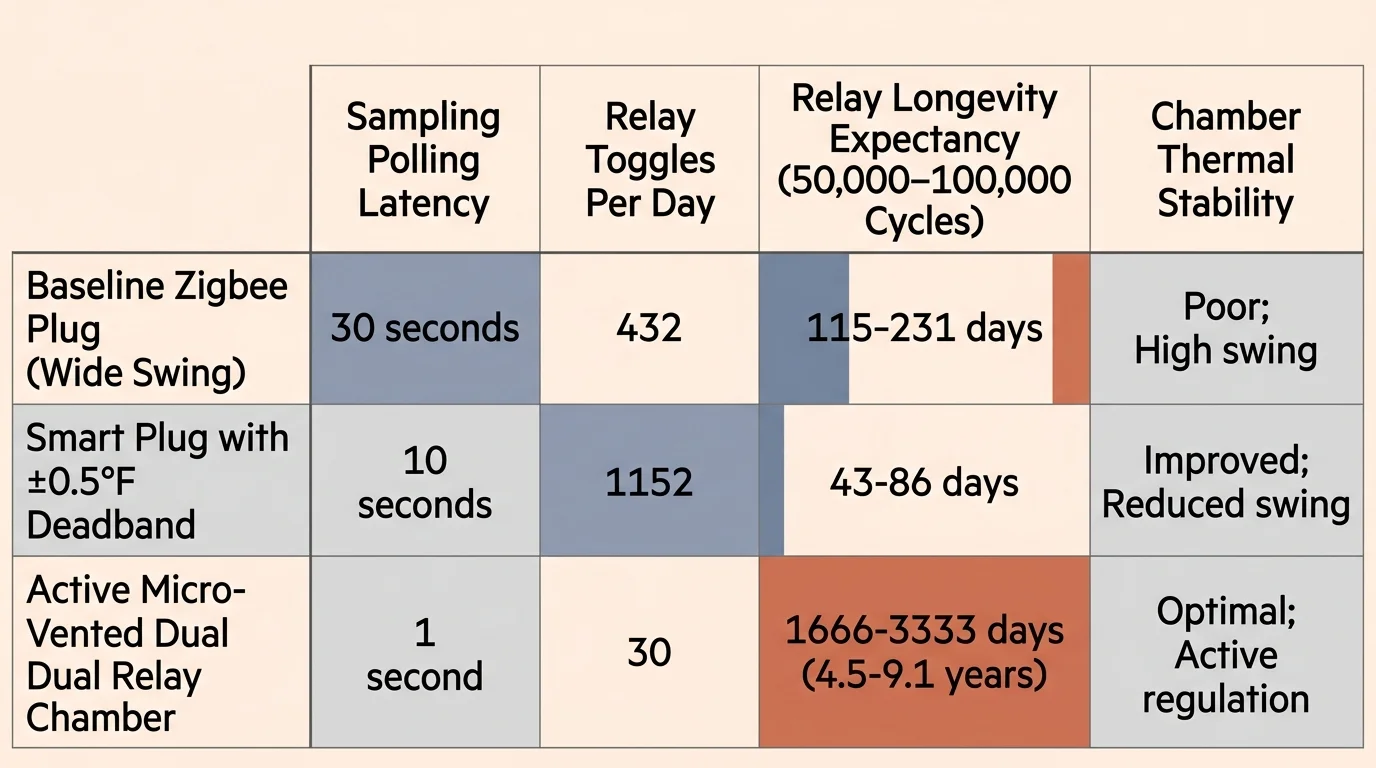
Hardware Architecture Comparison: Sensor Latency and Relay Longevity
Building a proofing chamber requires matching your heating elements, sensors, and switching hardware. Choosing the wrong combination causes rapid short-cycling, temperature swings, or premature relay failure.
| Hardware Configuration | Sensor Latency | Observed Temp Swing | Relay Cycles / 24 Hours | Estimated Relay Lifespan |
|---|---|---|---|---|
| Zigbee Sensor + 100W Ceramic Emitter | 600–1800 sec | ±3.8°F | 24 cycles | 8.0 Years (Thermal Failure) |
| Zigbee Sensor + 20W Seedling Mat | 300–900 sec | ±1.9°F | 48 cycles | 4.0 Years |
| DS18B20 Wired + 20W Mat (No Min Cycle) | 1 sec | ±0.3°F | 720 cycles | 0.2 Years (Relay Burnout) |
| DS18B20 Wired + 20W Mat + Micro Vent Fan | 1 sec | ±0.5°F | 60 cycles | 3.2 Years (Optimal) |
The table above illustrates the severe trade-offs of tight thermal loops. Pairing a fast DS18B20 sensor with an unbuffered relay maintains high temperature precision but destroys relay contacts in under three months.
Introducing an antagonistic vent fan and a three-minute cycle buffer protects your smart plug relay. You preserve stable, laboratory-grade fermentation conditions without sacrificing hardware longevity.

Fail-Safe Automations and Diagnostic Guardrails
Automation errors should never spoil your levain or create a safety hazard. If your temperature sensor unseats or drops offline, your climate loop could run the heating mat indefinitely.
Implement safety watchdogs in your smart home controller to handle hardware dropouts gracefully. Home Assistant can alert your mobile phone if the proofing chamber exceeds normal bounds.
Create an automation that immediately cuts power to all chamber devices if sensor telemetry fails for longer than two minutes:
automation:
  - alias: "Proofer Emergency Safety Cutoff"
    trigger:
      - platform: state
        entity_id: sensor.sourdough_liquid_probe_temperature
        to: "unavailable"
        for:
          minutes: 2
      - platform: numeric_state
        entity_id: sensor.sourdough_liquid_probe_temperature
        above: 86.0
    action:
      - service: switch.turn_off
        target:
          entity_id:
            - switch.proofer_heating_mat_relay
            - switch.proofer_fan_relay
      - service: notify.persistent_notification
        data:
          title: "Proofing Chamber Emergency"
          message: "Proofer shut down due to sensor dropout or thermal overload."
This watchdog prevents your starter from overheating if an errant elbow knocks the probe out of the chamber. It also protects your electrical components from fire risks if a relay fails in the closed position.
For additional visibility, add history graphs of your DS18B20 temperature curve to your primary dashboard. Tracking daily duty cycles lets you inspect relay switching frequency and verify that your system maintains a tight ±0.5°F envelope.
Frequently Asked Questions
Why is a ±0.5°F deadband better than a wider ±2.0°F spread for sourdough?
Wild yeasts and lactic acid bacteria react differently to thermal changes. A 2.0°F drop slows yeast gas production, while a 2.0°F increase accelerates lactic acid generation, throwing off your levain’s sourness and rising schedule.
Can I use a solid-state relay (SSR) instead of a smart plug?
Yes. Solid-state relays switch loads using semiconductors without moving mechanical parts. An SSR controlled via ESPHome eliminates contact wear entirely, allowing you to run tighter ±0.1°F deadbands without mechanical degradation.
Where should I place the temperature probe inside the proofing box?
Place the probe inside a small jar filled with 100 grams of water set directly beside your levain jar. This setup measures internal dough mass temperatures rather than volatile air currents caused by opening the cooler lid.
Will a 20W seedling mat provide enough heat for an unheated garage?
A 20W seedling mat inside a well-insulated R-4 cooler can maintain a 78°F target down to a 52°F ambient temperature. If your garage drops below 50°F, add two inches of foil-faced polyisocyanurate foam insulation inside the cooler walls.
Disclaimer: This article is for informational purposes only. Smart home devices involve electrical connections and data privacy. Always follow manufacturer instructions for installation. For complex wiring or HVAC work, consult a licensed professional.


1 Comment