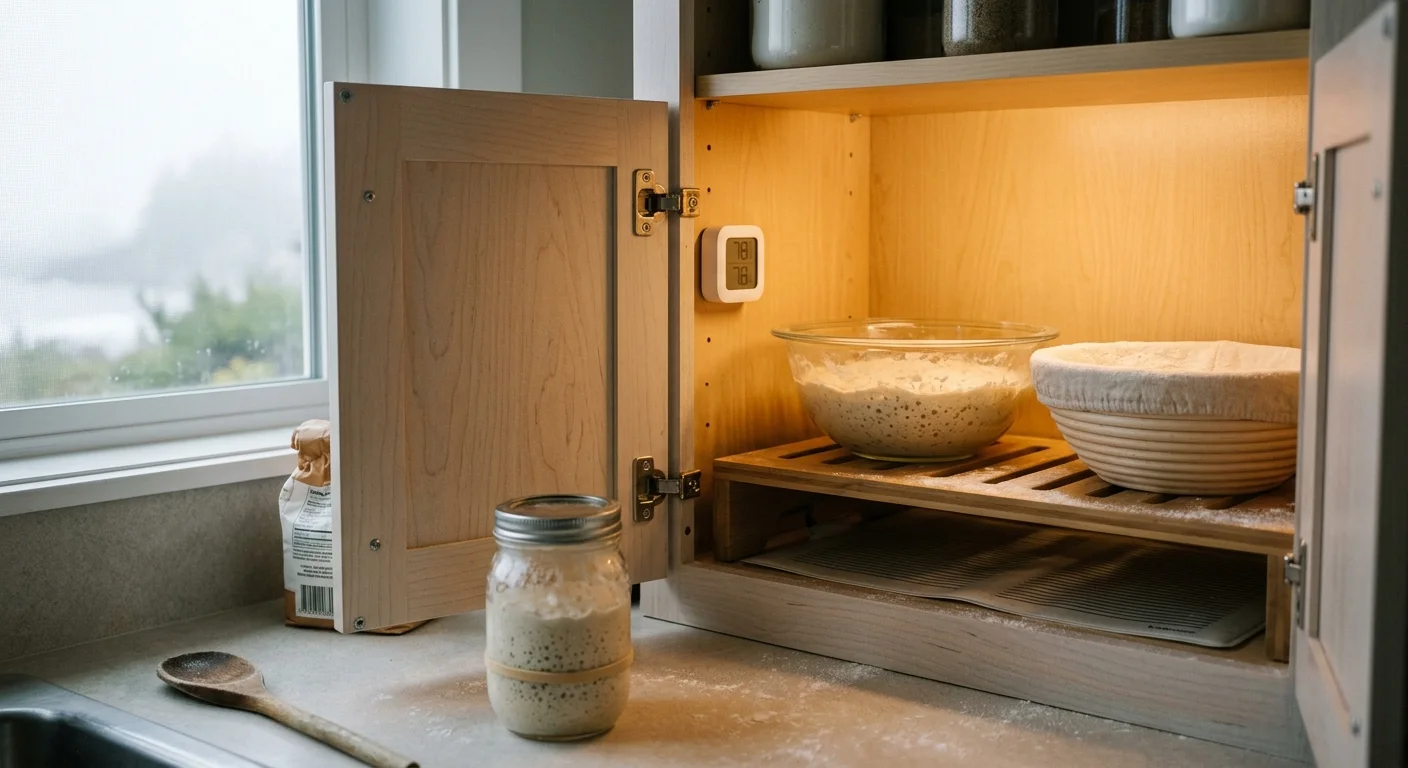
Coastal humidity spikes and marine fog swings routinely collapse high-hydration sourdough by destabilizing yeast activity inside your kitchen. You can stop unpredictable proofing cycles by transforming an ordinary 24-inch pantry cabinet into a precision fermentation chamber.
Commercial proofing boxes cost hundreds of dollars and crowd your counter space. A standard pantry cabinet running dual-threshold smart routines can stabilize dough temperatures at 78°F and relative humidity at 65% for under ninety dollars.
This guide details the hardware, wiring safety, and hysteresis automation rules required to eliminate coastal moisture swings and guarantee consistent loaf volume.
The Coastal Microclimate Dilemma in Sourdough Fermentation
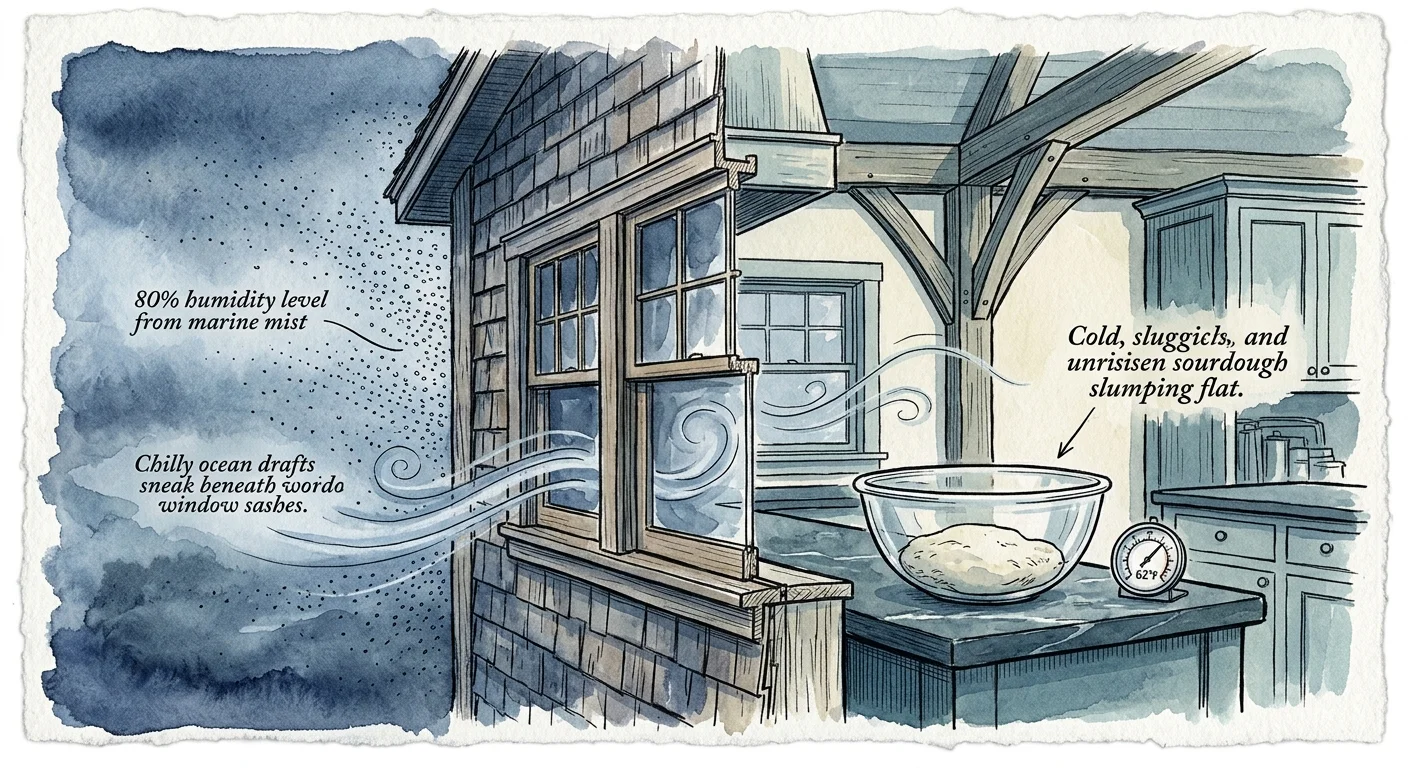
Baking sourdough along a coastline presents severe microclimate challenges that indoor climate control rarely solves. Dense marine layers cause indoor humidity to surge past 80% while ambient kitchen temperatures drop sharply overnight.
These sudden swings disrupt yeast metabolism and bacterial acid production. Wild yeast strains multiply reliably between 75°F and 82°F; cold coastal drafts drop dough temperatures into the low 60s, stalling fermentation.
High ambient humidity compounds this problem by reducing surface evaporation from your fermenting dough. Without proper moisture balance, the dough skin weakens, leading to flat loaves that spread across your baking stone instead of rising upward.
Commercial proofer boxes consume valuable countertop real estate and hold only one bowl at a time. Converting an enclosed pantry cabinet creates a spacious, hidden environment where fermentation metrics remain locked regardless of exterior coastal weather.
Controlling this space requires an understanding of how relative humidity and heat interact in confined woodwork. Balancing these two variables requires dedicated sensors, low-wattage heat sources, and automated ventilation.
Essential Hardware for Cabinet Microclimate Conversion
Building an automated proofing cabinet does not require industrial hardware. You can assemble a commercial-grade microclimate using consumer smart components that fit discreetly on a single 24-inch shelf.
Reliable automation begins with precision data collection. According to Wirecutter’s smart home testing, responsive Zigbee and Thread sensors deliver faster localized polling updates than cloud-dependent Wi-Fi monitors.
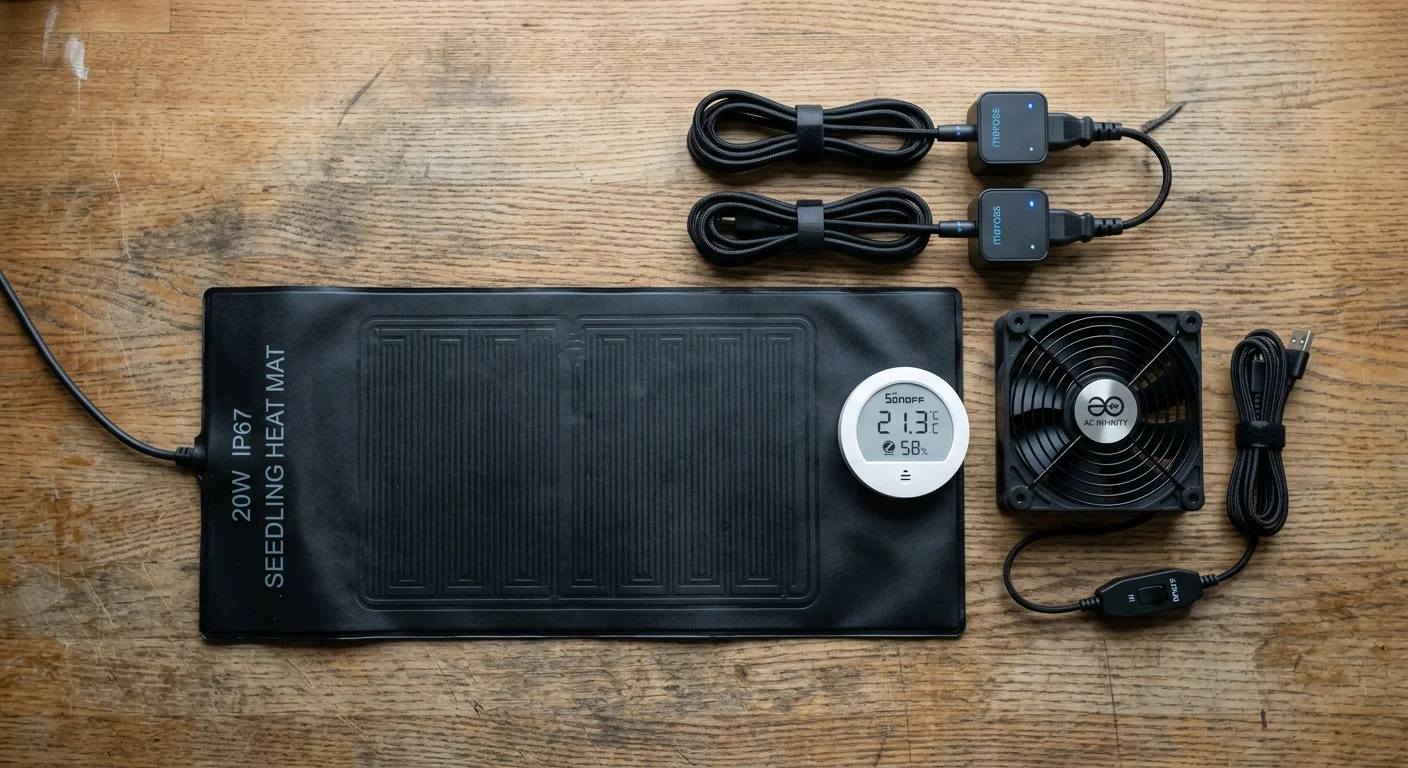
Your heating element must provide gentle, distributed warmth without creating scorch spots beneath your fermentation vessel. A waterproof 20-watt seedling or reptile heat mat delivers steady surface temperatures without drying out the surrounding air.
Humidity management requires two opposing tools: an extraction fan for excess coastal moisture and a renewable desiccant block. An ultra-quiet 80mm cabinet fan exhausts damp air when outdoor marine fog infiltrates your pantry.
A smart plug with integrated power metering switches your heat mat safely. This plug lets you monitor energy draw while providing automated shutoff triggers if components overheat.
| Component | Specific Model | Operating Metric | Protocol | Approximate Cost |
|---|---|---|---|---|
| Climate Sensor | Aqara Temperature and Humidity Sensor T1 | ±0.5°F, ±3% RH accuracy | Zigbee 3.0 | $24.00 |
| Heat Source | Vivosun 10″ x 20.75″ Heat Mat | 20 Watts continuous output | Mains 120V | $21.00 |
| Ventilation Fan | AC Infinity AXIAL 8025 Muffin Fan | 28 CFM airflow at 18 dBA | Mains 120V | $18.00 |
| Smart Switching | Sonoff S31 Zigbee Smart Plug | 15A relay with power monitoring | Zigbee 3.0 | $15.00 |
| Passive Moisture Trap | Eva-dry E-333 Mini Dehumidifier | Adsorbs up to 6 oz moisture | Renewable Silica | $19.00 |
Select components that communicate over local mesh networks rather than relying strictly on external internet connections. Local execution ensures your fermentation routines continue running even during coastal storm internet outages.
If you prefer an ecosystem-agnostic setup, look for devices certified under the Matter smart home standard to streamline communication across Apple Home, Home Assistant, and Google Home platforms.
Designing the Hysteresis Automation Logic
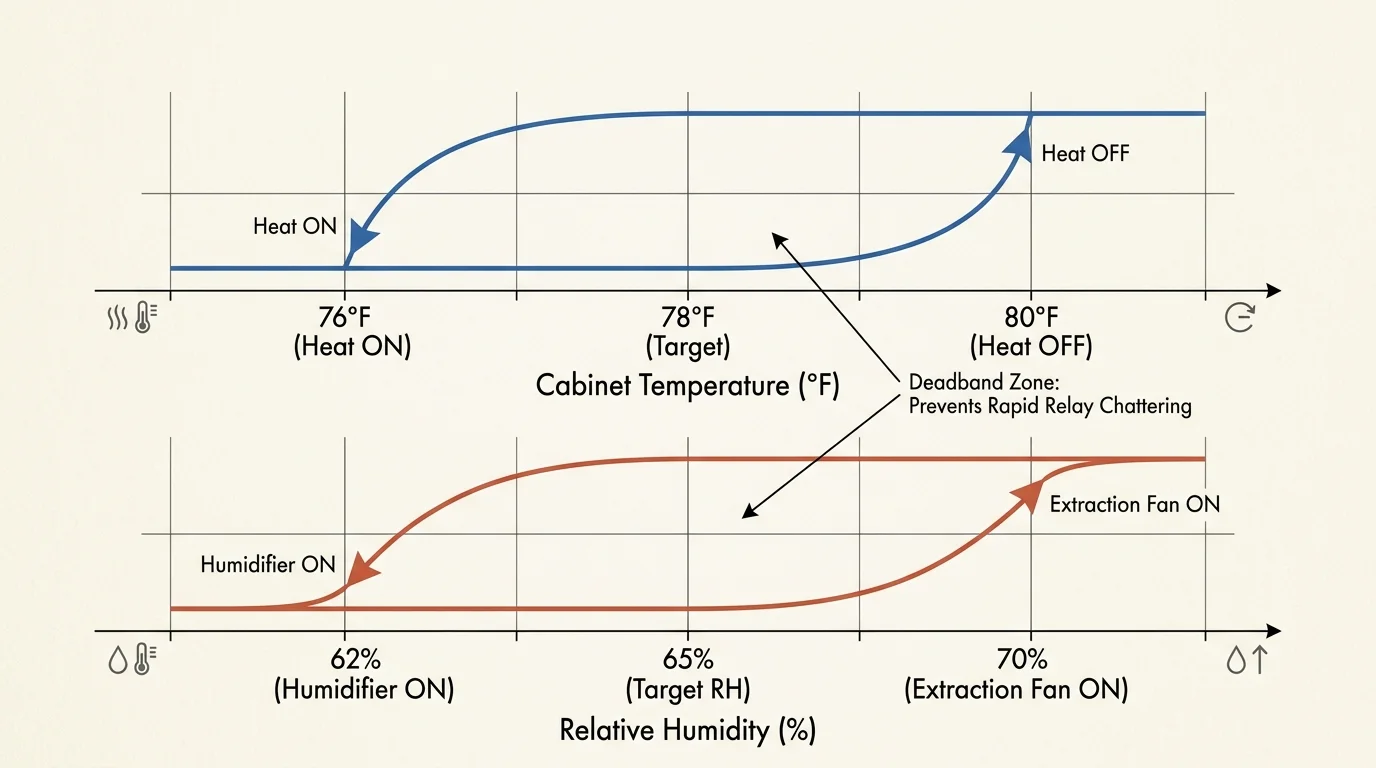
Automating a tiny, enclosed space requires strict hysteresis control. If you command your smart plug to toggle at an exact target of 78°F, the relay will rapidly switch on and off every two minutes as heat dissipates.
Rapid switching strains smart plug relays and creates unstable temperature waves through your dough. Establishing a deadband—a buffer zone between your trigger thresholds—protects hardware and stabilizes fermentation rates.
Set your heating routine to activate only when cabinet temperature falls below 76.5°F. Configure the routine to deactivate once the sensor records 78.5°F, allowing radiant warmth to carry the space to 79°F naturally.
Manage humidity using a parallel deadband to counteract coastal fog intrusions. Set your cabinet exhaust fan to turn on at 72% relative humidity and shut down once levels return to 64%.
- Open your smart home automation builder (such as Home Assistant, Apple Shortcuts, or Alexa Routines).
- Create a trigger for Sensor Temperature < 76.5°F with an action to power on the heat mat smart plug.
- Create a complementary trigger for Sensor Temperature > 78.5°F to cut power to the heat mat.
- Add a moisture safety routine triggering the exhaust fan when relative humidity exceeds 72%.
- Program a failsafe condition that turns off all heating devices if continuous run time exceeds 45 minutes.
Keep air movement minimal during heating phases. Sourdough dough forms an undesirable crust if fans blow directly across the bowl while the heater is active.
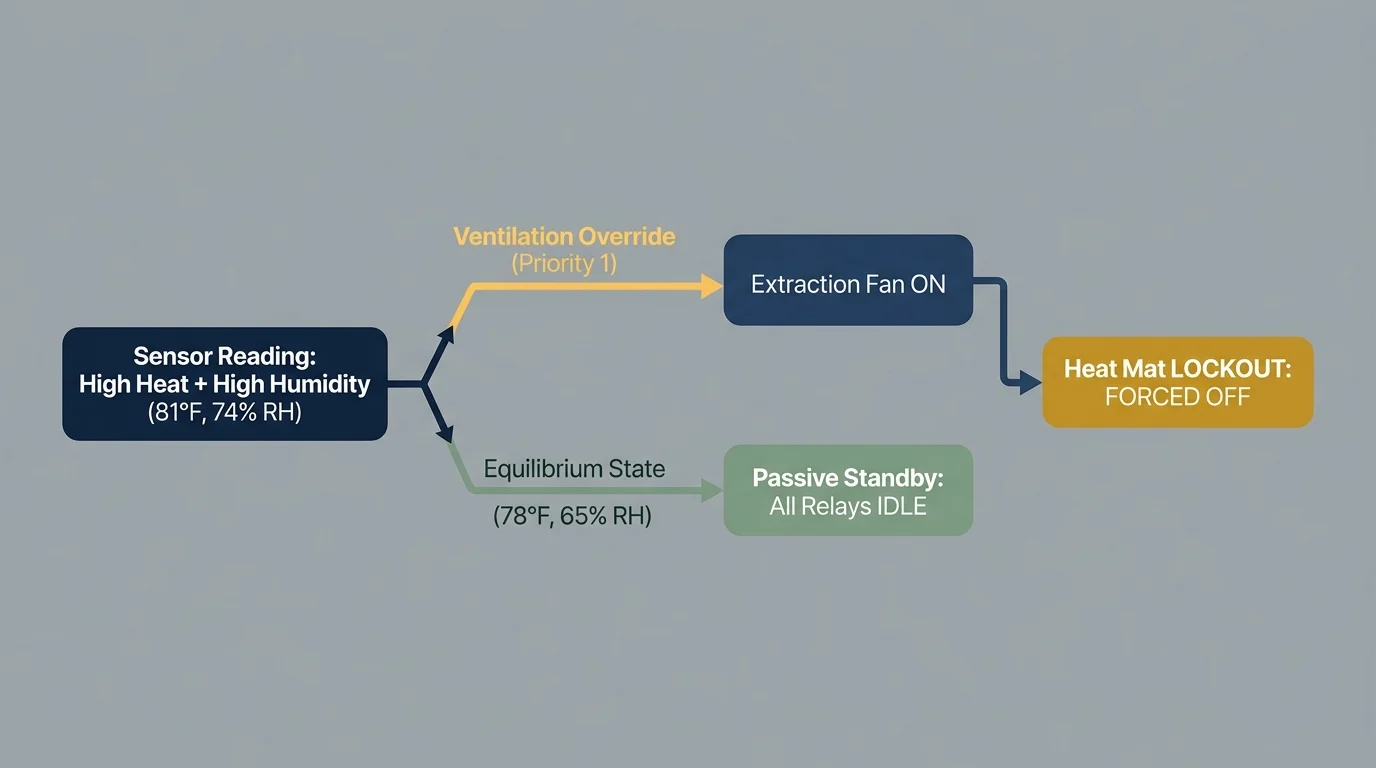
Program a condition that disables the exhaust fan whenever the heating mat is actively drawing power, unless humidity exceeds an emergency threshold of 80%.
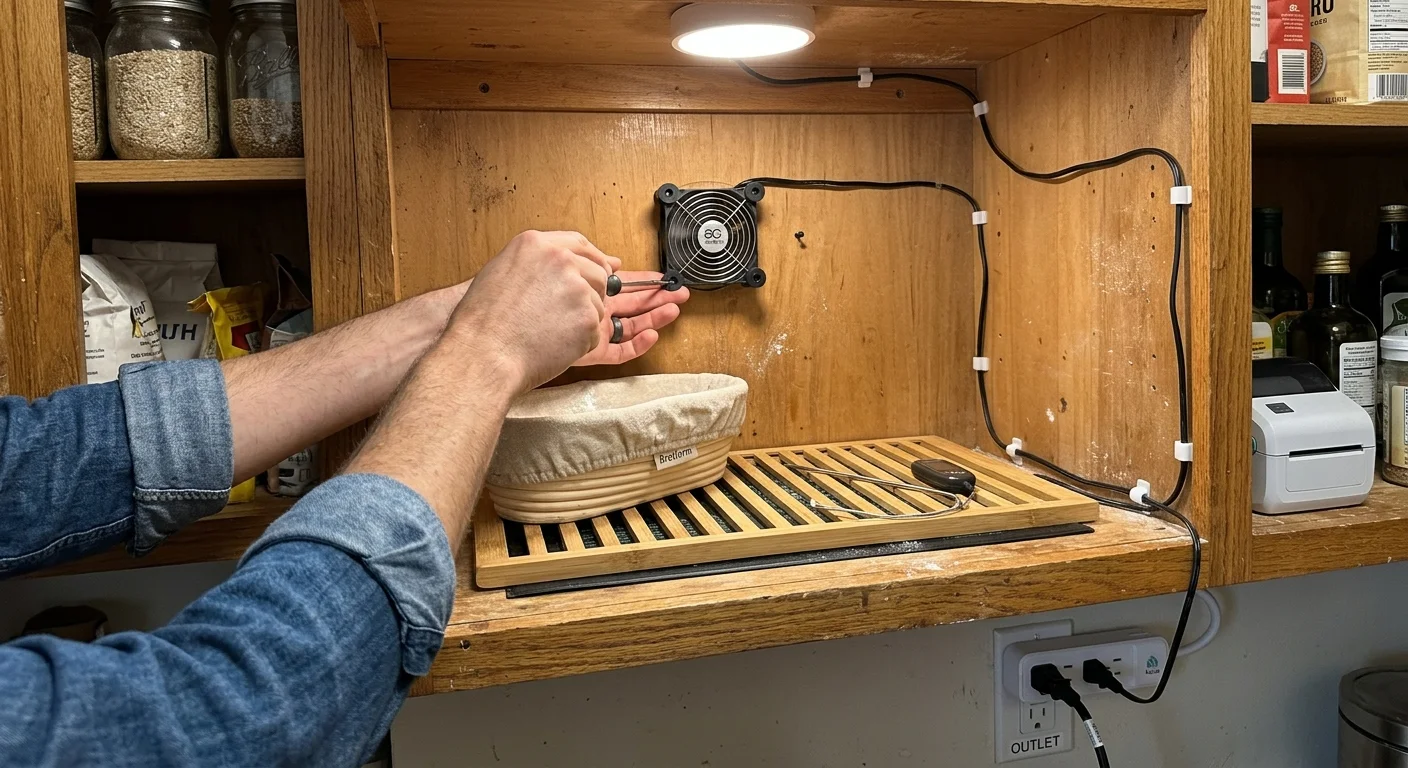
Step-by-Step Installation in a Standard 24-Inch Pantry
Modifying a standard 24-inch wide kitchen pantry requires zero permanent structural damage. You can build this entire proofing enclosure using non-invasive mounting hardware and reversible pass-throughs.
Select a shelf located in the lower third of the pantry cabinet. Lower shelves stay naturally cooler and provide better clearance for rising loaves and thermal circulation.
- Clean the interior shelf thoroughly using an unscented, food-safe surface cleaner to remove residual kitchen dust.
- Route your power cables along the rear cabinet hinge line using adhesive wire clips to prevent pinched wires.
- Place a 12-inch by 12-inch unglazed quarry tile directly on top of the 20-watt heating mat to act as a thermal buffer.
- Position the Aqara climate sensor exactly three inches above shelf height, securing it to the interior sidewall with removable tape.
- Place the Eva-dry renewable dehumidifier on the opposite side of the shelf to balance passive moisture collection.
- Install the AC Infinity exhaust fan along the upper rear cabinet corner using vibration-damping silicone mounts.
The quarry tile or unglazed baking stone serves a vital physical purpose in this setup. Direct heat from an electric mat warms the bottom of your fermentation vessel too aggressively, killing yeast at the base of your dough.
The stone absorbs concentrated heat from the 20-watt mat and radiates gentle, ambient warmth across the shelf. This creates an even thermal envelope that mimics commercial deck ovens.
Position your climate sensor away from the surface of the stone. Mounting the sensor three inches up on the sidewall ensures you measure circulating air temperature rather than the surface heat of the tile.
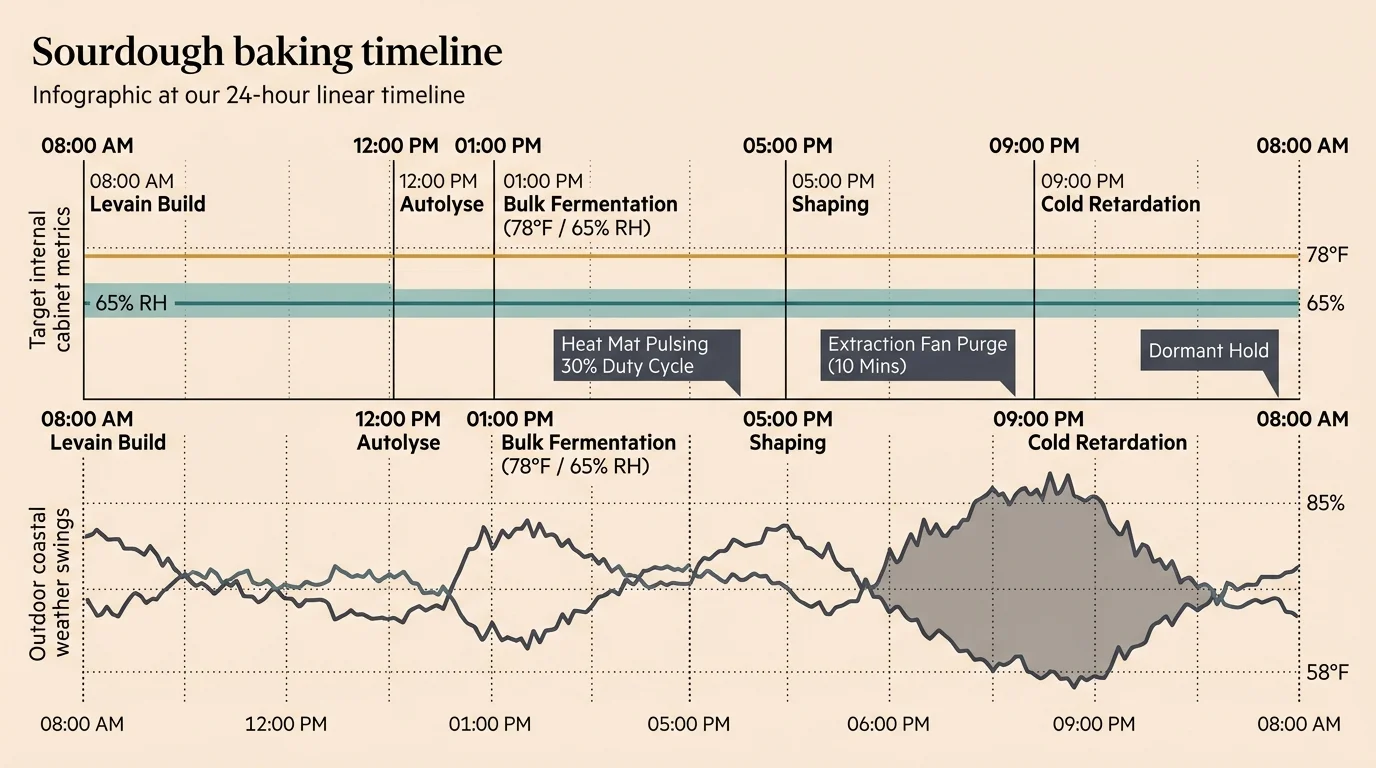
Worked Example: A 24-Hour Coastal Sourdough Schedule
To understand how this system operates under real conditions, consider this scenario from an oceanfront kitchen in Astoria, Oregon. Outside conditions average 54°F with 88% ambient relative humidity.
The formula uses 500 grams of organic bread flour, 390 grams of water (78% hydration), 100 grams of levain, and 10 grams of salt. Total hardware investment for the cabinet conversion was $97.00.
Without automation, dough proofing on the kitchen counter experiences sharp thermal swings. The kitchen drops to 63°F at night and warms to 71°F by mid-afternoon, causing bulk fermentation to fluctuate unpredictably between four and nine hours.
At 8:00 AM, the baker mixes the dough and places the covered glass bowl onto the buffered pantry shelf. The pantry sensor immediately logs 65.1°F and 81% relative humidity from morning ocean air.
The automated routine initiates immediately. The smart plug powers the 20-watt heat mat, while the exhaust fan runs for three minutes to purge ambient coastal moisture down to 65%.
- 08:00 AM: Heat mat powers ON. Temperature: 65.1°F, RH: 81%. Fan clears moisture for 180 seconds.
- 09:15 AM: Shelf reaches 78.5°F. Smart plug turns heat OFF. Thermal mass of stone holds 78.0°F.
- 11:30 AM: Mat cycles on once for 14 minutes as pantry air dips to 76.4°F during an exterior door opening.
- 01:15 PM: Bulk fermentation completes with a precise 75% rise, domed edges, and active aeration.
- 01:30 PM: Dough is shaped and transferred to an oval banneton for overnight cold retard in the refrigerator.
Because the microclimate remained locked within a 2°F band, bulk fermentation completed in exactly five hours and fifteen minutes. The dough structure remained taut and easy to score, producing explosive oven spring.
Multi-Device Scenes and Sensor State Conflict Management
Power users can expand basic hysteresis loops into dedicated smart scenes tailored for distinct baking stages. Your pantry environment requires different parameters for starter propagation than it does for bulk fermentation.
Create a dedicated “Starter Boost” scene that targets 81°F and 60% relative humidity. This elevated temperature encourages vigorous lactic acid production, reviving refrigerated starters in half the usual time.
Configure a second scene labeled “Slow Proof” running at 72°F. This setting slows enzymatic breakdown during long bulk rises, allowing complex organic acids to develop without over-proofing the gluten mesh.
- Starter Maintenance Scene: Target 81°F (±1°F) / 60% RH. Maximizes wild yeast reproduction and leavening strength.
- Standard Bulk Ferment Scene: Target 78°F (±1°F) / 65% RH. Balances yeast gas production with enzymatic dough extensibility.
- Retard Buffer Scene: Target 68°F (±1°F) / 55% RH. Provides controlled pre-cooling before dough transfers to refrigeration.
Automation conflicts occur when temperature and humidity triggers call for opposing physical actions. For example, high humidity may trigger the exhaust fan while low temperature demands heat.
Resolve these conflicts by programming device state priorities into your automation engine. Moisture extraction must always take precedence over heating for brief intervals.
Running an exhaust fan while heating consumes negligible electricity, but failing to clear trapped moisture causes condensation rot inside wood cabinets. Program your logic to allow four minutes of fan ventilation before re-evaluating heating needs.
Always implement physical hardware shutoffs alongside software rules. Use smart plugs equipped with local timers that automatically cut power after 60 continuous minutes regardless of network connectivity.
Troubleshooting Microclimate Swings and Sensor Lag
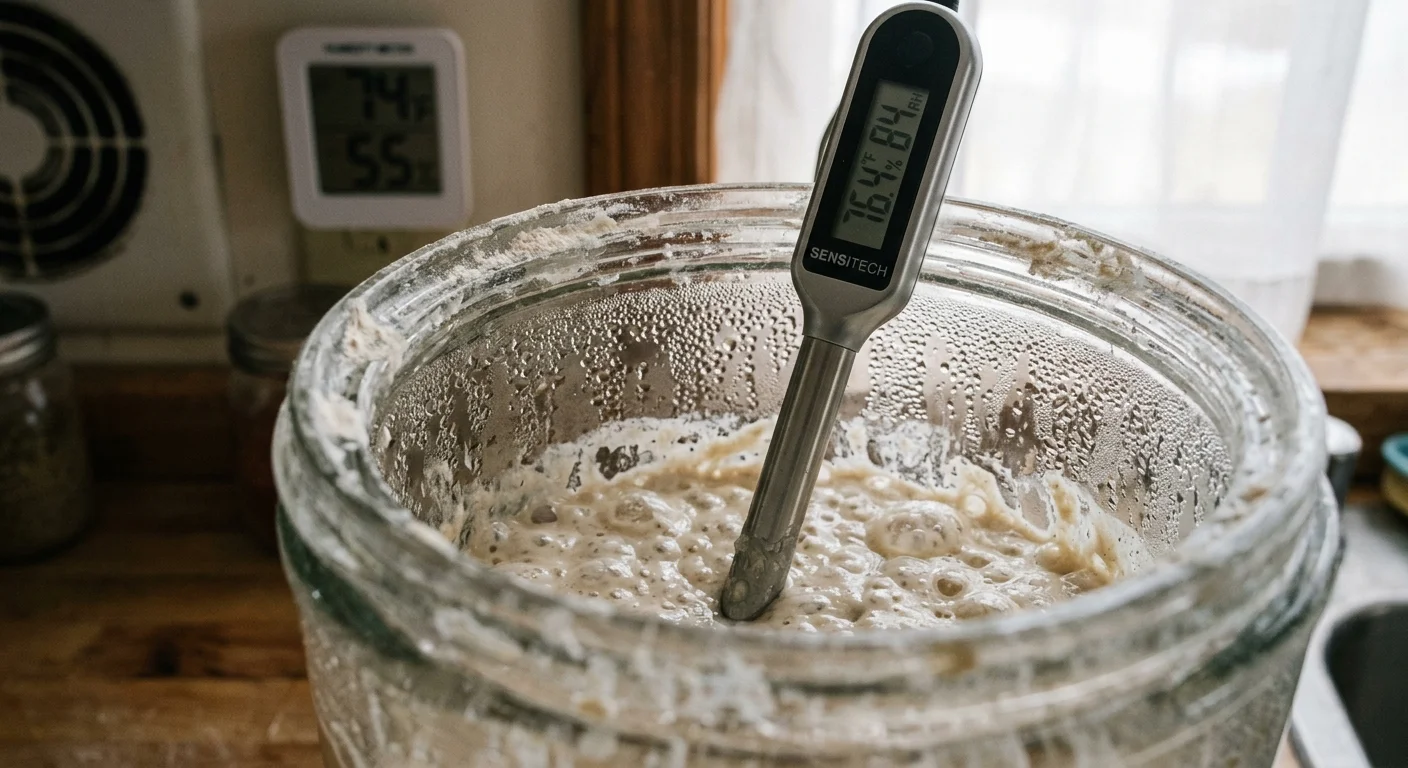
When dialling in your cabinet routines, you may encounter data discrepancies caused by sensor lag. Ambient air changes temperature much faster than a large mass of cold dough.
If your dough entered the pantry straight from tap-cold water, its internal temperature will lag cabinet air by up to 90 minutes. Do not increase the cabinet temperature above 82°F to compensate.
Raising air temperatures too aggressively overheats the outer dough layer while the center remains sluggish. Trust the calibrated ambient environment to warm the dough core gradually and evenly.
Condensation forming on interior cabinet walls indicates excessive relative humidity and inadequate air exchange. If the exhaust fan fails to lower humidity below 70%, your pantry door seal may be too tight.
Install a 1-inch decorative brass louvered vent on the lower cabinet door rail to provide passive intake air. This intake allows the exhaust fan to pull fresh, conditioned room air across the proofing zone.
If your climate sensor reports erratic temperature spikes, verify its distance from the heat buffer. Direct radiant heat from the quarry tile will produce false high readings if the sensor sits closer than three inches.
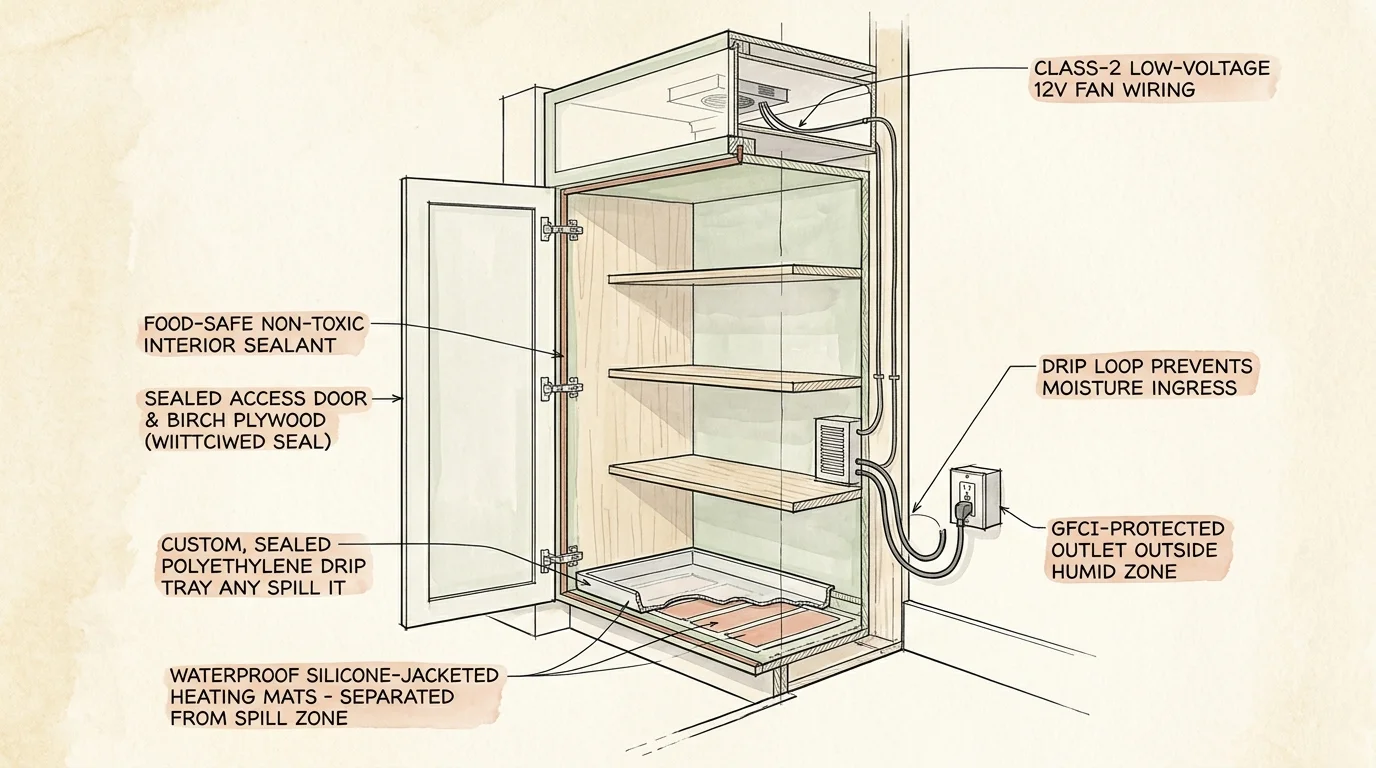
Electrical Safety and Food-Safe Cabinet Guidelines
Operating heating elements and moisture devices inside an enclosed wooden pantry demands careful safety management. Never repurpose high-draw household space heaters or open-coil elements for cabinet automation.
Confine heating hardware strictly to low-wattage, IP67-rated waterproof seedling or reptile heat mats. These mats operate at maximum power draws of 20 to 30 watts, eliminating combustion hazards inside wood joinery.
Route all power cables through existing shelf gaps or create clean pass-throughs using rubber grommets. Ensure electrical cords do not rest against the edge of the quarry tile or pinch beneath heavy shelf weights.
Form a downward “drip loop” in every power cord before it enters an electrical outlet or power strip. Drip loops guarantee that accidental liquid drips flow off the wire bend rather than running directly into the socket.
Protect your cabinet finish from accidental sourdough overflows. High-hydration dough expands aggressively and can damage natural wood shelves if containers overflow during bulk rise.
Place your fermentation vessel inside a shallow, food-grade polypropylene tray resting on the quarry tile. The tray catches sticky spills without impeding radiant heat transfer into your dough.
Frequently Asked Questions
Can I use a Wi-Fi smart plug instead of Zigbee for my proofing routines?
Yes, Wi-Fi smart plugs function well if your pantry receives strong router coverage. However, Zigbee devices execute routines locally, ensuring your heat cycles continue running even if your home internet connection drops.
What is the ideal relative humidity for proofing open-bowl sourdough?
Maintain relative humidity between 60% and 68% for uncovered dough. Levels above 72% make dough surfaces sticky and slack, while humidity below 55% causes a hard, dry skin to form over the bowl.
Will a 20-watt seedling heat mat damage natural wood pantry shelves?
A 20-watt mat produces gentle surface warmth between 80°F and 85°F, which will not scorch wood. Placing an unglazed ceramic tile between the mat and your bowl diffuses heat safely while protecting the cabinet surface.
How do I prevent my sourdough starter from drying out in an automated cabinet?
Always rest a loose glass lid, silicone cover, or damp linen cloth over your starter jar. The automated cabinet stabilizes surrounding ambient conditions, but direct exposure to circulating air will dry the starter surface over several hours.
Disclaimer: This article is for informational purposes only. Smart home devices involve electrical connections and data privacy. Always follow manufacturer instructions for installation. For complex wiring or HVAC work, consult a licensed professional.