
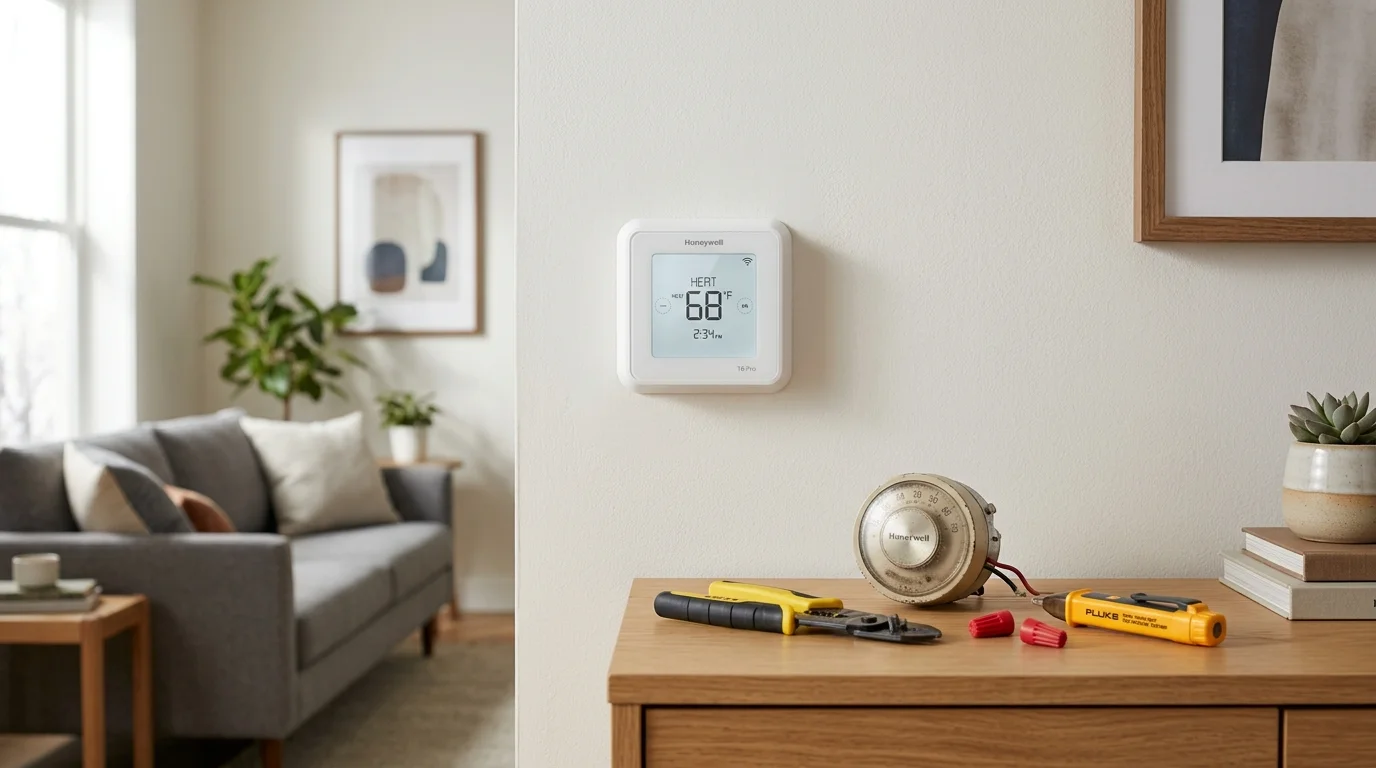
You can slash high winter electric bills by swapping inaccurate 240V baseboard dials for smart controllers without forfeiting your security deposit. Mechanical bimetal thermostats waste substantial electricity and create erratic temperature swings in rental apartments.
Unlike standard guides that assume you own the building, this guide demonstrates how renters can safely verify gang-box volume and wire line-voltage controllers non-destructively.
Upgrading your 240v baseboard heater smart control brings precise scheduling while ensuring you can restore the original bimetal dial before your lease ends.
The High-Voltage Challenge in Rental Baseboards
Most rental apartments built with electric resistance heaters rely on crude wall dials. These devices use a mechanical bimetallic strip that bends as the ambient temperature changes.
Once a digital unit is wired in place, learning how to create the perfect temperature schedule keeps living spaces comfortable while cutting down continuous heating waste.
Tenants evaluating smart thermostats for renters must navigate strict landlord rules alongside unique electrical constraints.
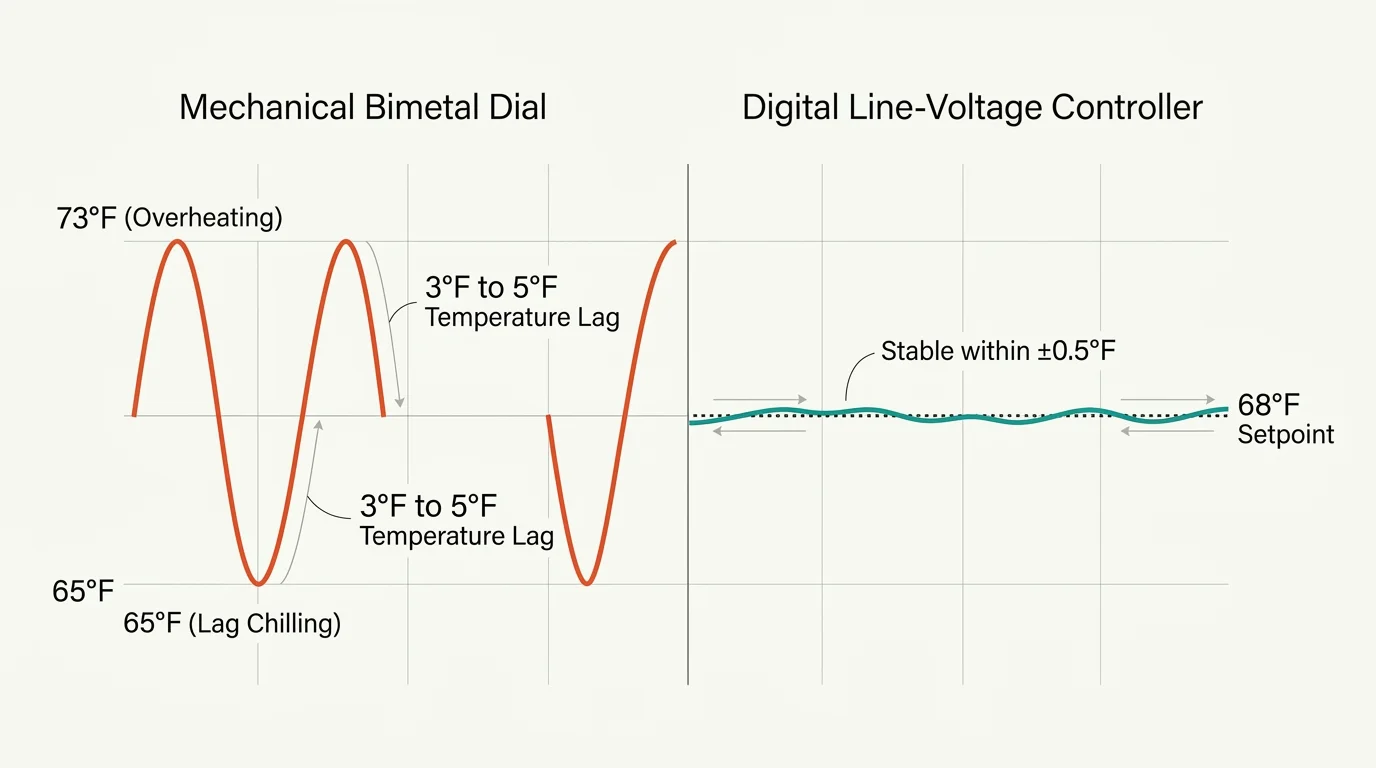
Bimetallic strips respond slowly to room changes. This lag causes temperature swings between 3°F and 5°F above or below your desired setpoint.
You end up shivering when the heater turns off too early; you sweat when it overheats the room. This inefficient cycle inflates your winter power bills.
Replacing these analog dials with digital controllers stabilizes room temperatures within 0.5°F. Solid-state switching provides immediate comfort and stops wasteful over-cycling.
The best smart home is the one you don’t have to manage.
As a tenant, you cannot alter the apartment’s structural wiring or tear open drywall. You must work strictly within the boundaries of the existing junction box.
High-voltage heating circuits carry lethal current. A 240-volt circuit delivers severe electrical shocks, making proper safety protocols mandatory before touching any wires.

Line-Voltage vs. Low-Voltage: Why Nest and Ecobee Fall Short
Most smart thermostats on retail shelves operate on 24-volt alternating current (VAC). Devices like the Google Nest Learning Thermostat or Ecobee Smart Thermostat Premium control low-voltage central HVAC relays.
While low-voltage HVAC setups often accommodate smart thermostats that work without a C-wire, baseboard heaters require controllers built specifically for direct line-level current.
While standard low-voltage systems allow you to install a smart thermostat yourself in minutes, line-voltage units demand extra precautions due to direct 240V connections.
Connecting a low-voltage 24V thermostat directly to your rental apartment baseboard circuit will instantly destroy the controller. It also creates a severe fire hazard.
Electric baseboard heaters run on line voltage, typically 120V or 240V. The full heating current travels directly through the wall thermostat switches.
According to appliance evaluations by Consumer Reports, dedicated line-voltage controllers eliminate the need for dangerous electrical workarounds in resistance-heated homes.
Some homeowners use low-voltage thermostats by adding an external line-voltage relay, such as the Aube RC840T-240. This module converts 240V power to 24V and costs between $35 and $50.
For tenants, however, relay transformers are impractical. They require mounting an external junction box or modifying the heater enclosure, which violates most lease agreements.
Dedicated line-voltage smart thermostats solve this issue cleanly. They fit directly into your existing electrical box and handle the heavy electrical load safely.
Calculating Resistive Heating Loads Under NEC 80% Rules
Before purchasing hardware, you must verify that your baseboard heaters do not exceed the controller’s maximum load rating. Overloading a line-voltage controller causes internal components to overheat.
After establishing your zone wattage, you can read and understand your thermostat’s energy reports to ensure actual runtimes match your expected power draw.
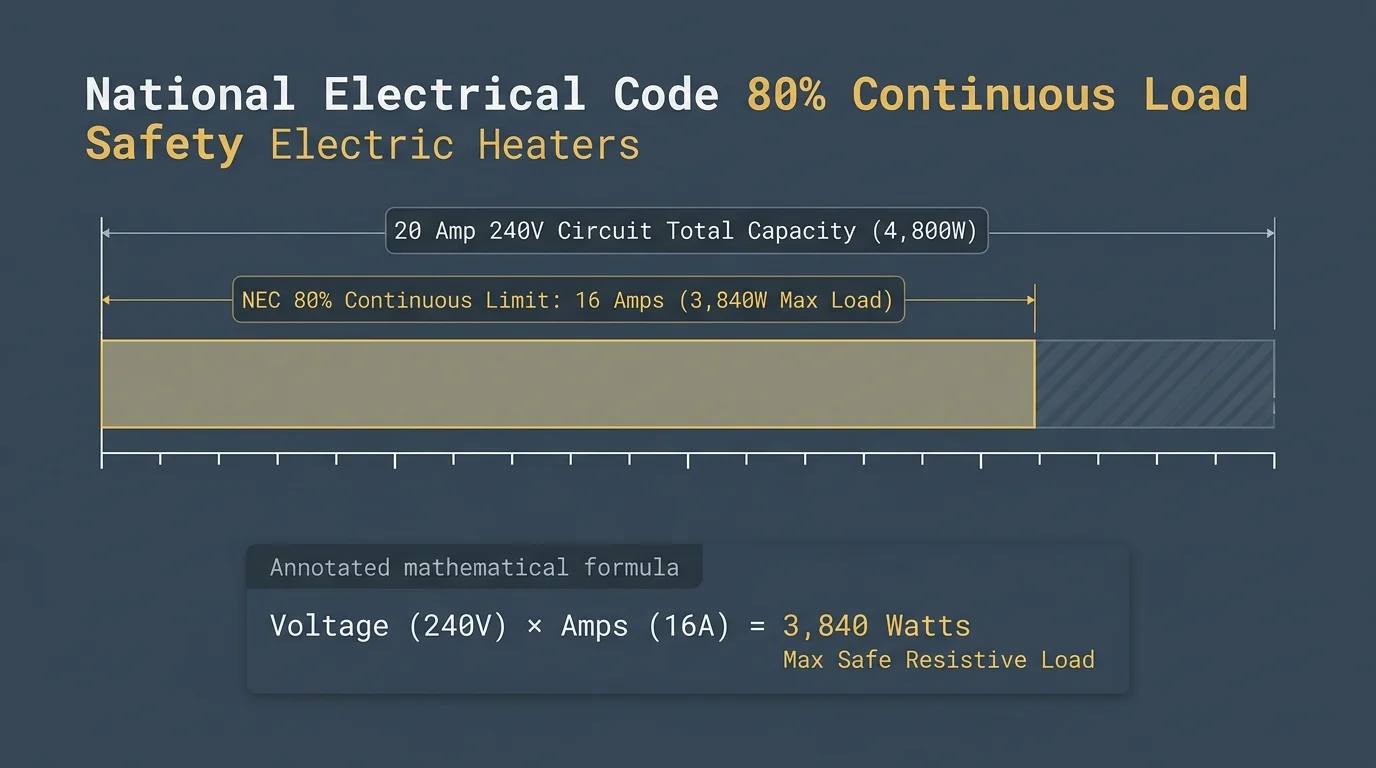
Under National Electrical Code (NEC) Article 424, electric space heating is classified as a continuous load. Continuous loads run for three hours or more at a time.
The continuous load rule states that an electrical circuit must not run above 80% of its total breaker capacity. You must calculate both breaker capacity and controller ratings.
Here is how the standard electrical math works for a rental apartment heating zone:
- Breaker size: 20-amp, 240-volt double-pole breaker
- Continuous limit: 20 amps × 0.80 = 16 amps maximum continuous current
- Total circuit wattage limit: 16 amps × 240 volts = 3,840 watts
Now consider a concrete apartment scenario. Your open-concept living area contains two 8-foot electric baseboards wired to a single wall dial.
Check the metal specification plate located inside the lower corner of each heater. In our scenario, each heater is rated for 1,500 watts at 240 volts.
- Total zone wattage: 1,500 watts + 1,500 watts = 3,000 watts
- Operating current: 3,000 watts / 240 volts = 12.5 amps
A 12.5-amp load falls well below the 16-amp continuous limit of a 20-amp circuit. It also complies with standard line-voltage smart controllers.
However, that same 3,000-watt load would overload a 12.5-amp controller. In that case, you must select a 16-amp or 16.7-amp rated smart thermostat.
Always check minimum load requirements as well. Devices like the Mysa Smart Thermostat V2 require at least 150 watts of connected load to power their internal Wi-Fi radios.
Electrical Gang-Box Depth and Box-Fill Safety
Old mechanical dials take up minimal room inside the wall box. Their shallow metal housings rarely extend deeper than three-quarters of an inch.
If your gang-box location places the thermostat near a drafty corner, understanding how to use room sensors for better temperature control can balance heat across the room without physical modifications.
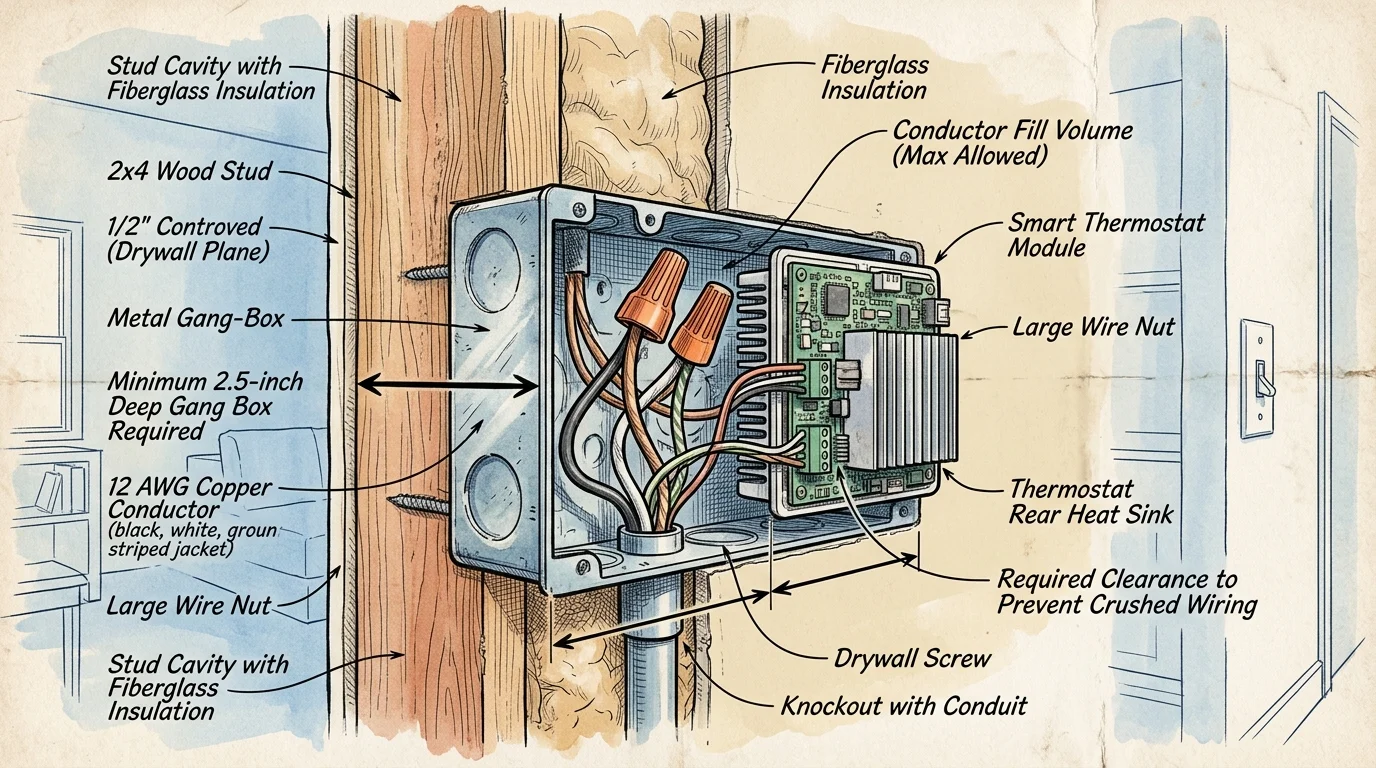
Line-voltage smart thermostats are considerably bulkier. They contain heavy heat sinks, microcontrollers, triacs, and wireless radios inside their rear housing.
NEC Section 314.16 governs electrical box-fill volume. Cramming thick wires and large electronics into an undersized box pinches insulation and causes electrical shorts.
Most line-voltage smart controllers require an electrical gang box depth of at least 2.0 to 2.5 inches. The total internal volume should measure between 18 and 22 cubic inches.
Many older rental properties contain shallow 1.5-inch metal utility boxes. A bulky smart thermostat will not fit safely inside these shallow enclosures.
You can check the available space non-destructively before buying hardware. Follow these steps to measure your wall box:
- Switch off the heating circuit breaker at the main electrical panel.
- Unscrew the two mounting screws holding the analog dial to the wall.
- Gently pull the dial forward without disconnecting any internal wires.
- Insert a plastic or wooden ruler to measure the distance from the drywall surface to the back of the metal box.
If your box measures less than 2.0 inches deep, standard line-voltage smart controllers will not seat flush against the wall. Never force the unit into the box.
Forcing the thermostat bends the mounting bracket and damages 12 AWG solid copper conductors. When space is tight, look for compact models or slim-profile wall plate spacers.
Identifying Single-Pole vs. Double-Pole Wiring
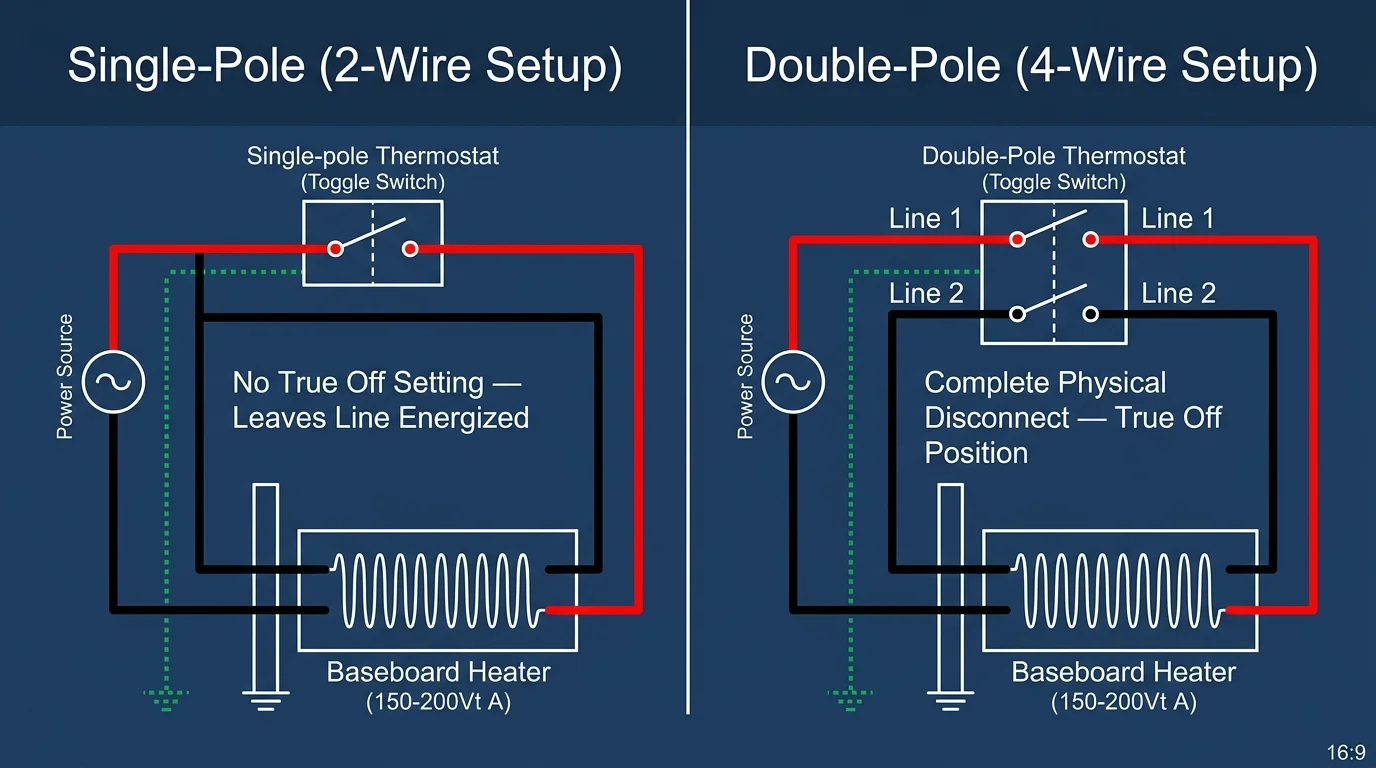
Before ordering your replacement controller, inspect the back of your existing dial to determine its pole configuration. Baseboard circuits use either single-pole or double-pole switching.
Because double-pole switches can fully disconnect heaters, setting up offline smart thermostat fail-safes is vital to ensure baseboards continue running if your Wi-Fi network drops in sub-zero weather.
A single-pole dial has two wire terminals or leads on the back. It interrupts only one hot leg of the 240-volt supply circuit.
Because one leg remains connected, power flows into the heater even when the dial is turned low. Single-pole dials lack a true mechanical “Off” setting.
A double-pole dial features four wire terminals or leads. It disconnects both 120-volt legs simultaneously when turned counterclockwise to the “Off” position.
- Single-pole (2 wires): Controls one line leg; baseboard retains voltage; dial labels typically show low temperatures rather than “Off.”
- Double-pole (4 wires): Breaks both line legs; completely de-energizes the heater; dial features a positive “Off” mechanical stop.
Most smart line-voltage thermostats require continuous electrical power across two legs to run their internal computer board and Wi-Fi chip. They need a 3-wire or 4-wire connection.
If you encounter a single-pole setup with only two wires entering the box, you must select a compatible model. Sinopé offers models compatible with two-wire installations.
Carefully note wire groupings before changing connections. Keeping the original wiring layout intact ensures you can convert dial thermostat baseboard setups back to factory condition later.
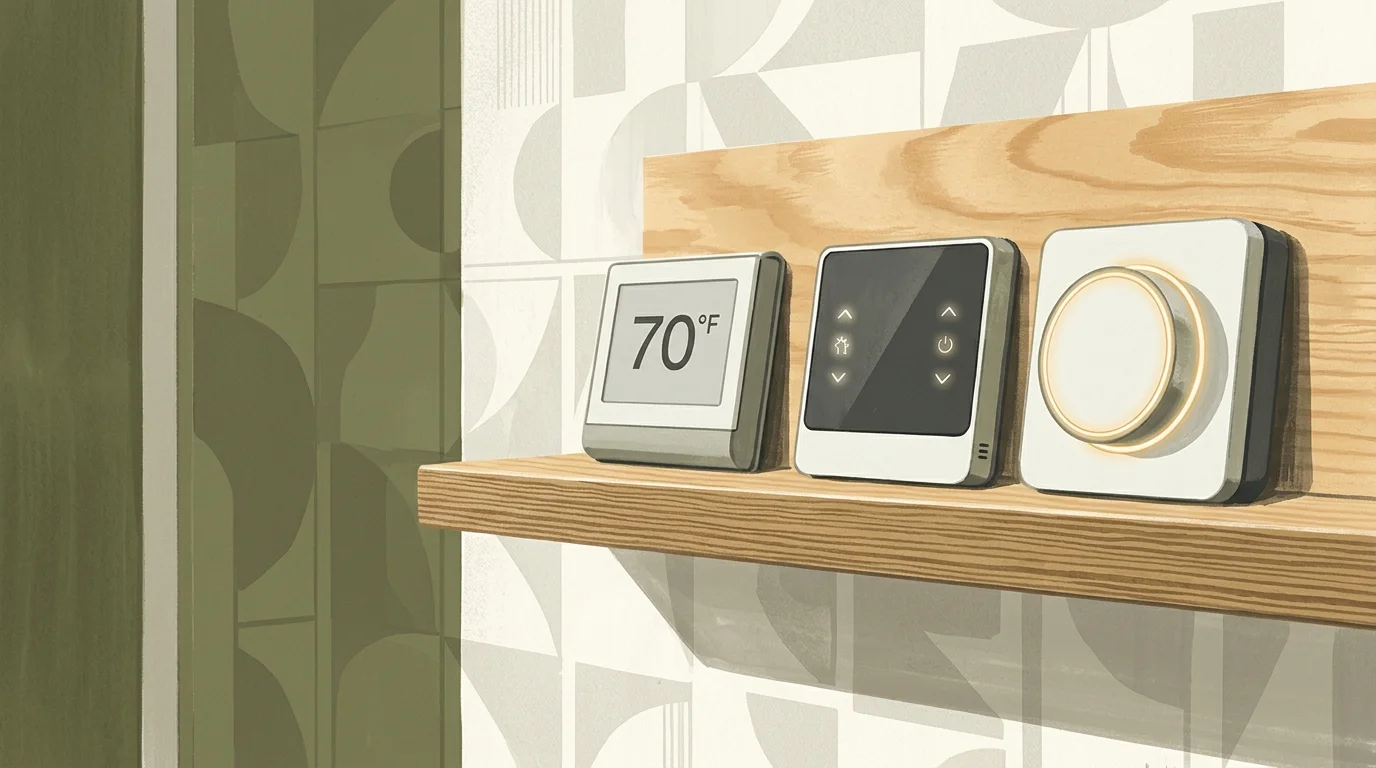
Top Line-Voltage Smart Controllers Compared
When selecting hardware, match the unit’s maximum resistive wattage and amperage to your calculated zone load. Do not use inductive motor controllers for resistive heaters.
Many top-tier line-voltage thermostats also integrate with broader smart home energy monitoring platforms so you can monitor real-time heating costs through your smartphone.
Configuring these controllers with proven energy-saving thermostat settings maximizes overall electricity reductions during peak winter months.
Smart line-voltage thermostats replace bimetallic switches with solid-state components called triacs. Triacs modulate power silently without the loud clicking sounds common to older dials.
Review the technical specifications and price points across leading line-voltage smart thermostats below:
| Model Name | Max Wattage (240V) | Max Amperage | Min Wattage | Supported Wiring | Retail Price |
|---|---|---|---|---|---|
| Mysa Smart Thermostat V2 | 3,800 W | 16.0 A | 150 W | 3 or 4 wires | $159 USD |
| Mysa Lite | 3,800 W | 16.0 A | 150 W | 3 or 4 wires | $89 USD |
| Sinopé TH1123WF | 3,000 W | 12.5 A | 150 W | 2 or 4 wires | $119 USD |
| Sinopé TH1124WF | 4,000 W | 16.7 A | 150 W | 4 wires | $135 USD |
The Mysa V2 remains popular due to its native compatibility with Apple Home, Google Home, and Amazon Alexa. It provides detailed energy consumption tracking inside its mobile application.
If you have tight heating budgets, the Mysa Lite reduces upfront costs while retaining core scheduling features. It omits ambient light sensing and Apple HomeKit support.
Sinopé models stand out for their flexible electrical engineering. The TH1123WF works reliably in older buildings where only two conductors enter the gang box.
You can also check for regional energy incentives. Certified hardware listed under the Energy Star Smart Thermostats program often qualifies for local utility rebates.
Electric utilities like BC Hydro, Hydro-Québec, and Puget Sound Energy offer instant rebates from $25 to $75 per unit. These discounts substantially lower your out-of-pocket upgrade cost.
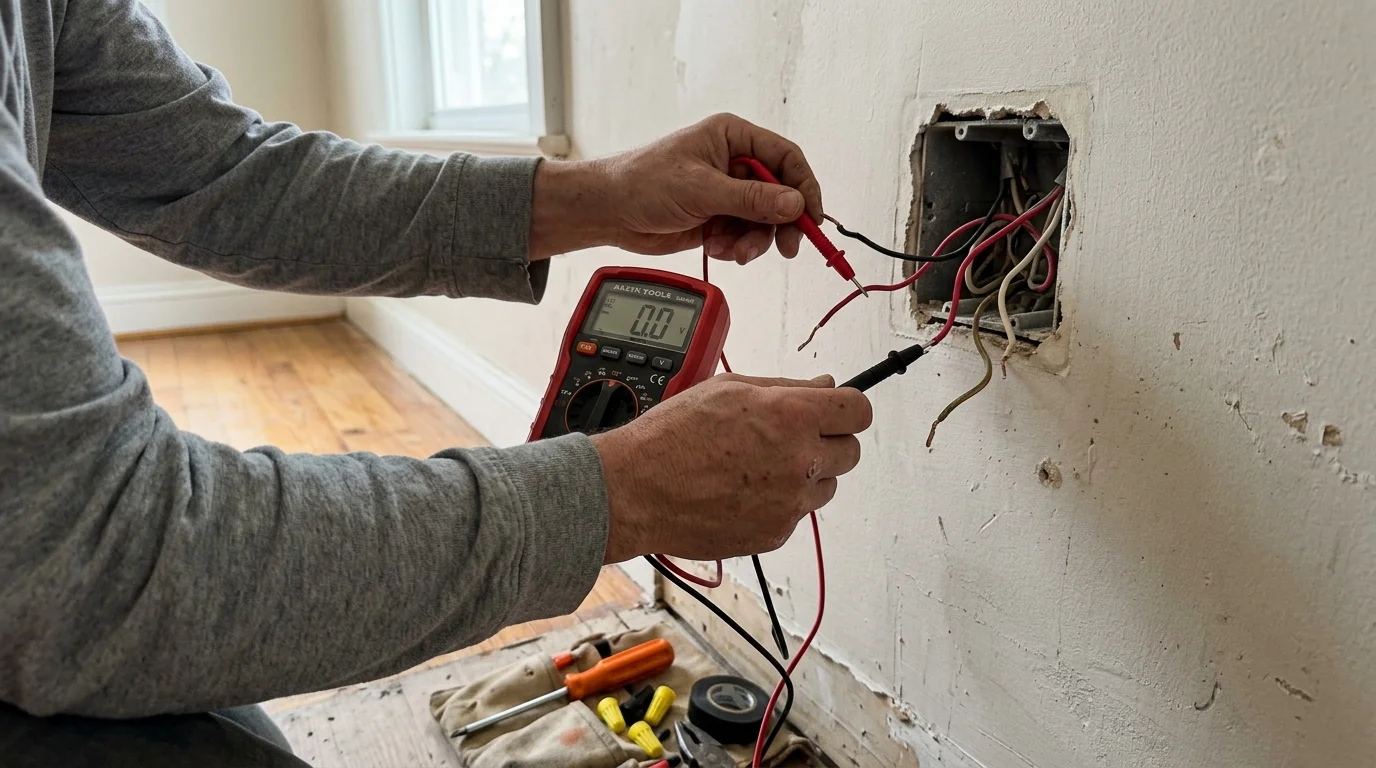
Step-by-Step Installation: Converting a 240V Dial Non-Destructively
Executing a clean line voltage smart thermostat installation requires patience and methodical safety habits. Follow this numbered process to install your controller safely.
- Cut circuit power: Locate your apartment breaker panel and flip the double-pole heating breaker to the “Off” position.
- Verify zero voltage: Remove the dial faceplate and hold a non-contact voltage tester against every wire inside the box. Ensure the tester indicates zero active voltage.
- Document connections: Take clear, well-lit smartphone photos of every terminal connection and wire grouping before touching any screws or wire nuts.
- Tag your conductors: Use colored electrical tape or write-on wire labels to mark the line (incoming power) and load (heater) conductors clearly.
- Disconnect the dial: Loosen the wire nuts or terminal screws and separate the old mechanical thermostat from the circuit conductors.
- Install lever connectors: Use WAGO 221 lever connectors instead of twist-on wire nuts. They provide superior clamping on thick 12 AWG copper wires and release without damaging conductors.
- Attach the smart thermostat: Connect the line wire, load wire, and neutral or second hot line according to the manufacturer’s wiring diagram.
- Fold conductors carefully: Push the thick copper conductors accordion-style into the back corners of the gang box. Leave the central cavity clear for the thermostat body.
- Mount the unit: Secure the mounting bracket to the gang box using the included machine screws. Do not use power drills; overtightening strips the metal box threads.
- Restore power and configure: Switch the circuit breaker back on, verify that the digital display illuminates, and complete initial app pairing.
Lever connectors like the WAGO 221 series are ideal for tenants. They prevent conductor fraying and ensure clean, non-destructive wire removal when you move out.
If your electrical tester detects any voltage after tripping the breaker, stop immediately. Some apartments share multi-wire branch circuits with separate panel breakers.
Never strip away excess wire insulation beyond what the manufacturer template requires. Exposed copper inside a crowded metal gang box creates short circuits.
Once paired to your home Wi-Fi network, program your weekday and weekend schedules. Dropping temperatures by 7°F to 10°F while at work delivers noticeable savings.
Tenant Reversibility and Off-Season Management
Renters must return their unit in its original condition to protect their security deposit. Treating the installation as a reversible modification keeps your landlord happy.
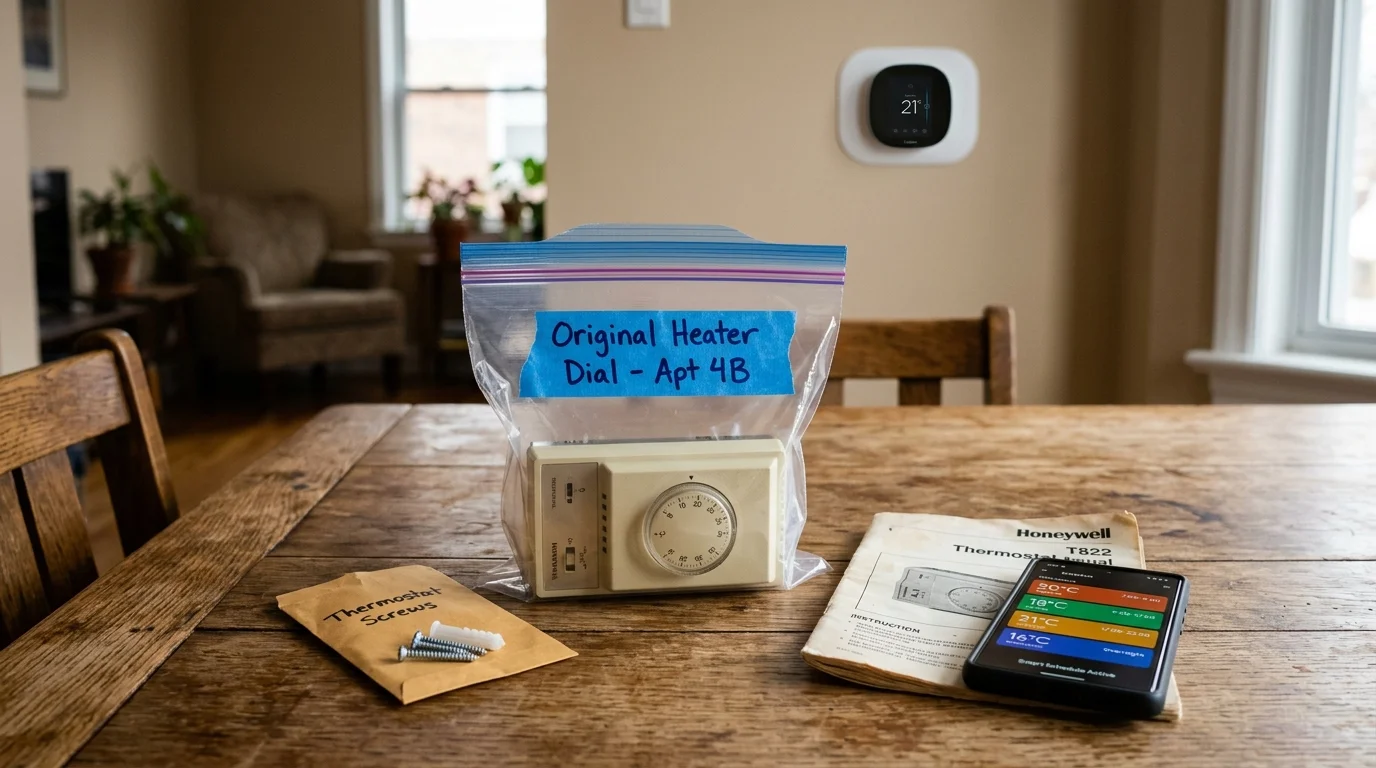
Place the old mechanical dial, mounting screws, and original wire nuts into a labeled zip-top bag. Store the bag in a dry, accessible closet shelf.
Keep your installation photos saved in a dedicated folder on your smartphone or cloud storage. These photos serve as a wiring reference when reversing the process at move-out.
During the move-out process, reverse the installation steps. Reattach the original mechanical dial exactly as documented in your original photos.
Smart line-voltage controllers also offer helpful off-season management modes. You can protect your living space with minimal energy expenditure year-round:
- Summer shutdown: Set your controller to a virtual “Off” state inside the companion app. This deactivates the solid-state relays throughout hot months.
- Freeze protection: When traveling during winter holidays, set your thermostat to an eco-temperature of 55°F (13°C) to prevent frozen pipes without overheating empty rooms.
- Early morning pre-heating: Program baseboards to warm your bedroom thirty minutes before your alarm rings. This avoids running the heaters all night long.
- Automated geofencing: Link your smartphone location to lower setpoints automatically when you leave your apartment for work.
By automating your temperature setbacks, you eliminate heating an empty home. These schedules allow smart controllers to pay for themselves within one to two heating seasons.
Carefully managing your rental’s electric heat balances personal comfort with smart energy budgeting. Modern smart controls eliminate the friction of analog living.
Frequently Asked Questions
Can I install a Google Nest or Ecobee on 240V baseboard heaters?
No, you cannot connect standard low-voltage thermostats directly to 240V baseboards. Connecting a 24V thermostat to line-voltage wiring destroys the unit and creates an immediate fire hazard.
Do line-voltage smart thermostats require a C-wire?
No, line-voltage controllers do not use 24V common wires. They power their displays and Wi-Fi radios directly from the 120V or 240V line conductors already present in your wall box.
Can a tenant legally replace an apartment thermostat?
Most rental leases allow minor, non-destructive device upgrades provided you do not damage walls or wiring. You must restore the original mechanical dial before vacating the property.
How much money will a line-voltage smart thermostat save?
Replacing mechanical dials with digital line-voltage smart controllers reduces baseboard heating costs by 15% to 25%. Precision scheduling and tighter temperature bands prevent continuous power waste.
Disclaimer: This article is for informational purposes only. Smart home devices involve electrical connections and data privacy. Always follow manufacturer instructions for installation. For complex wiring or HVAC work, consult a licensed professional.


1 Comment