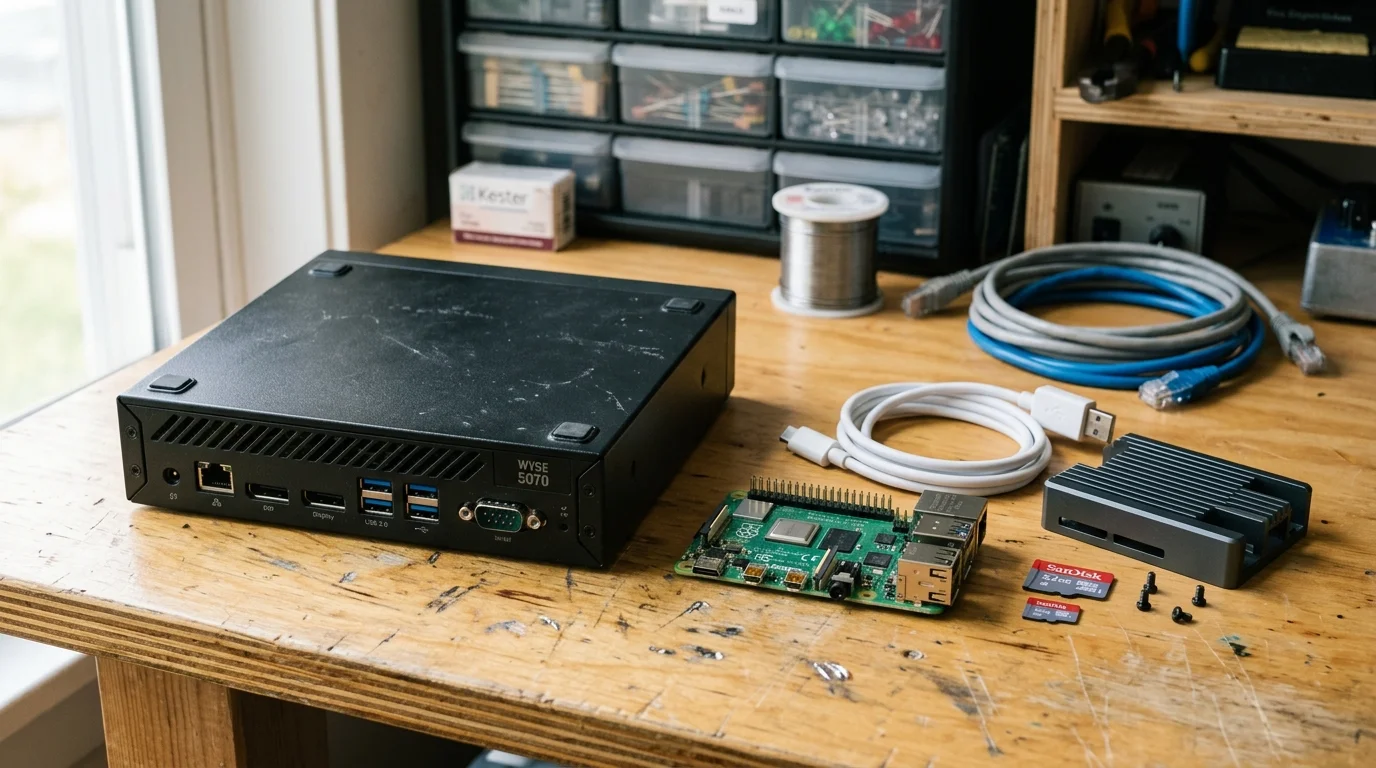
Building a local smart home hub should not drain your wallet. While the Raspberry Pi 4 remains the default recommendation, an off-lease enterprise thin client offers faster performance and superior drive endurance for less money.
Saving money on server hardware frees up budget for the best first smart home devices to buy when building out your living space.
Contrary to popular belief, buying a $45 refurbished Dell or HP thin client costs less out of pocket than a complete Pi 4 kit, while adding only $2.80 per year to your electric bill.
If you want a dependable server under $75 to run Home Assistant or local automations without corrupting memory cards, recycled office hardware is the superior choice.
The Real Cost of Ownership: Hidden Raspberry Pi Expenses
The standalone Raspberry Pi 4 appears affordable at first glance. However, the bare circuit board cannot run your smart home out of the box.
Accounting for power supplies, enclosures, and storage is an essential part of how to plan your smart home before buying anything.
Overlooking mandatory accessories like power adapters and external drives is one of the most common smart home mistakes beginners should avoid when building a hub.
To operate a reliable server, you must purchase an official power supply, a cooling case, and durable storage media.
According to PCMag’s smart home hub analysis, hidden accessory costs frequently push DIY single-board computers past the price of consumer alternatives.
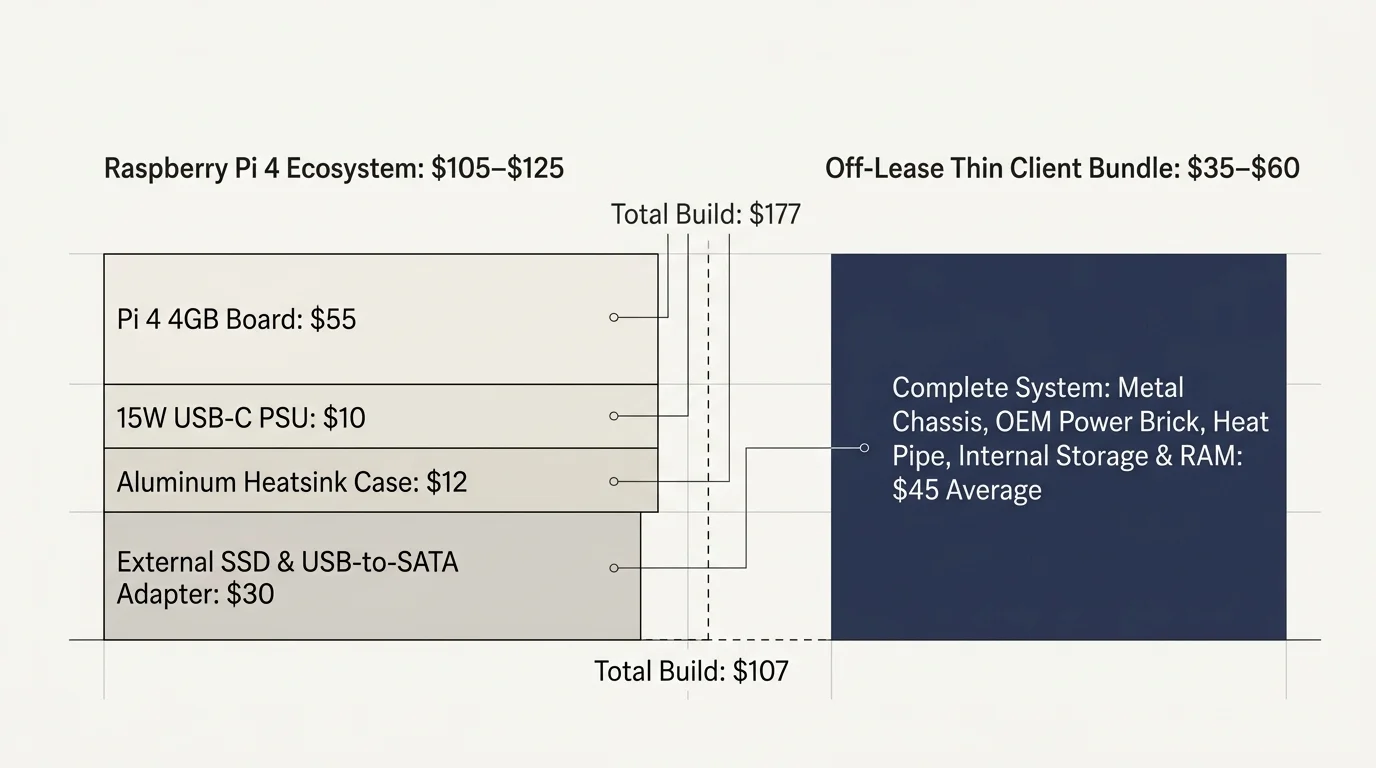
A Raspberry Pi 4 with 4GB of RAM carries an official retail price of $55. Unfortunately, supply volatility and bundling often push base board prices higher.
An official 15-watt USB-C power supply adds $10 to your cart. A passive aluminum heatsink case costs another $12 to prevent thermal throttling under heavy loads.
If you boot from a standard MicroSD card, the device will cost roughly $85 before taxes. However, running a smart home hub on flash memory creates severe reliability problems.
To prevent storage corruption, you need an external SSD and a compatible USB-to-SATA adapter bridge. That adds another $30 to your build cost.
When you tally every required component, a stable Raspberry Pi 4 setup costs between $105 and $125.
In contrast, enterprise thin clients sold on the secondary market arrive complete. Businesses retire thousands of these compact machines every month during office hardware refreshes.
A refurbished thin client typically includes an internal metal chassis, an integrated heatsink, system memory, and a matching original equipment manufacturer (OEM) power brick.
You can purchase these complete surplus bundles on secondary marketplaces for $35 to $60. That represents a 50 percent savings over an equivalent single-board computer setup.
Hardware Architecture: x86-64 Versatility vs. ARM64 SBCs
Under the hood, architecture dictates what software your server can run smoothly. The Raspberry Pi 4 uses an ARM-based Broadcom BCM2711 quad-core processor.
Having multiple native USB buses makes it far easier to add dedicated coordinators when understanding smart home protocols like Zigbee and Z-Wave.
The added compute power of x86 hardware is especially valuable if you plan on building a local voice pipeline using Whisper and Piper instead of cloud assistants.
Off-lease thin clients rely on traditional x86-64 processors from Intel or AMD. This distinction matters when you expand your smart home ecosystem beyond basic automations.
The generic x86-64 architecture provides universal software compatibility. You can install pre-built Docker containers and legacy binaries without hunting for multi-architecture images.
Intel chips like the Celeron J4105 and Pentium Silver J5005 support Intel Quick Sync Video. This feature enables hardware-accelerated video decoding for localized security camera streams.
The Broadcom chip inside the Raspberry Pi handles lightweight event automations cleanly. However, it strains quickly when processing real-time object detection or running media transcodes.
Memory configuration represents another significant architectural divide. The Raspberry Pi 4 solders its LPDDR4 memory directly to the circuit board.
If you purchase a 2GB or 4GB Raspberry Pi, you can never upgrade its capacity. When your hub outgrows that memory footprint, you must replace the entire computer.
Enterprise thin clients feature standard DDR4 small outline dual in-line memory module (SODIMM) slots. Most motherboards accommodate up to 32GB of RAM across two slots.
This expandability lets you transform a basic automation hub into a multi-purpose home server. You can run network ad-blocking, local network-attached storage, and home automation from a single $50 chassis.
In computing, architectural longevity depends on upgrade paths; hardware that cannot expand its memory or storage will face premature obsolescence as software demands grow.
Thin clients also offer superior input/output versatility. They feature multiple physical USB 3.0 buses, native gigabit Ethernet controllers, and dedicated display interfaces.
Many models even contain an open M.2 Key-E slot intended for Wi-Fi cards. You can repurpose this internal slot to host specialized machine-learning accelerators or additional network adapters.
Storage Reliability: M.2 SATA Endurance vs. MicroSD Failures
Storage architecture forms the foundation of smart home reliability. A home automation server writes data constantly, updating sensor values, device timestamps, and state changes.
Home Assistant relies on an internal SQLite database by default. This database writes updates to disk every few seconds to record environmental metrics.
Standard consumer MicroSD cards use flash storage intended for intermittent write cycles, such as saving digital photos. They lack wear-leveling controllers capable of managing thousands of constant disk writes.
Within six to eighteen months of continuous smart home logging, standard memory cards inevitably fail. The resulting corrupted file system can take down your automated lighting, climate controls, and security monitors.
Recovering from an unexpected drive failure requires manual operating system reinstallation and recent snapshot backups. If you lack a recent backup, you lose your automations permanently.
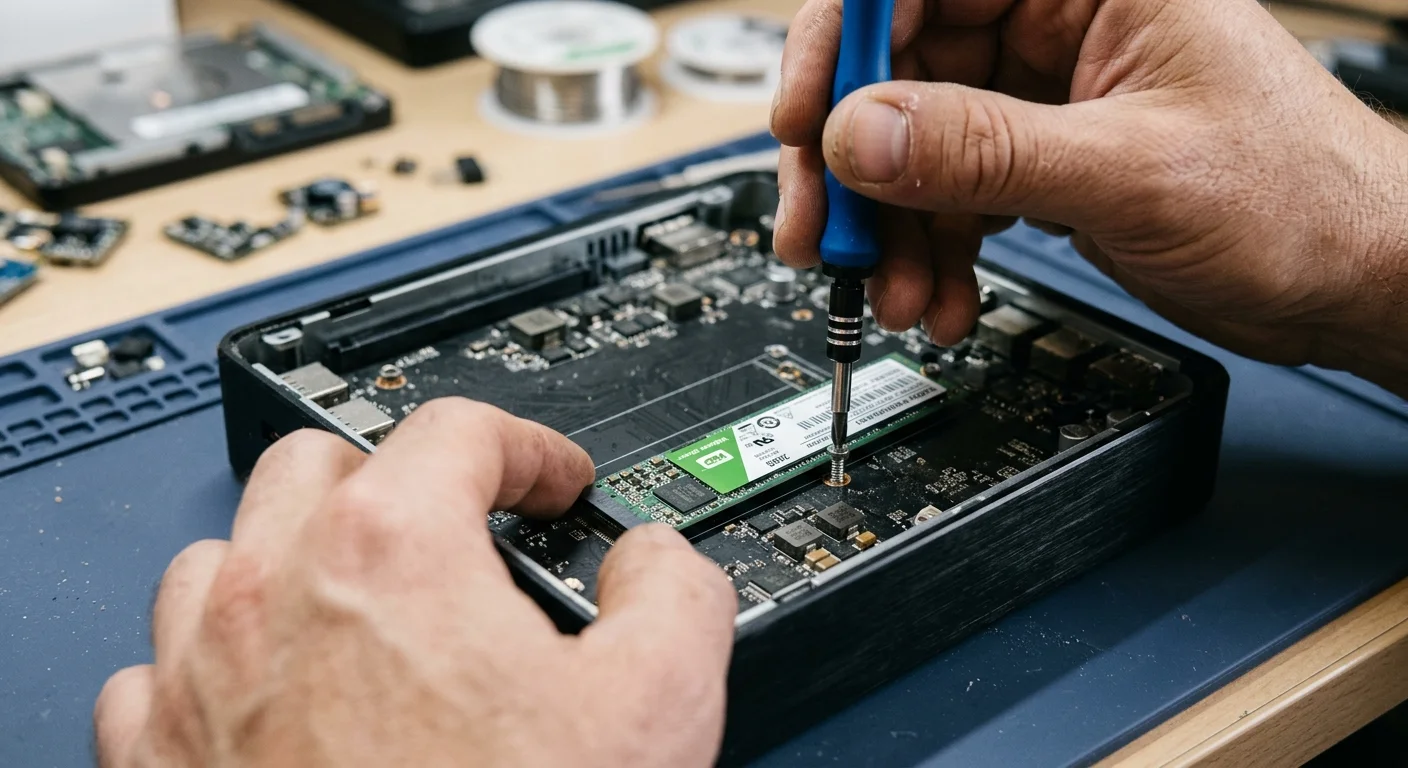
Used enterprise thin clients eliminate this failure point entirely. They feature internal M.2 2280 SATA connectors or standard 2.5-inch SATA bays.
Commercial M.2 solid-state drives utilize robust flash controllers and dedicated cache buffers. These drives deliver write endurance ratings between 70 and 150 Terabytes Written (TBW).
Logging five gigabytes of sensor data daily would take more than thirty years to exhaust an entry-level SATA SSD. Internal solid-state storage gives your smart home hub enterprise-grade resilience.
Adding an SSD to a Raspberry Pi introduces separate complications. You must connect the drive via an external USB-to-SATA adapter cable.
Many USB adapter bridges lack native support for SCSI Translation (UASP). Without proper UASP support, the Raspberry Pi operating system cannot execute the TRIM command.
Neglecting SSD TRIM commands leads to degraded performance and shortened drive lifespans. Furthermore, external drive enclosures dangling from cables look cluttered and risk accidental disconnection.
A thin client keeps the drive securely locked inside its rigid metal case. This internal mounting protects your drive from physical snags and accidental power interruptions.
Power Consumption and Annual Operating Costs Analyzed
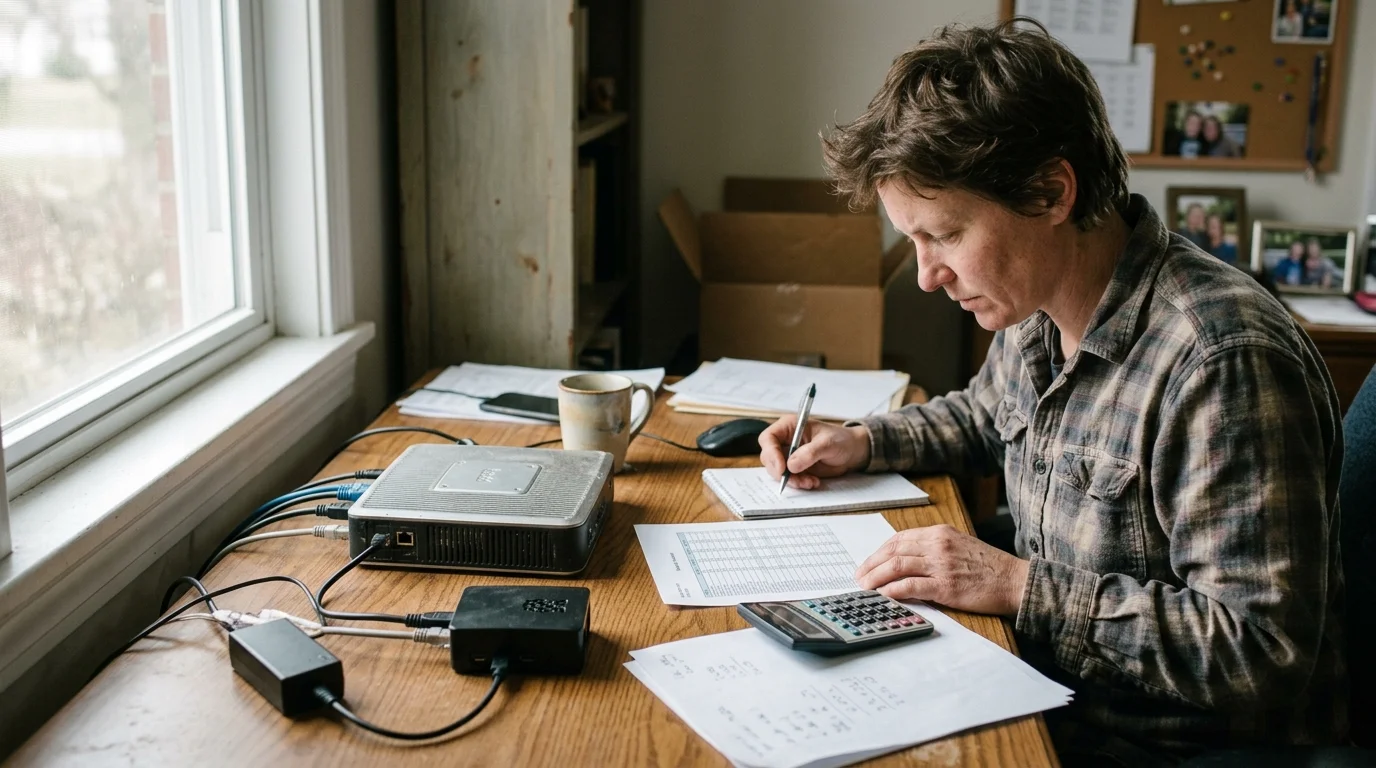
Smart home servers run continuously, operating 24 hours a day, 365 days a year. Because these devices never sleep, operational energy efficiency is a primary purchasing consideration.
Minimizing your server’s baseline energy draw complements other energy-saving automations that lower your bills across your living spaces.
Enthusiasts frequently choose the Raspberry Pi because of its low power draw. When idling, a Raspberry Pi 4 consumes approximately 2.7 to 3.4 watts of electricity.
When running multiple background integrations and database queries, the Pi draws roughly 4.2 watts. Under maximum processing load, power consumption peaks around 7.5 watts.
Intel-based thin clients draw slightly more power, but remain remarkably efficient. A Dell Wyse 5070 powered by an Intel Celeron J4105 idles between 3.5 and 5.5 watts.
Under a typical automation load, that same thin client consumes around 6.5 watts. Older AMD-based units, such as the HP T630, idle between 6.0 and 8.0 watts.
To evaluate these differences, you must calculate annual operating costs using real electricity rates. The United States national average residential electricity cost sits near $0.16 per kilowatt-hour (kWh).
The annual electrical expense of a continuously running device follows a simple formula:
Annual Cost = (Wattage × 8760 Hours ÷ 1000) × Electricity Rate per kWh
A Raspberry Pi 4 drawing an average of 3.5 watts consumes 30.66 kWh annually. At $0.16 per kWh, powering the Raspberry Pi costs $4.91 each year.
A Dell Wyse 5070 drawing an average of 5.5 watts consumes 48.18 kWh over the same duration. That translates to an annual electricity expense of $7.71.
The difference in electricity cost between a single-board computer and a refurbished thin client is approximately $2.80 per year. That amounts to less than twenty-four cents per month.
It would take over twenty years of energy savings for the Raspberry Pi to offset its higher initial equipment cost. From a financial perspective, the thin client wins on total cost of ownership.
| Device Model | Processor Model | Idle Power Draw | Active Smart Hub Draw | Annual Power Cost ($0.16/kWh) | Storage Interface | Typical Used Cost |
|---|---|---|---|---|---|---|
| Raspberry Pi 4 (4GB) | Broadcom BCM2711 | 3.0W | 4.2W | $5.89 | MicroSD / USB 3.0 | $105 (Complete Kit) |
| Dell Wyse 5070 | Intel Celeron J4105 | 4.2W | 6.1W | $8.55 | M.2 SATA (2280) | $45 (Complete) |
| HP T630 | AMD GX-420GI | 6.5W | 9.8W | $13.74 | M.2 SATA (2242/2280) | $40 (Complete) |
| Lenovo ThinkCentre M710q | Intel Core i3-7100T | 8.5W | 14.0W | $19.62 | M.2 NVMe + 2.5″ SATA | $70 (Complete) |
The table above illustrates the real-world trade-offs across common budget hardware options. While the Raspberry Pi 4 consumes the fewest watts, its elevated acquisition cost negates those utility savings.
The Dell Wyse 5070 represents the optimal sweet spot between energy efficiency, compute performance, and purchase price. The HP T630 serves as a reliable runner-up when Intel models are unavailable.
One-liter mini PCs like the Lenovo ThinkCentre M710q draw more power. However, they offer enough processing headroom to run localized media servers alongside your automation controller.
Top Sub-$75 Hardware Candidates on the Secondary Market
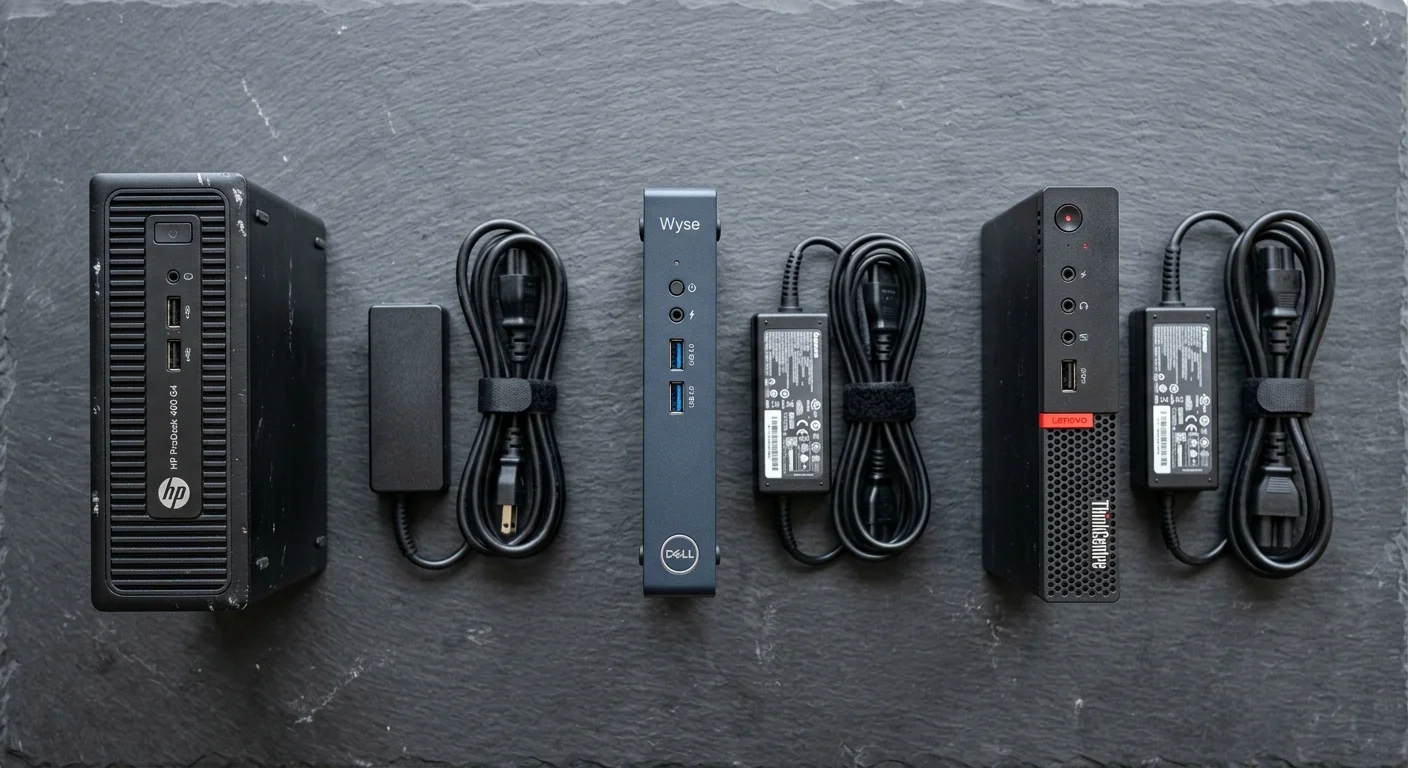
Finding the right surplus hardware requires knowing which enterprise models deliver the best reliability. Three specific platforms consistently sell within the sub-$75 budget envelope.
The Dell Wyse 5070 stands as the premier choice for budget smart home enthusiasts. Dell manufactured this machine in vast quantities for financial institutions, healthcare networks, and enterprise call centers.
The base unit features an Intel Celeron J4105 quad-core chip running at a base clock of 1.5 GHz. An upgraded configuration contains the Intel Pentium Silver J5005 processor.
The Wyse 5070 operates completely fanless through a massive internal aluminum heatsink. Because it lacks moving parts, it runs silently and never pulls dust into its internal electronics.
Its motherboard contains two DDR4 SODIMM slots supporting up to 32GB of memory. It also includes an internal M.2 SATA storage slot and five external USB 3.0 ports.
The HP T630 provides a dependable secondary option when Dell hardware inventory runs low. This machine runs on an AMD GX-420GI quad-core system on a chip.
The HP T630 also features a fanless passive cooling design. It incorporates dual M.2 storage slots, allowing you to separate your operating system from automated backups.
The HP unit costs slightly less than the Dell on used marketplaces, routinely selling for $35 to $45. However, its AMD processor runs warmer and consumes roughly two to three watts more power at idle.
If you need maximum compute power for local computer vision tasks, consider a 1-liter Ultra-Small Form Factor (USFF) PC. The Lenovo ThinkCentre M700 or M710q Tiny frequently sells for $60 to $75.
These units utilize 35-watt desktop processors like the Intel Core i3-6100T or i3-7100T. They include active cooling fans and accommodate both high-speed NVMe drives and secondary 2.5-inch SATA hard disks.
When shopping for used thin clients on secondary marketplaces, pay attention to listing details. Confirm the seller includes the proprietary external DC power supply brick.
- Verify that the listing explicitly includes the original manufacturer power adapter.
- Check that the unit includes at least 4GB of installed DDR4 system RAM.
- Confirm the chassis contains its internal drive mounting screw or bracket.
- Avoid units marked BIOS Locked unless you are comfortable resetting motherboard jumpers.
Purchasing a machine that already includes its power supply prevents unexpected accessory expenses. Sourcing a replacement OEM power brick separately typically adds $15 to your overall project cost.
Worked Financial Scenario: Complete Hub Setup Cost Breakdown
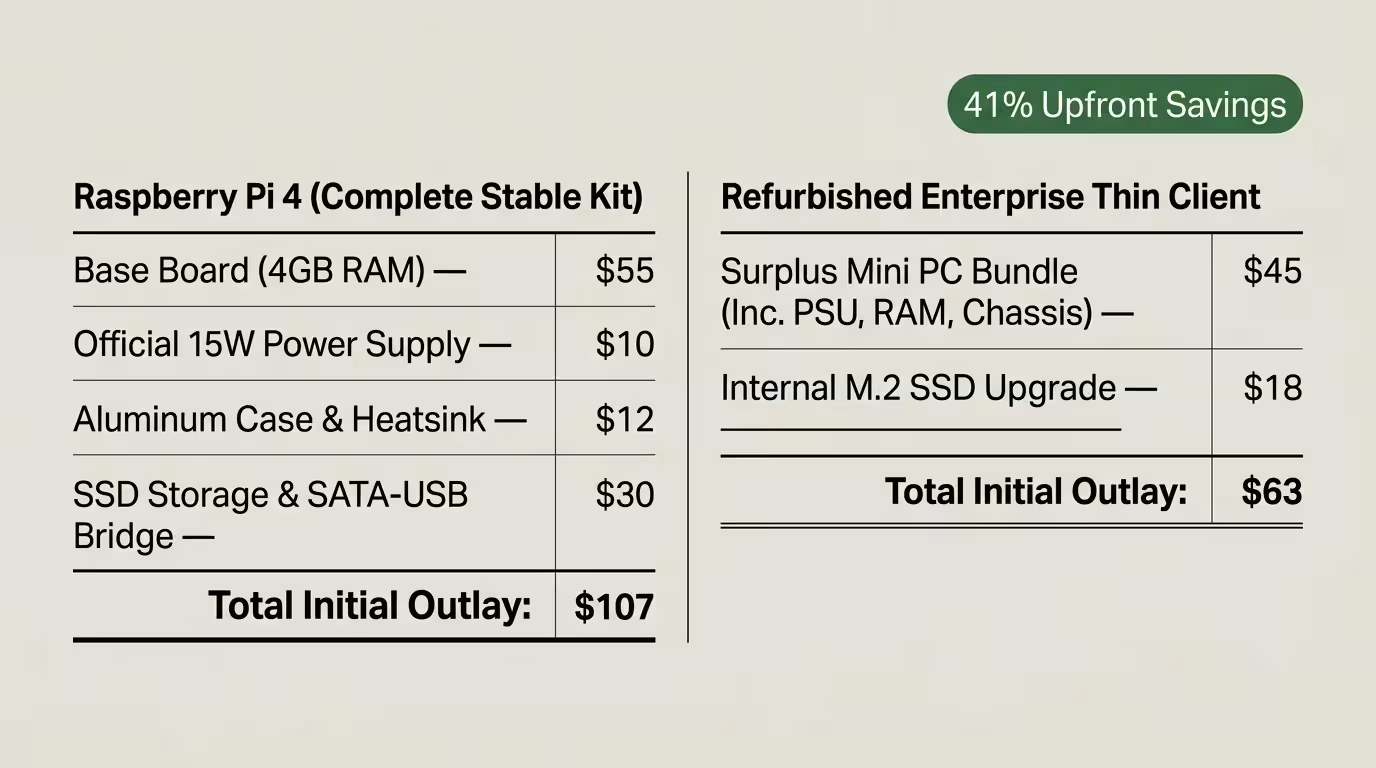
To demonstrate the economic advantage of repurposed commercial hardware, let us examine an authentic purchasing scenario. In this scenario, we source hardware to build a dedicated Home Assistant hub under a strict $75 budget.
We source an off-lease Dell Wyse 5070 thin client from an enterprise liquidator on eBay. The unit includes an Intel Celeron J4105 processor, 4GB of DDR4 memory, and the original 65-watt Dell power adapter.
The total winning bid and shipping cost for the thin client bundle totals $42.50. The computer arrives in working order, but contains an undersized 16GB embedded flash storage module.
To guarantee longevity, we order a brand-new 128GB M.2 2280 SATA solid-state drive from an online retailer for $14.99. This drive delivers a 75 TBW endurance rating.
We supply an existing 8GB USB thumb drive to flash the installation image, incurring zero additional expense. The final out-of-pocket hardware investment totals $57.49.
Now, let us calculate the expense of building a comparable Raspberry Pi 4 automation server during the same purchasing window.
The bare Raspberry Pi 4 Model B board with 4GB of RAM costs $55.00 at standard retail pricing. Shipping and handling charges add $6.50, bringing the subtotal to $61.50.
To prevent system instability, we purchase the official 15.3-watt Raspberry Pi USB-C power supply for $12.00. We also purchase a fluted aluminum passive cooling enclosure for $10.99.
To match the solid-state storage speed of the thin client, we avoid memory cards. We buy a 120GB external USB 3.0 SSD for $21.99.
The total out-of-pocket expenditure for the Raspberry Pi 4 build comes out to $106.48. This pushes the project $31.48 beyond our strict $75 budgetary threshold.
- Dell Wyse 5070 Chassis, CPU, 4GB RAM, and Power Supply: $42.50
- New 128GB M.2 2280 SATA Solid-State Drive: $14.99
- Total Thin Client Deployment Investment: $57.49
- Raspberry Pi 4 4GB Motherboard plus shipping: $61.50
- Official 15W Power Supply, Aluminum Case, and 120GB SSD: $44.98
- Total Raspberry Pi Deployment Investment: $106.48
Choosing the used thin client yields an immediate upfront cash savings of $48.99. That represents a 46 percent reduction in starting equipment costs.
Even after factoring in the thin client’s minor $2.80 annual electrical premium, the recycled office PC remains significantly cheaper. It would take over seventeen years of continuous runtime for the Raspberry Pi to overcome its upfront pricing deficit.
Step-by-Step Installation: Deploying Home Assistant OS
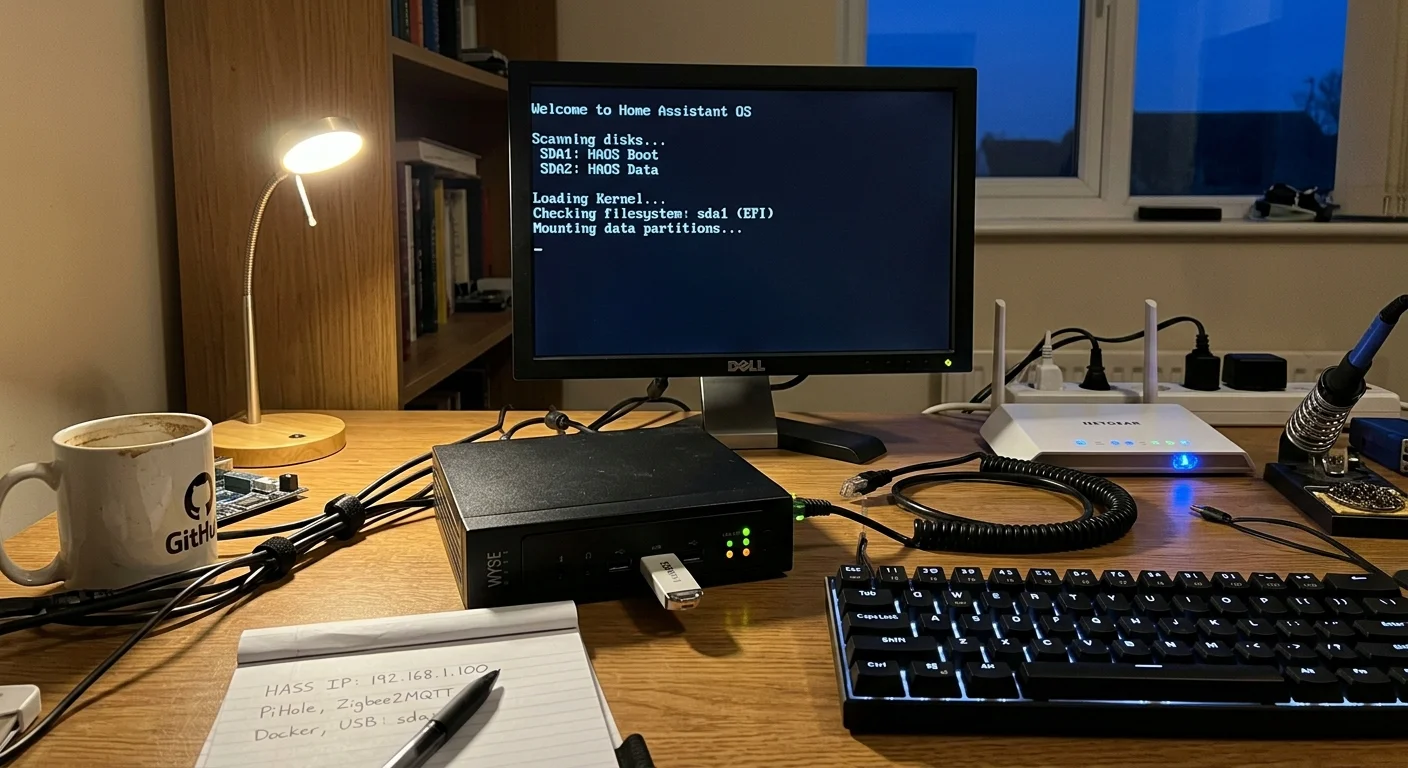
Installing Home Assistant OS bare-metal on an x86-64 thin client takes roughly thirty-five minutes. This deployment method eliminates virtualization overhead, giving your hub direct access to internal storage and USB radios.
You need a temporary USB flash drive containing an Ubuntu Live desktop image, your thin client, and a working computer. Connect the thin client to a monitor, keyboard, and your wired home network.
- Insert your new M.2 SATA SSD into the internal drive slot of the thin client and secure it with a mounting screw.
- Power on the thin client and press the F2 or F12 key repeatedly to access the system BIOS settings.
- Navigate to the power settings menu and configure the machine to automatically power back on after an AC electrical outage.
- Disable Secure Boot under the security menu, ensure the boot mode is set to UEFI, and save your configuration changes.
- Boot the thin client using the Ubuntu Live USB drive by selecting the Try Ubuntu environment.
- Open the pre-installed web browser inside Ubuntu and download the latest generic x86-64 Home Assistant OS disk image (haos_generic-x86-64.img.xz).
- Launch the built-in Disks utility within Ubuntu, locate your internal M.2 SSD, and select Restore Disk Image from the gear menu.
- Select the downloaded Home Assistant OS image file and confirm the write operation to flash the image directly to the drive.
- Shut down the operating system, remove the installation flash drive, and power the thin client back on.
The thin client will boot into the freshly flashed Home Assistant operating system within thirty seconds. The software automatically partitions the remaining empty space on your M.2 SSD for data storage.
Once initialization finishes, open a browser on any device connected to your local network. Navigate to homeassistant.local:8123 to open the initial setup wizard.
The system will prompt you to create an administrator account, name your smart home hub, and assign your geographic location. Your high-performance, low-cost local automation server is now fully operational.
Optimizing Local Connectivity and Radios
A smart home server needs radio hardware to communicate with wireless battery-powered accessories. Popular low-power protocols include Zigbee, Z-Wave, and Thread.
Modern localized smart homes increasingly rely on the unified Matter smart home standard specifications for cross-vendor device interoperability. Connecting a universal radio adapter lets your server interface directly with these smart devices.
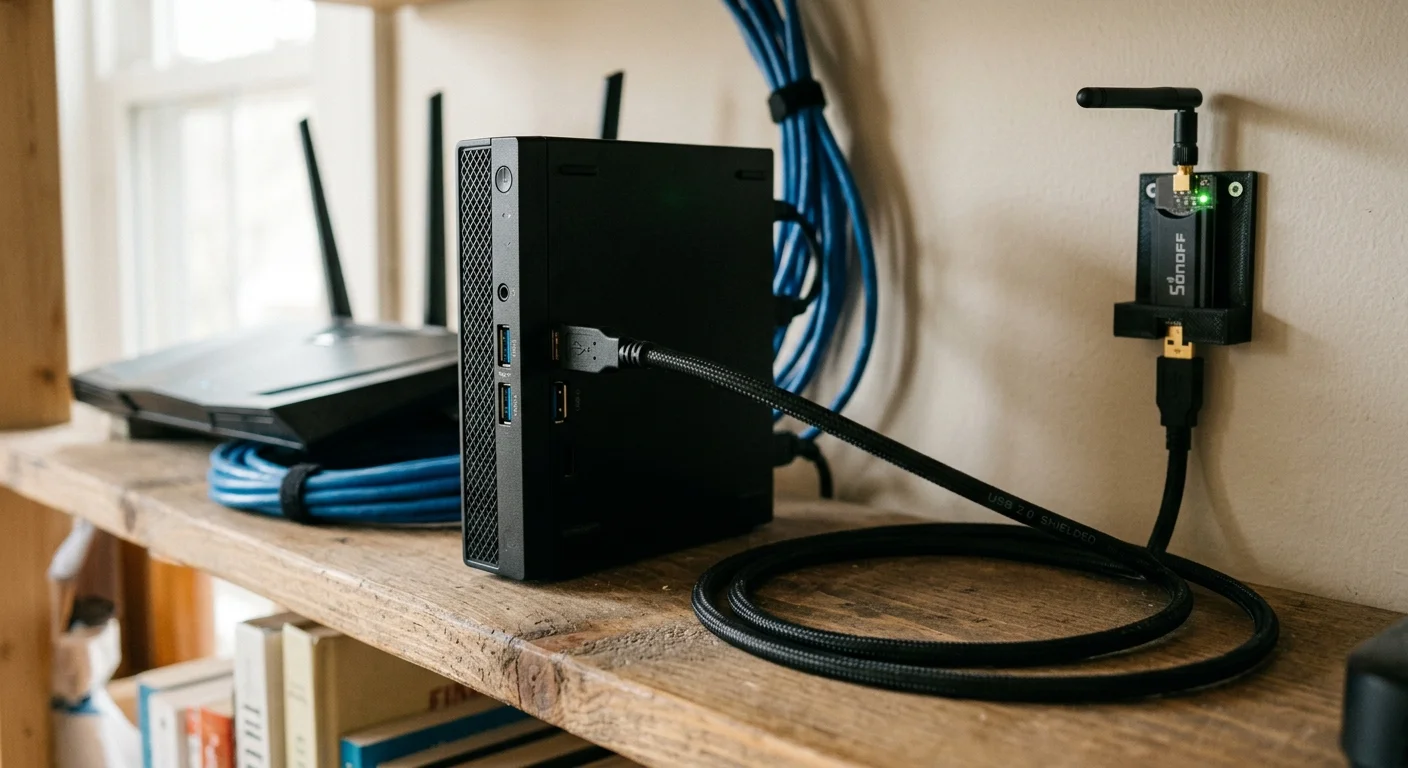
Avoid plugging USB radio coordinators directly into the ports on your server. Metal computer chassis and internal motherboard circuitry emit high-frequency electromagnetic interference.
This radio frequency noise severely degrades 2.4 GHz wireless signals, causing dropped Zigbee messages or sluggish smart switch responses. You can prevent this interference using a simple physical adjustment.
Always connect your smart home radio coordinator to a three-foot or six-foot USB 2.0 extension cable. This cable physically isolates the sensitive antenna from internal motherboard electronic interference.
Plug the extension cable into a black USB 2.0 port rather than a blue USB 3.0 port whenever possible. USB 3.0 controller clocks emit broadband electrical noise directly across the 2.4 GHz spectrum.
Thin clients make connecting multiple radios straightforward because they offer plentiful USB interfaces. You can easily attach a dedicated Zigbee dongle, a Z-Wave controller, and a local backup drive simultaneously.
To maintain rock-solid connectivity, access your home internet router’s administrative dashboard. Assign a permanent static IP reservation to your thin client’s physical MAC address.
Reserving a static IP address ensures your home automation dashboard remains accessible at the exact same network address after local router reboots. It also guarantees uninterrupted communication with local network devices like smart bulbs and wall plugs.
Frequently Asked Questions
Can a used thin client run software other than Home Assistant?
Yes. Because thin clients utilize generic x86-64 architecture, you can install alternative operating systems like Debian Linux, Ubuntu Server, or TrueNAS. Many users install the Proxmox VE hypervisor to run Home Assistant alongside a Pi-hole ad-blocker.
Are fanless thin clients prone to overheating when running 24/7?
No. Enterprise thin clients feature heavy aluminum heatsinks engineered to cool low-wattage processors under continuous operation. Even under active automation loads, temperatures generally stabilize safely between 40 and 55 degrees Celsius.
Why is an M.2 SATA SSD preferred over an NVMe SSD in budget thin clients?
Many older budget thin clients, including the Dell Wyse 5070 and HP T630, only support SATA protocol on their M.2 slots. Installing an NVMe drive in a SATA-only slot prevents the motherboard from recognizing the storage drive.
How difficult is it to restore a thin client if the drive fails?
Restoring the hub is straightforward if you configure automated backups to cloud storage or an external drive. You simply replace the internal M.2 SSD, reflash the base image, and upload your saved backup archive during onboarding.
Disclaimer: This article is for informational purposes only. Smart home devices involve electrical connections and data privacy. Always follow manufacturer instructions for installation. For complex wiring or HVAC work, consult a licensed professional.