You cannot open a web browser on a headless smart plug or light bulb to accept an apartment Wi-Fi splash screen. You can solve this connection roadblock permanently in under twenty minutes without calling your property manager.
Establishing a stable connection also allows apartment dwellers to deploy automated routines like presence simulation with smart lights and plugs to make an empty home look occupied.
Deploying an inexpensive travel router in Wireless Internet Service Provider mode creates an isolated subnetwork that bypasses captive portal screens for every device. This method lets you authenticate once on your phone while shielding your smart home accessories from curious neighbors.
This technical guide shows you how to bridge your headless gear onto managed residential networks using hardware routers and software cloning workarounds.
Why Captive Portals Break Headless Smart Devices
Headless Internet of Things (IoT) hardware lacks graphical user interfaces, display screens, and integrated web browsers. Devices such as smart plugs, smart bulbs, and environmental sensors rely on low-power microcontrollers like the ESP32 or ESP8266.
While client isolation offers baseline separation on shared networks, understanding how to secure your smart home from hackers becomes critical when operating connected hardware in multi-tenant environments.
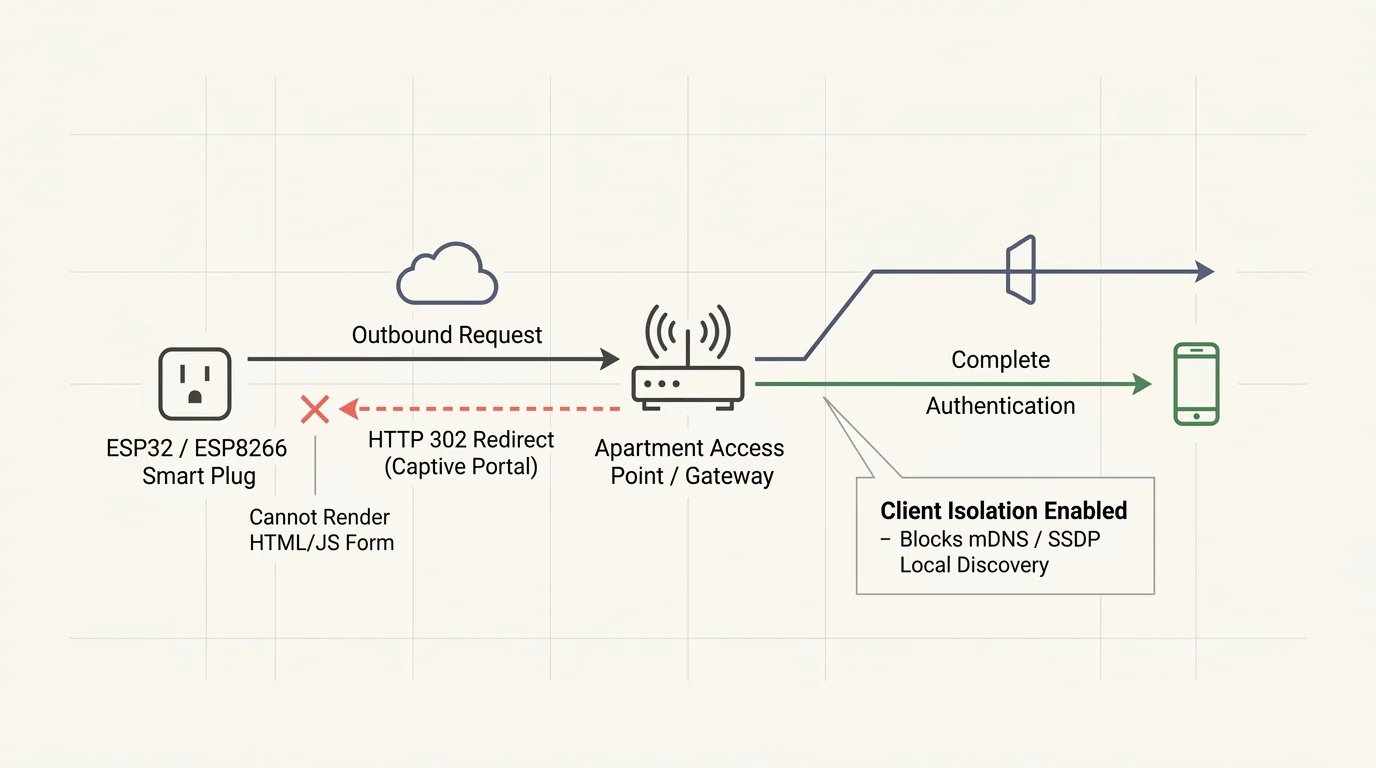
These embedded microcontrollers cannot interpret HTML forms or run JavaScript authorization scripts. When the device joins a network, it expects an immediate, unhindered connection to external cloud endpoints.
Student housing, condominiums, and managed multi-dwelling unit (MDU) communities typically use captive portals to regulate network traffic. Enterprise access points from vendors like Cisco Meraki, Aruba, or Ruckus intercept initial outbound web requests.
The gateway server issues an HTTP 302 redirect that forces client devices toward an authentication landing page. Because a smart plug cannot process this redirect, its cloud registration process fails immediately.
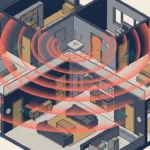
Most commercial property networks also enforce client isolation to protect tenant privacy. Client isolation prevents devices on the same Wi-Fi network from communicating directly with each other over local subnets.
This security policy breaks standard mobile onboarding. Your smartphone cannot discover the smart bulb via local multicast DNS (mDNS) or Simple Service Discovery Protocol (SSDP) streams.
According to consumer networking analyses published by PCMag Smart Home experts, captive portals remain the leading reason smart home devices fail during rental installations.
Without an intermediary device to handle authentication, your smart bulbs will remain offline in pairing mode indefinitely.
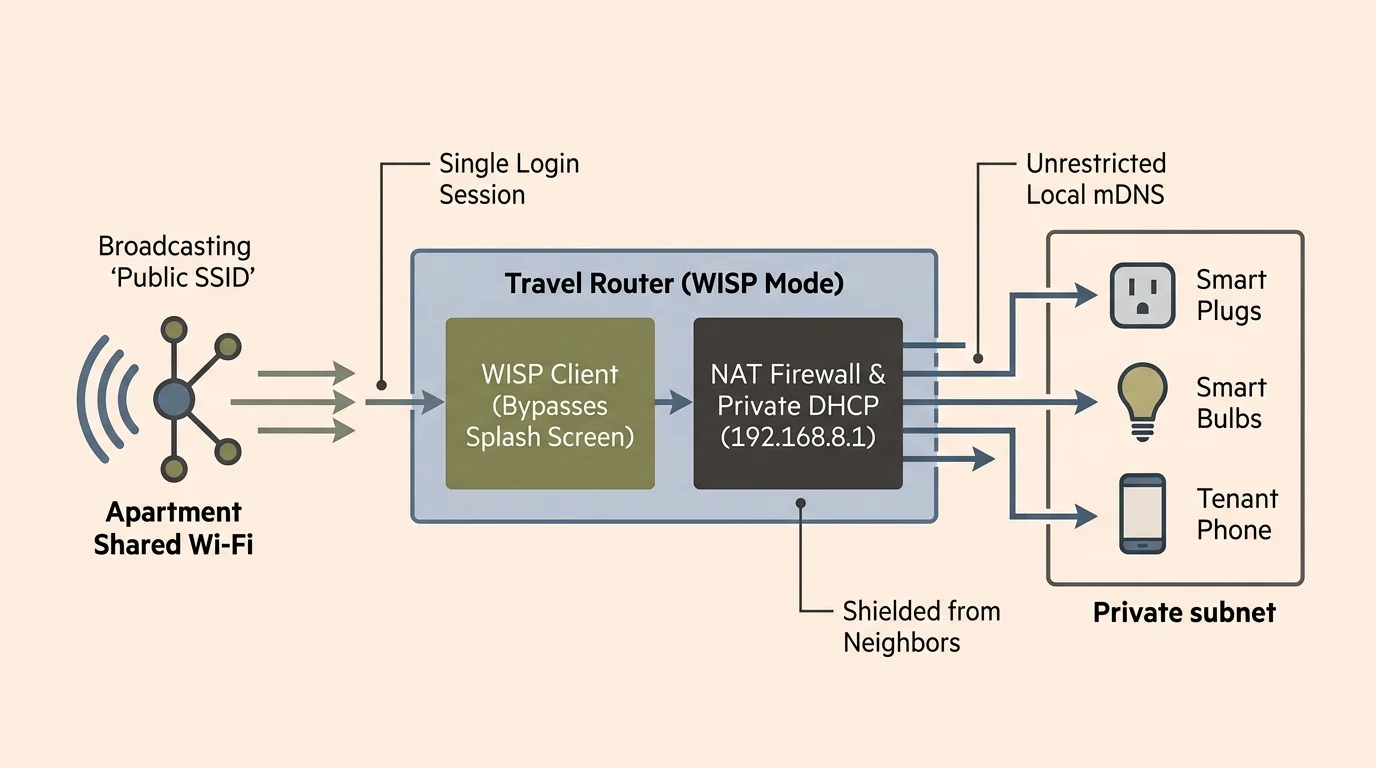
Method 1: The Travel Router Solution (Recommended)
A portable travel router operating in Wireless Internet Service Provider (WISP) mode offers the cleanest solution for apartment renters. WISP mode connects the router wirelessly to the building’s shared infrastructure while broadcasting a separate, private Wi-Fi network in your unit.
In dense apartment complexes where dozens of neighboring routers compete for bandwidth, resolving 2.4GHz spectrum crowding helps ensure your bridged devices maintain responsive, low-latency connections.
The travel router functions as an active network bridge and Network Address Translation (NAT) firewall. The apartment building’s access point sees only one connected client: your travel router.
You authenticate the captive portal once using your smartphone or laptop connected to the travel router. After you accept the terms, the apartment gateway whitelists the travel router’s external Media Access Control (MAC) address.
Every smart plug, smart bulb, and voice assistant connected to your travel router inherits this authenticated internet access instantly. None of your individual smart devices ever encounter the captive portal splash screen.
Modern travel routers also broadcast distinct 2.4 GHz and 5 GHz wireless bands simultaneously. This dual-band capability eliminates pairing failures caused by smartphones attempting to configure 2.4 GHz-only smart plugs across combined frequencies.
Follow these operational steps to establish your travel router bridge:
- Position the travel router in a central location within line of sight of your primary smart home devices.
- Connect the travel router to its USB-C power supply and wait for the status LED to turn solid white or blue.
- Connect your smartphone or laptop to the default private Wi-Fi network name printed on the router’s bottom label.
- Open an internet browser window and navigate to the default administration IP address, typically 192.168.8.1 or 192.168.1.1.
- Select “Repeater” or “WISP” mode within the network management interface.
- Scan for your apartment building’s public wireless network name and click “Connect.”
- Open a new browser tab on your laptop or phone, navigate to any unencrypted website, and submit the apartment captive portal form.
- Create a custom 2.4 GHz SSID and WPA2 Pre-Shared Key on the travel router for your smart home accessories.
Once finished, you can pair all your smart bulbs and plugs directly to your new private 2.4 GHz network. They will maintain seamless cloud connectivity even when your personal computer is turned off.
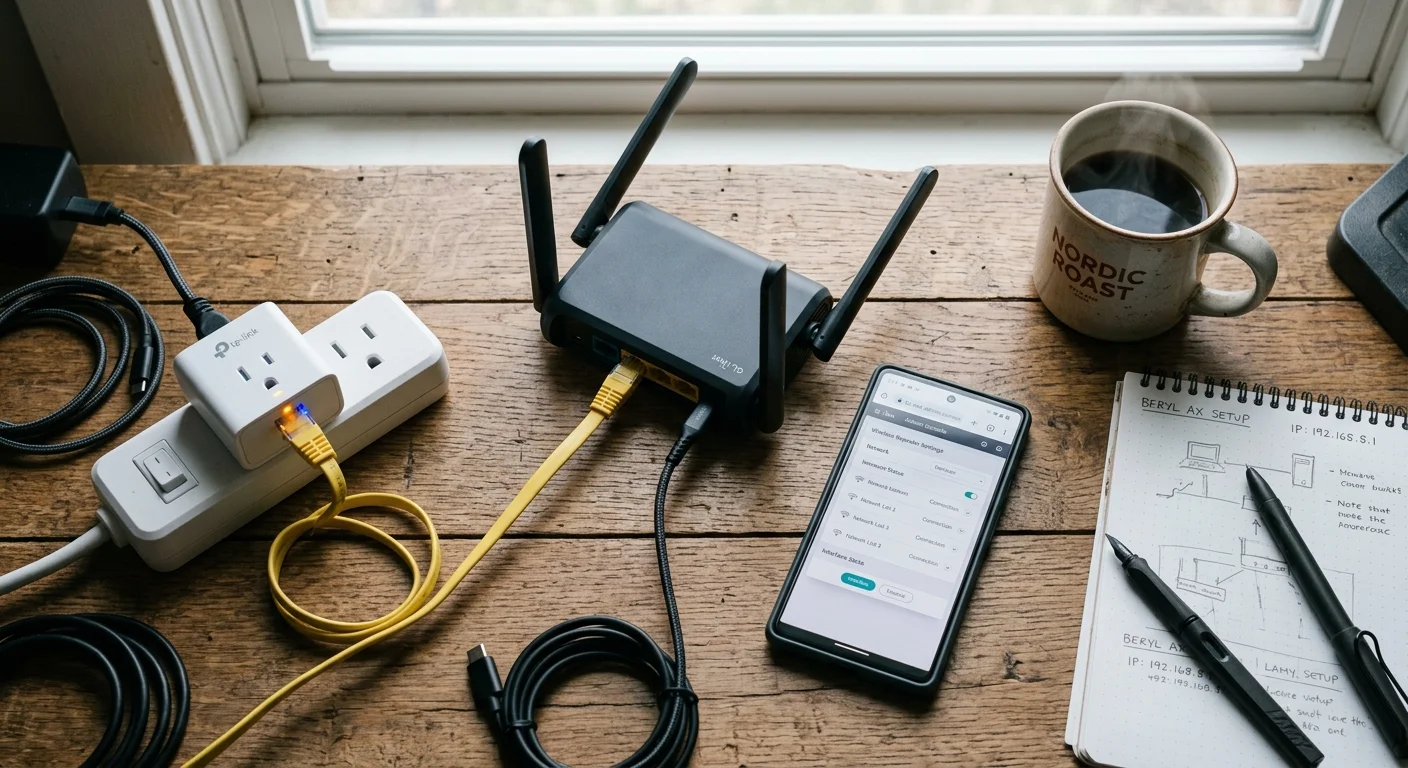
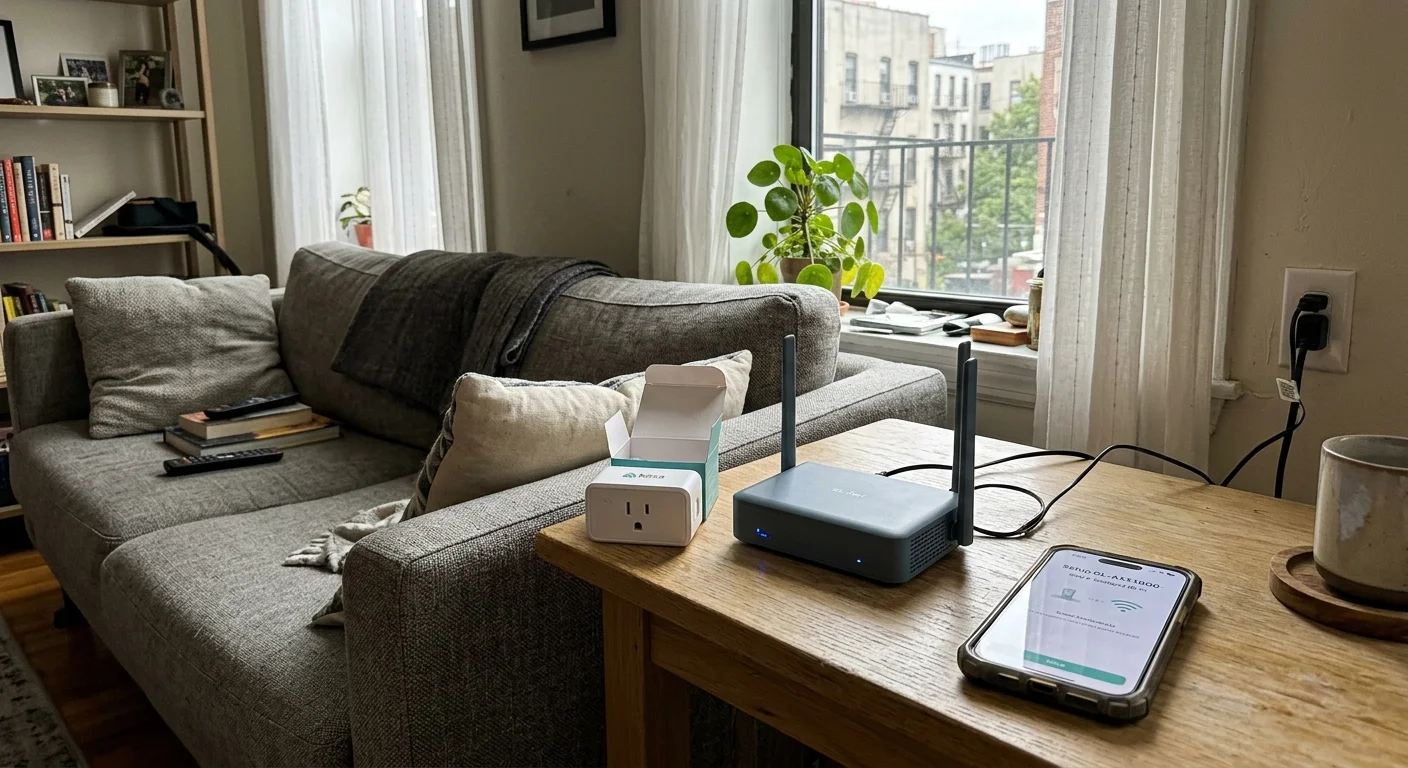
Worked Setup Example: GL.iNet Beryl AX and Kasa Smart Plugs
Consider a practical rental scenario inside a university-affiliated apartment building that uses a 24-hour captive portal timeout. In this scenario, you want to automate your living room lighting without asking the building IT department for manual device exemptions.
Beyond controlling lamps, you can apply this isolated setup toward kitchen routines such as automating your coffee maker with smart plugs without dealing with Wi-Fi dropouts.
This deployment uses the following hardware and software parameters:
- Gateway Hardware: GL.iNet GL-MT3000 (Beryl AX) travel router ($89.00 street price).
- Target Accessories: Two TP-Link Kasa KP125M Matter-enabled smart plugs ($19.99 each).
- Upstream Network: “Campus_Lofts_Resident” (Managed 802.11ax network requiring student ID login).
- Downstream Private Band: “Loft402_IoT” (Dedicated 2.4 GHz 802.11n broadcast with WPA2-Personal).
- Time Required: 14 minutes from unboxing to complete automation verification.
Unbox the GL.iNet GL-MT3000 and connect the included 5V/3A power adapter to a wall outlet near your entryway. Connect your laptop to the default broadcast SSID “GL-MT3000-4b2” using the default password “goodlife”.
Open a web browser and navigate to the local administration console at http://192.168.8.1. Create an administrative password, select English as the system language, and open the “Internet” configuration menu.
Under the “Repeater” section, click “Scan” and choose “Campus_Lofts_Resident”. Before connecting, click “Network Settings,” select “DNS,” and temporarily disable “DNS Rebind Protection.”
Disabling DNS Rebind Protection allows the travel router to accept the apartment gateway’s local IP redirection. If this setting remains enabled, the router’s internal OpenWrt firewall will block the splash page redirect.
Click “Connect” to link the GL-MT3000 as an upstream wireless client. On your laptop, navigate to http://neverssl.com to trigger the apartment captive portal instantly.
The browser automatically redirects to the management landing page at https://auth.campusnetwork.net/login. Enter your tenant credentials, agree to the network terms, and submit the form.
Return to the GL.iNet admin panel and set the 2.4 GHz Wi-Fi network name to “Loft402_IoT” using the WPA2-PSK encryption protocol. Open the TP-Link Kasa app on your smartphone, ensure your phone connects to “Loft402_IoT,” and initiate device setup.
Plug the first Kasa KP125M smart plug into an outlet. The companion app discovers the plug via Bluetooth Low Energy, applies the “Loft402_IoT” credentials, and connects to the internet in 35 seconds.
Configure an automated schedule in the Kasa app to turn on your floor lamp at 6:30 PM daily. Latency tests confirm an upstream ping of 14.2 milliseconds to 8.8.8.8, adding only 1.8 milliseconds of overhead compared to a direct connection.
The GL-MT3000 draws an average of 2.8 watts during regular operation. At an electricity rate of $0.16 per kilowatt-hour, powering this dedicated bridge continuously costs approximately $0.32 per month.
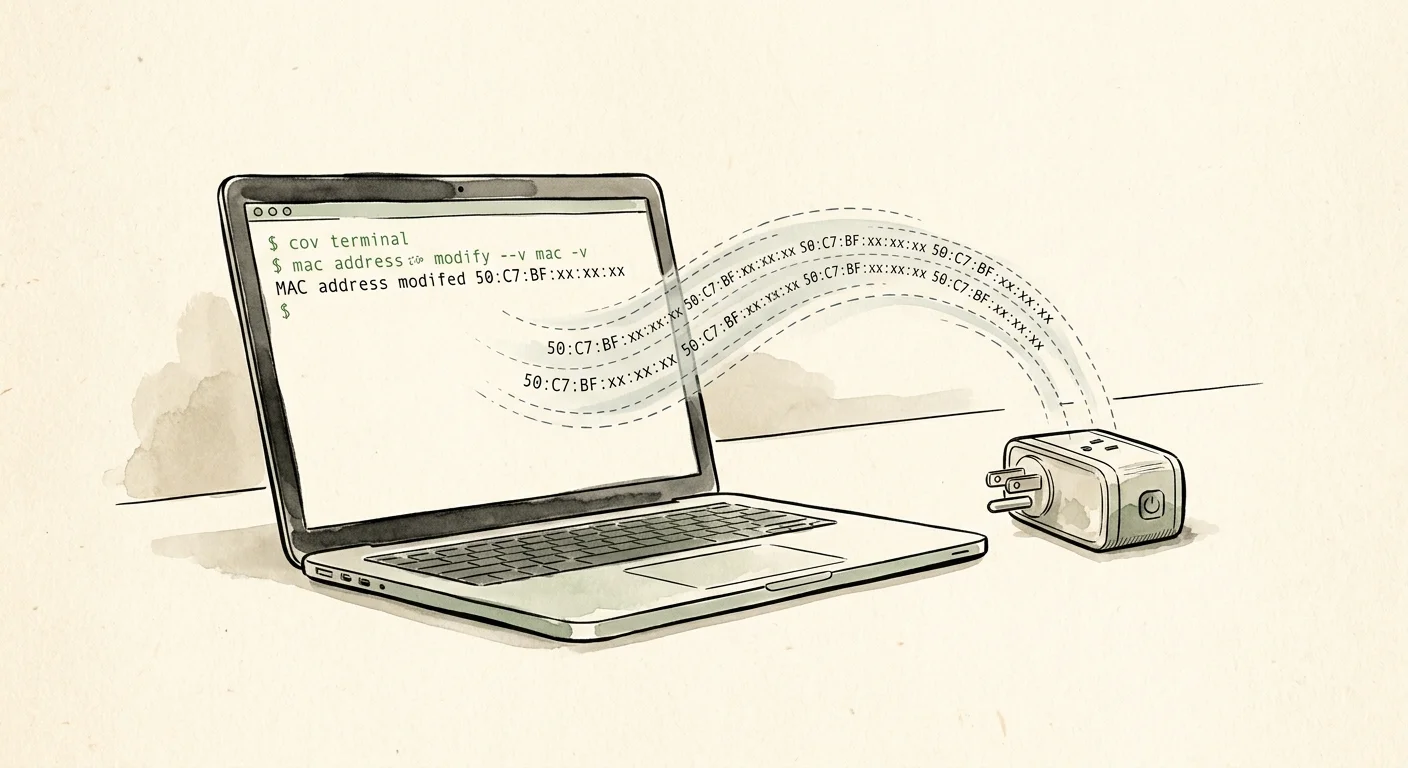
Method 2: MAC Address Spoofing via Your Laptop
If you cannot purchase a travel router, you can authenticate headless devices using MAC address spoofing. Every network card possesses a unique 12-character hexadecimal Media Access Control address, such as 00:1A:2B:3C:4D:5E.
Because captive portals routinely enforce DHCP lease timeouts, MAC spoofing is a frequent culprit when smart devices keep disconnecting after an initial successful setup.
Apartment captive portals grant network privileges by tracking these physical hardware addresses in their internal DHCP tables. Once a specific MAC address passes the splash page challenge, the portal permits it to send internet packets freely.
You can temporarily assign your smart plug’s MAC address to your personal computer’s wireless card. After completing the captive portal screen on your computer, you revert your computer’s MAC and power on the smart device.
Follow this procedure to clone a MAC address on a Windows 11 laptop:
- Locate the smart plug’s physical MAC address printed on its regulatory sticker or outer retail box.
- Write down the 12-character alphanumeric sequence accurately.
- Open the Windows Start Menu, type “Device Manager,” and press Enter.
- Expand the “Network adapters” section and double-click your primary Wi-Fi controller.
- Click the “Advanced” tab and select “Locally Administered Address” or “Network Address” from the property list.
- Click the “Value” radio button and type the smart plug’s MAC address without colons, spaces, or hyphens.
- Click “OK” to apply the spoofed address to your laptop’s wireless card.
- Connect your laptop to the apartment Wi-Fi and open a web browser to complete the captive portal login.
- Return to Device Manager, re-select the “Not Present” option to restore your laptop’s native MAC, and click “OK.”
- Insert your smart plug into the wall outlet immediately so it claims the pre-authenticated DHCP lease.
On macOS, you can execute the spoofing sequence using the built-in terminal command line utility:
- Disconnect your Mac from the Wi-Fi network by holding Option and clicking the Wi-Fi status menu.
- Open the Terminal application from your Applications and Utilities folder.
- Type
sudo ifconfig en0 ether 00:11:22:33:44:55, substituting your smart device’s actual MAC address. - Press Enter and provide your local macOS administrator password to execute the hardware override.
- Reconnect to the apartment Wi-Fi network and complete the browser authentication splash screen.
- Disconnect your Mac from the network to avoid an IP address collision.
- Restart your Mac or run
sudo ifconfig en0 ether $(networksetup -getmacaddress en0 | awk '{print $3}')to restore your native address. - Power on your smart bulb or plug to connect directly through the validated lease.
This method requires zero financial investment, but it carries operational constraints. Whenever the apartment network resets its authorization cache, you must repeat this manual cloning routine for every headless accessory.
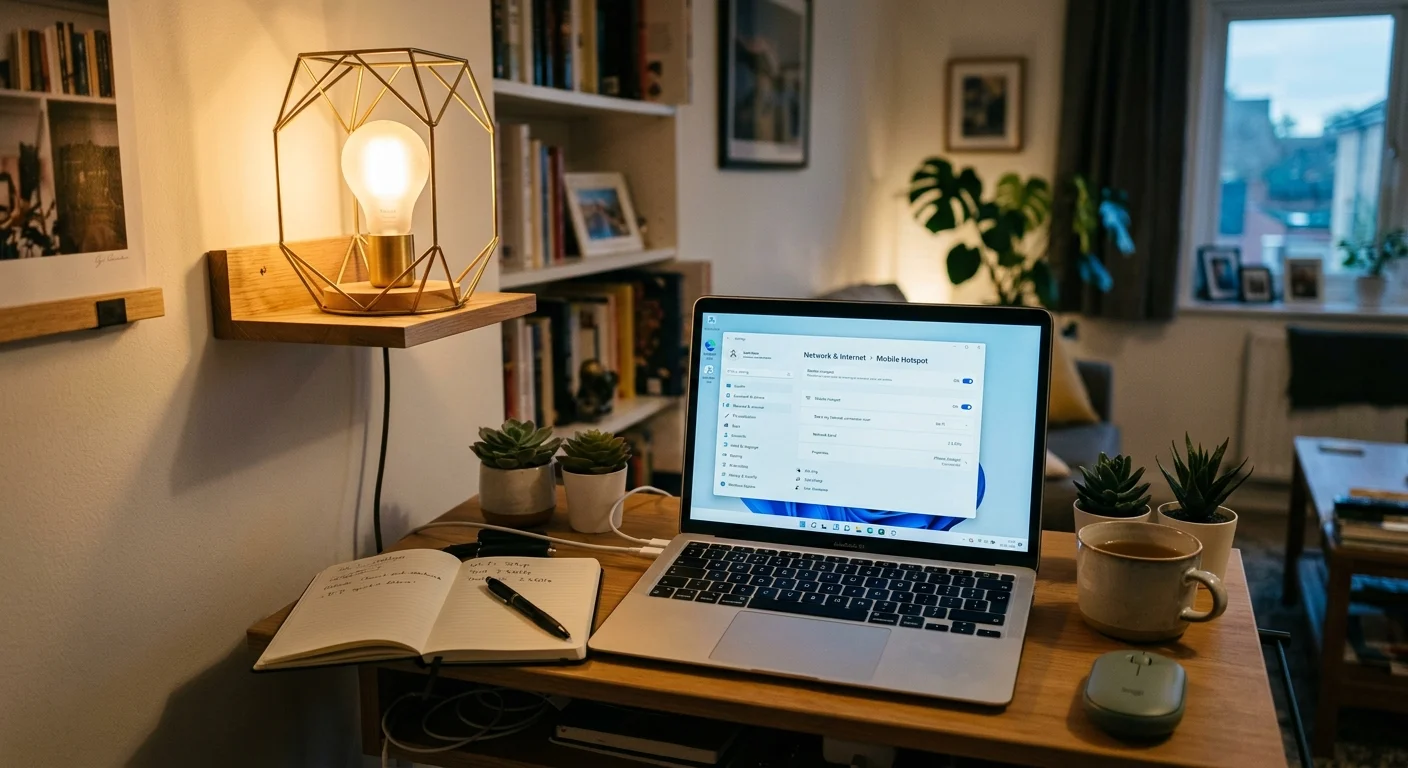
Method 3: Windows or macOS Virtual Hotspot Pass-Through
You can bridge headless devices without third-party routers by converting your personal computer into an active software access point. This approach routes your smart home traffic through your computer’s existing network card.
Windows 11 includes native Wi-Fi Direct virtual adapter support that receives and broadcasts wireless signals simultaneously over a single network card. This software feature bypasses captive portals by sharing your computer’s authenticated session.
To establish a Windows 11 mobile hotspot bridge:
- Open the “Settings” panel on your PC and navigate to the “Network & internet” tab.
- Click on the “Mobile hotspot” configuration menu.
- Select “Wi-Fi” under the “Share my internet connection from” dropdown field.
- Choose “Wi-Fi” under the “Share over” parameter.
- Click “Edit” to define an SSID name and a secure WPA2 password, then select the “2.4 GHz only” band.
- Toggle the “Mobile hotspot” switch to “On.”
- Connect your smart bulb or plug to this newly broadcast virtual SSID using the vendor app.
Setting up a similar wireless bridge on macOS requires two distinct physical network adapters. macOS cannot receive upstream Wi-Fi and broadcast a downstream Wi-Fi hotspot over the same internal wireless card simultaneously.
You must connect your Mac to the apartment network via an Ethernet cable or a secondary USB Wi-Fi dongle. You can then open System Settings, navigate to “General,” select “Sharing,” and activate “Internet Sharing” from your wired connection to your Wi-Fi interface.
While software hotspots cost nothing, they present substantial power and reliability drawbacks. Your host computer must remain fully awake and running 24 hours a day to keep your automations functioning.
If your computer enters system sleep, installs an automatic operating system update, or restarts, your smart home devices disconnect immediately. A standard desktop computer running continuously draws 60 to 150 watts, inflating your electric bill by $7.00 to $18.00 monthly.
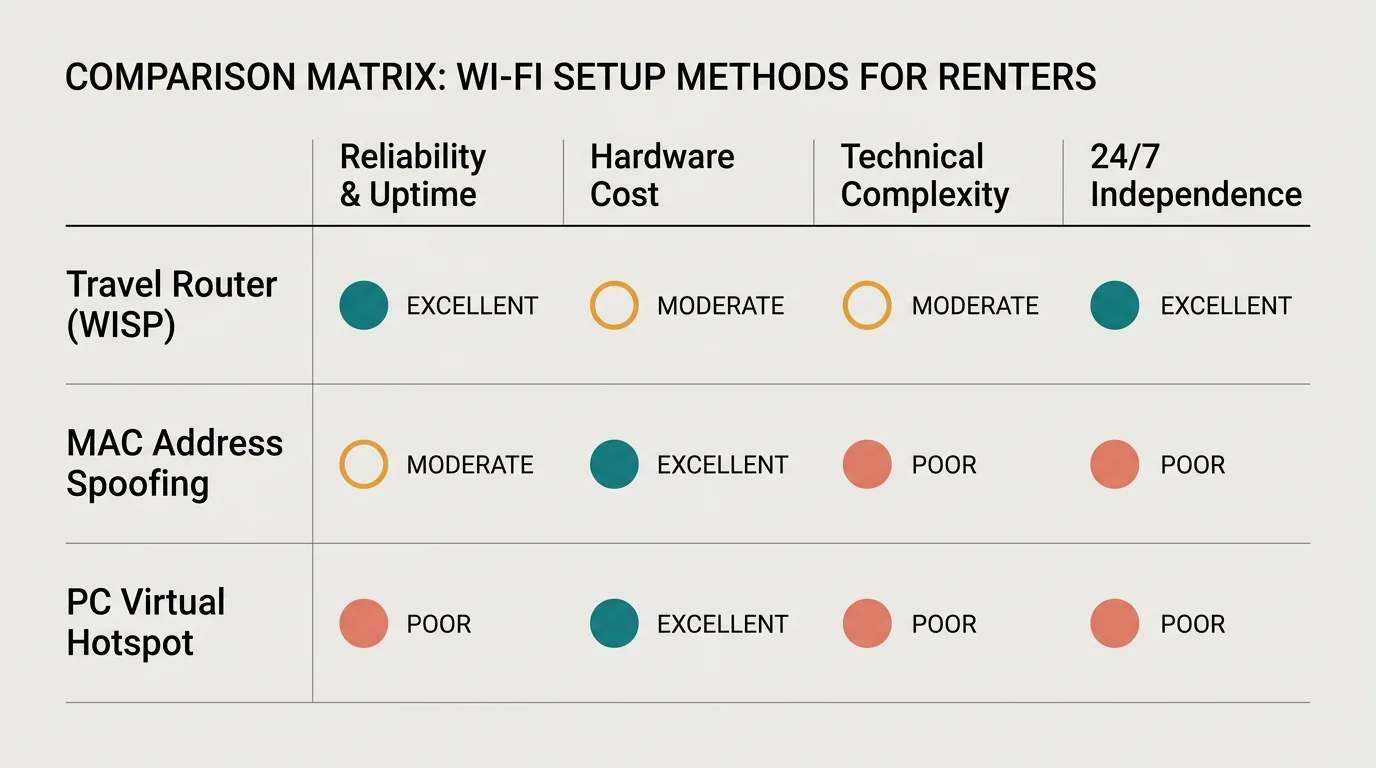
Comparing Captive Portal Workarounds for Renters
Selecting the right connection workaround depends on your hardware budget, technical confidence, and apartment lease duration. Review these measured operational attributes before deploying your smart home infrastructure.
| Workaround Method | Hardware Cost ($) | Setup Time (Minutes) | 24/7 Automation Reliability | Re-Authentication Maintenance | Local Device Isolation |
|---|---|---|---|---|---|
| Dedicated Travel Router (WISP) | $40 – $110 | 10 – 15 | High (Independent hardware) | Low (Single authentication) | High (Hardware NAT firewall) |
| Laptop MAC Spoofing | $0 | 15 – 20 per device | Medium (Dependent on lease) | High (Repeated on lease drop) | None (Shared public subnet) |
| PC Software Hotspot | $0 | 5 – 10 | Low (Host sleep disrupts link) | Medium (Requires active host) | Medium (Software virtual subnet) |
| Landlord Portal Whitelist | $0 | 24 – 72 hours | High (Persistent MAC bypass) | None (Admin managed) | None (Exposed to neighbors) |
As the comparison table illustrates, a dedicated travel router delivers superior long-term stability and local isolation. While MAC address spoofing costs nothing upfront, it demands manual maintenance whenever the building flushes active DHCP reservations.
Reliable hardware product testing from Wirecutter Smart Home guides confirms that smart accessories require uninterrupted network uptime to maintain scheduled routines.
The best smart home is the one you don’t have to manage.
Choosing a dedicated hardware bridge ensures your lighting schedules, automated heaters, and security sensors operate predictably without daily troubleshooting.
Security and Privacy Risks on Shared Apartment Wi-Fi
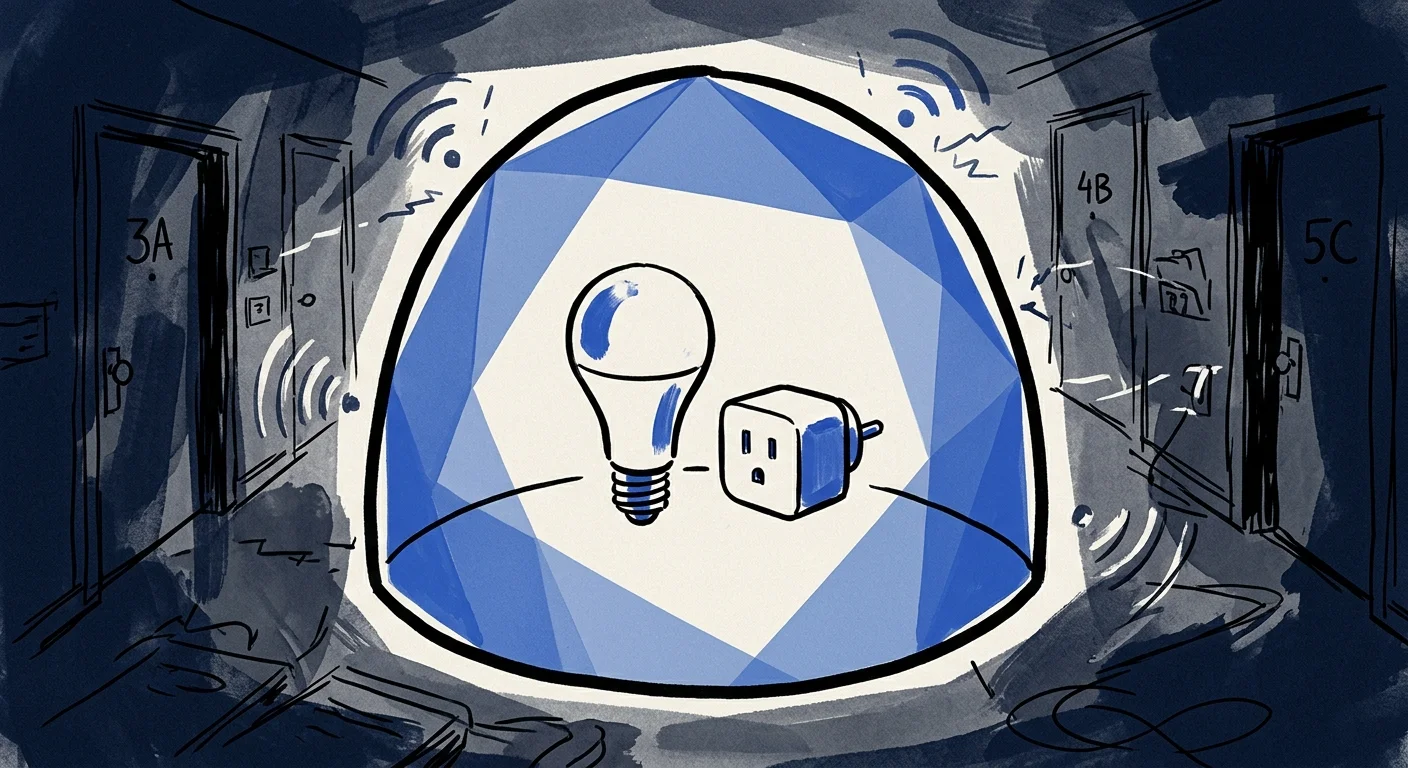
Operating smart devices directly on shared multi-tenant networks exposes your living space to serious digital privacy risks. Public apartment networks treat all connected tenants as members of an open local area network.
Without an isolating router, every resident in your complex can see your smart plugs and bulbs using network scanning applications like Fing. Unprotected devices broadcast device names, firmware revisions, and hardware MAC addresses across the shared subnet.
Many smart plugs use unencrypted local communication protocols for pairing and state reporting. Malicious neighbors can intercept these packets, manipulate your wall switches, or toggle your bedroom lights without your consent.
Open subnets also allow accidental streaming hijacks. A neighbor attempting to cast media from their smartphone could easily stream video or audio to your smart display or smart speaker.
Deploying a travel router introduces a robust Stateful Packet Inspection (SPI) firewall between your devices and your neighbors. The router assigns private IP addresses (such as 192.168.8.x) that are completely invisible to the building’s upstream subnet.
This isolation guarantees your smart home ecosystem remains strictly private. Your neighbors cannot scan your accessories, and your local automation routines stay fully protected.
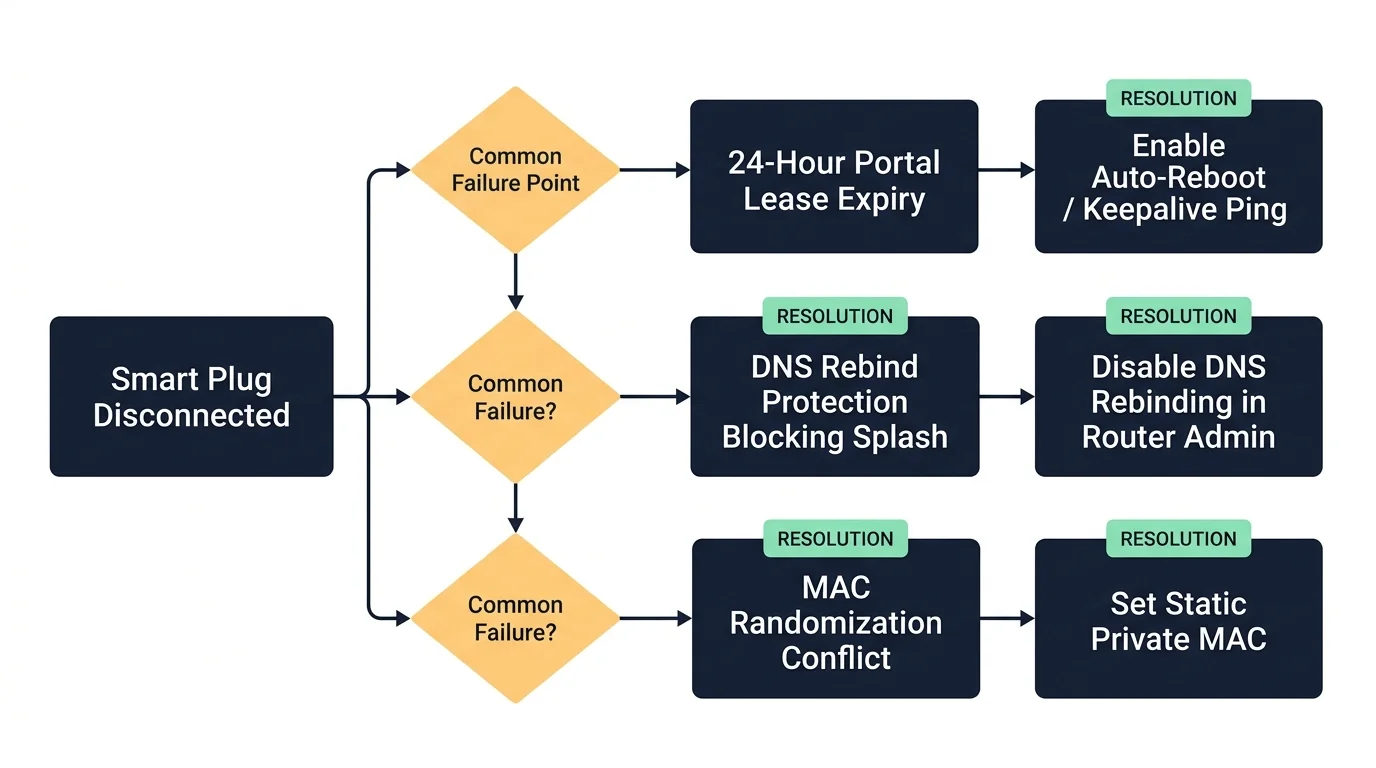
Troubleshooting Persistent Portal Disconnections
Captive portal systems often reset authorization tokens on fixed 24-hour, 7-day, or 30-day schedules. When this session expiration occurs, the upstream gateway cuts off internet access to your travel router or bridged device.
If your smart devices suddenly show offline status in their companion applications, reconnect your smartphone to the travel router’s Wi-Fi network. Open your mobile browser and attempt to load an unencrypted webpage.
Modern web traffic uses HTTPS, which often suppresses captive portal redirects due to security certificate mismatches. To force the authentication screen to appear, enter one of these explicit diagnostic addresses into your browser URL bar:
http://neverssl.com(Loads pure HTTP traffic without SSL handshakes)http://1.1.1.1(Sends an unencrypted web request to Cloudflare’s public resolver)http://captive.apple.com(Triggers Apple’s native captive portal detection agent)http://detectportal.firefox.com/canonical.html(Triggers Mozilla’s portal verification script)
Complete the terms prompt to re-establish the connection. All downstream smart plugs and bulbs will restore their cloud connections within 60 seconds.
If your travel router fails to connect to the apartment Wi-Fi during initial setup, check your DNS rebind settings. OpenWrt-based routers block portal redirects by default because they interpret the gateway’s IP rewrite as a malicious DNS spoofing attack.
Navigate to your travel router’s advanced settings, locate “DNS Rebinding Attack Protection,” and temporarily disable it. Re-enable the protection once you successfully authenticate through the splash page.
Disable “Private Wi-Fi Address” or “Randomized MAC” on your smartphone while configuring travel routers or performing MAC cloning. Randomized MAC addresses generate artificial hardware identifiers that corrupt authentication handshakes.
Frequently Asked Questions
Can I ask my apartment property manager to whitelist my smart plug?
Yes, many managed student housing and residential complexes provide an administrative self-service portal where you can manually register headless devices. You must provide the plug’s 12-character MAC address, which allows the central server to bypass the splash screen for that specific device.
Do smart plugs work over 5 GHz apartment Wi-Fi networks?
Nearly all budget and mid-range smart plugs contain 2.4 GHz-only Wi-Fi radios because 2.4 GHz signals penetrate walls better and require less power. If your apartment building only broadcasts a unified 5 GHz network, you must use a travel router to split out an independent 2.4 GHz frequency band.
Will a travel router slow down my apartment internet speeds?
A Wi-Fi 6 travel router operating in repeater mode introduces a negligible 1 to 3 millisecond ping increase. While repeated wireless signals can cut peak theoretical bandwidth by roughly 20 to 30 percent, smart home devices require less than 1 Mbps of bandwidth to function flawlessly.
Can I use a Zigbee or Z-Wave hub instead of Wi-Fi smart plugs?
Yes, migrating to Zigbee or Z-Wave smart plugs eliminates captive portal issues for individual accessories because the plugs communicate directly with a local hub. However, your central smart home hub must still connect to the internet, which requires either an Ethernet port or a travel router bridge.
Disclaimer: This article is for informational purposes only. Smart home devices involve electrical connections and data privacy. Always follow manufacturer instructions for installation. For complex wiring or HVAC work, consult a licensed professional.