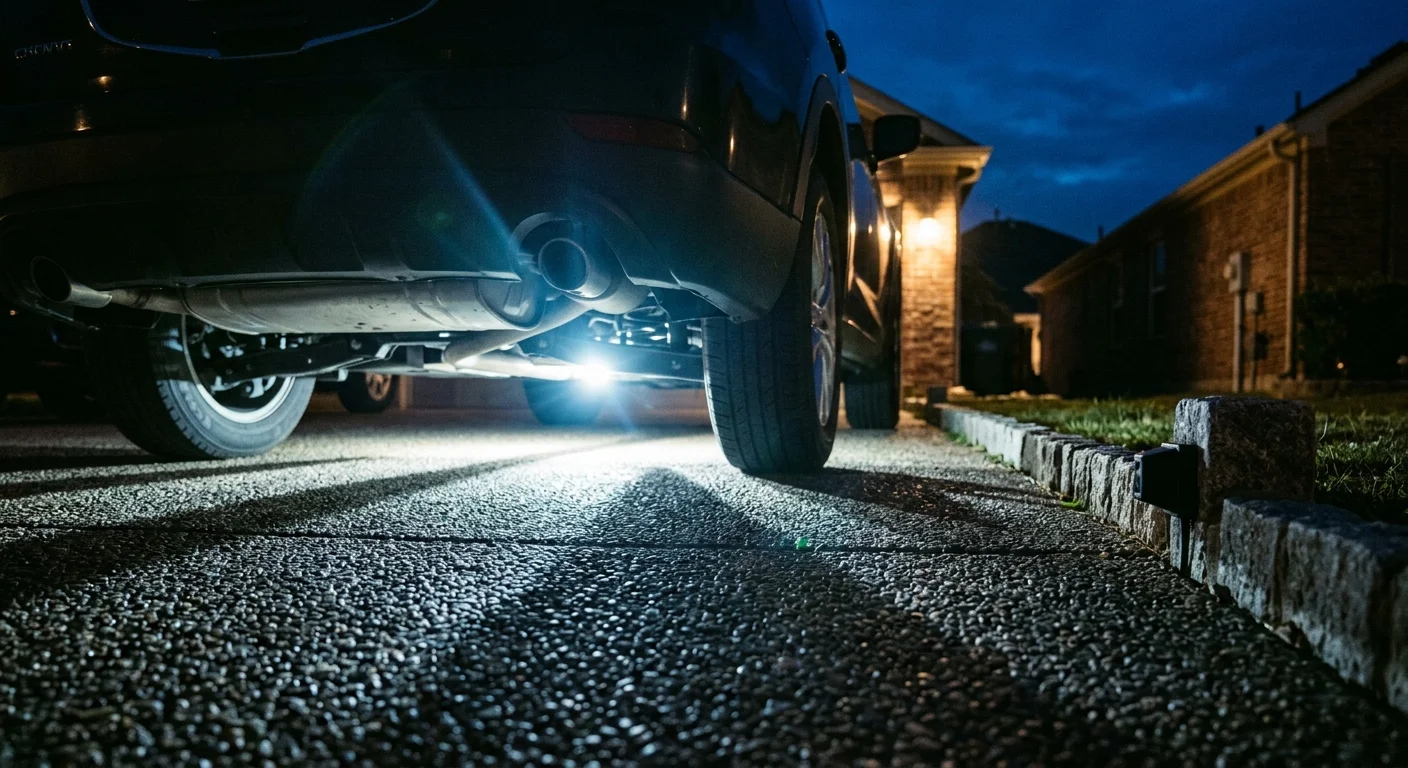
A cordless reciprocating saw tears through an automotive exhaust pipe in under sixty seconds, sticking you with a four-thousand-dollar replacement bill before security cameras alert your phone. Proactive suburban vehicle owners need perimeter defenses that react before saw blades touch steel.
Traditional motion cameras notify you long after thieves flee the scene. Calibrating an active infrared tripwire between eight and twelve inches off your driveway pavement catches human crawlers while allowing roaming neighborhood cats to pass underneath undisturbed.
Wiring this low-elevation beam into smart dry-contact relays instantly triggers 120-lumen under-vehicle strobes the millisecond an intruder enters. This setup completely bypasses cloud latency and frightens catalytic converter thieves away in seconds.
The 60-Second Saw Problem: Why Cameras Fail Against Catalytic Converter Theft
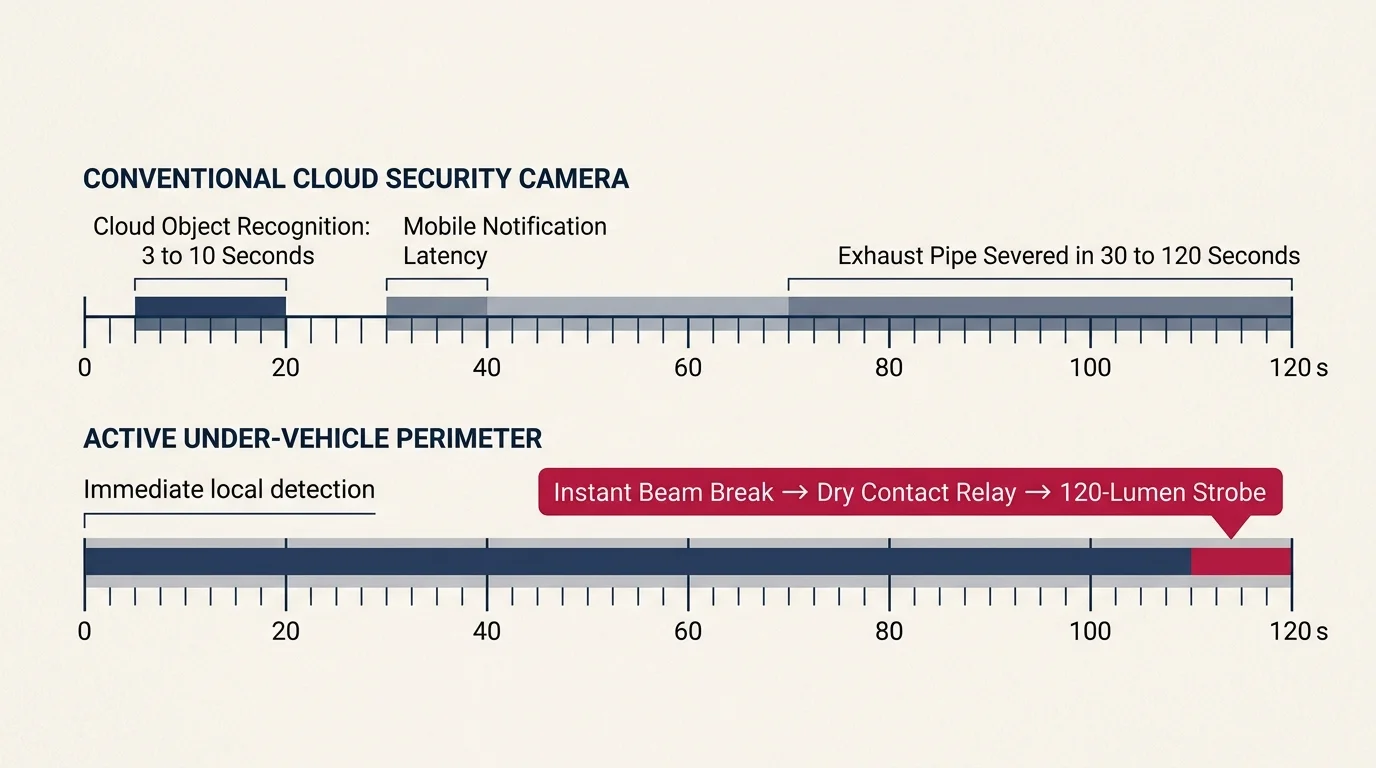
According to the National Insurance Crime Bureau (NICB), an experienced thief slices through exhaust pipes in 30 to 120 seconds using a battery-powered reciprocating saw. The entire criminal operation takes less time than brewing a cup of coffee.
Conventional smart security cameras fail in these scenarios because of digital processing latency. Cloud-based object recognition takes anywhere from 3 to 10 seconds to analyze video frames and push a mobile alert to your nightstand.
By the time your smartphone chime wakes you from a sound sleep, the thief has already severed the catalytic converter and scrambled back into a getaway car. Footage of a masked figure in a dark hoodie offers zero investigative recovery value.
While nationwide insurance claims dropped significantly from their 2022 high of 64,433 reported thefts, criminal crews remain intensely active in California, Texas, Florida, and New York. Suburban residential driveways remain their preferred hunting grounds.
Illicit scrap metal recyclers pay thieves $50 to $250 for standard gasoline converters, while hybrid units fetch up to $800 due to their higher concentrations of palladium, platinum, and rhodium.
In contrast, your out-of-pocket repair costs routinely run from $1,000 to over $3,500 for replacement parts. On hybrid cars and full-size trucks, severed oxygen sensor harnesses frequently push repair bills past $4,000.
As detailed in Consumer Reports smart home security guidance, passive surveillance cameras record crimes rather than stopping them. Protecting your driveway requires instantaneous active deterrence at the exact physical perimeter of your vehicle.
The most effective perimeter defense denies an intruder the two assets they rely on most: darkness and time.

Calculating the Detection Plane: Why 8 to 12 Inches Stops Crawlers but Ignores Cats
Outdoor passive infrared (PIR) motion floodlights fail in driveway applications because they cast broad detection cones. Warm engine hoods, wind-blown branches, and stray animals trigger constant nuisance alerts, conditioning you to ignore notifications.
A low-elevation active infrared tripwire solves this nuisance issue through geometric filtering. By constraining the optical beam to a narrow horizontal plane, you eliminate false trips from ambient environmental movement.
Calculating the correct beam elevation requires balancing animal clearance against human anatomy. Domestic cats feature an average shoulder height of 9 to 10 inches, but their walking torso profile remains between 5 and 7 inches off the ground.
Conversely, an adult human intruder cannot slide beneath a chassis without presenting a vertical profile of at least 11 to 14 inches. Even when lying flat on a wheeled mechanic’s creeper, their chest and shoulders break a 9.5-inch beam.
Factory ground clearances dictate the maximum allowable beam height. Standard passenger sedans ride between 5 and 6 inches above the asphalt, while crossover SUVs and pickup trucks offer 8 to 10 inches of clearance.
Positioning your active infrared beam at an exact height of 9.5 inches skims cleanly beneath SUV rocker panels. At this elevation, the sensor ignores passing felines while catching any intruder crawling toward your exhaust system.
- Domestic Cats and Small Raccoons: Torso profiles stay below 7 inches; animals walk beneath the beam without tripping contacts.
- Prone Human Crawlers: Torso and shoulder profiles require 11 to 15 inches of vertical clearance, guaranteeing an immediate beam break.
- Hydraulic Trolley Jacks: Pump handles and lifting saddles sit between 9 and 14 inches high during positioning, triggering the sensor.
- Wind-Blown Leaves: Ground debris tumbles within 1 to 4 inches of the pavement, clearing the detection plane completely.
Beam Sensor Physics: Active Infrared vs. Passive Detection
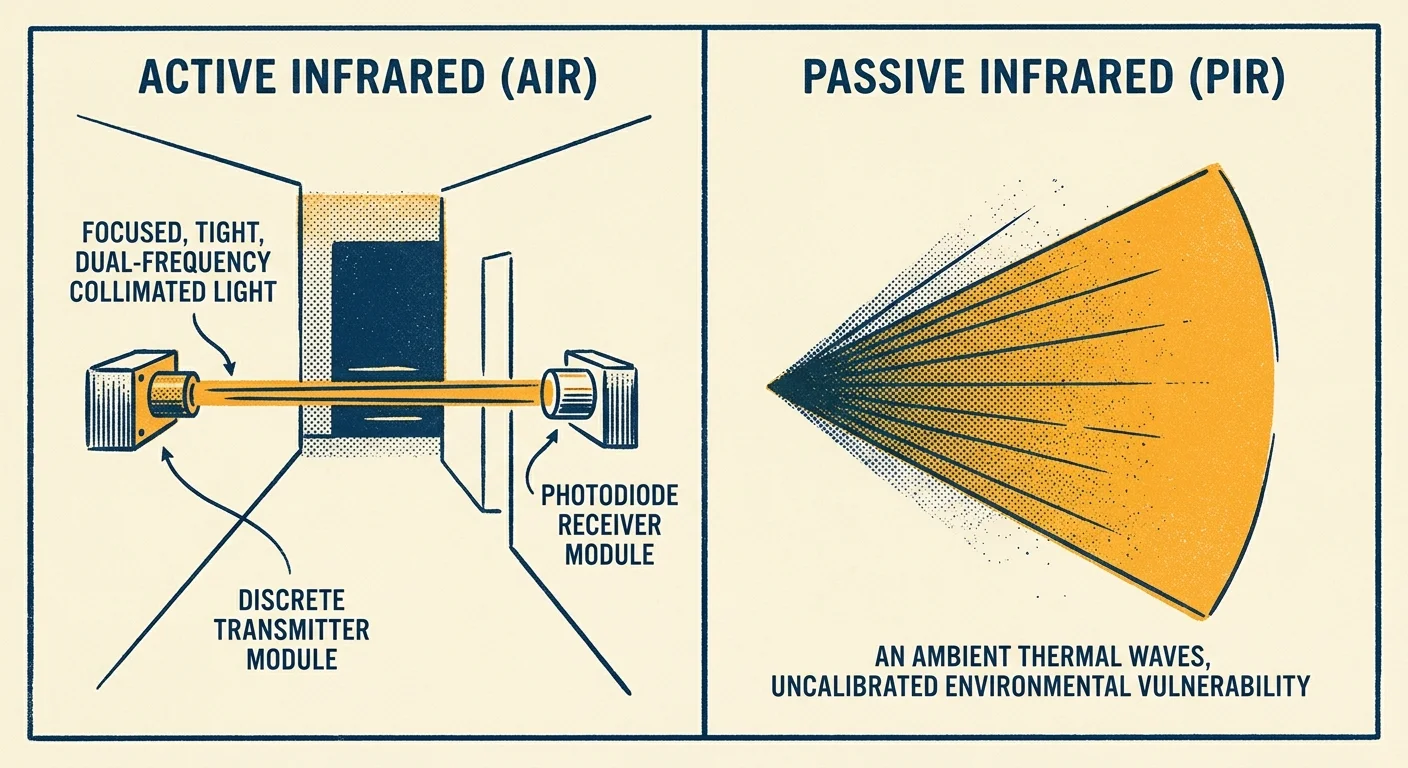
Passive infrared sensors detect thermal differentials radiating from moving heat sources. Unfortunately, a cooling automotive engine block creates massive convective heat currents that blind standard passive sensors.
Active infrared (AIR) systems eliminate thermal confusion by projecting a focused beam of modulated light. The system monitors the optical pulse train rather than background temperature, ensuring flawless operation across freezing winter nights and sweltering summer days.
Retro-reflective beam sensors house both the infrared emitter and receiver inside a single outdoor enclosure. The unit bounces a pencil-thin infrared beam off an opposing prismatic reflector, cutting installation wiring in half.
Industrial photobeam sensors operate with response times between 10 ms and 50 ms. This instantaneous triggering allows the system to register rapid movements, such as a rolling floor jack or a sliding mechanic’s creeper.
Point-to-point dual-beam sensors require separate transmitter and receiver units on opposite sides of the driveway. While they require running power to both sides, dual-beam setups offer extreme immunity against dense fog and heavy snowfall.
Core Hardware Architecture: Infrared Beams, Relays, and Deterrents
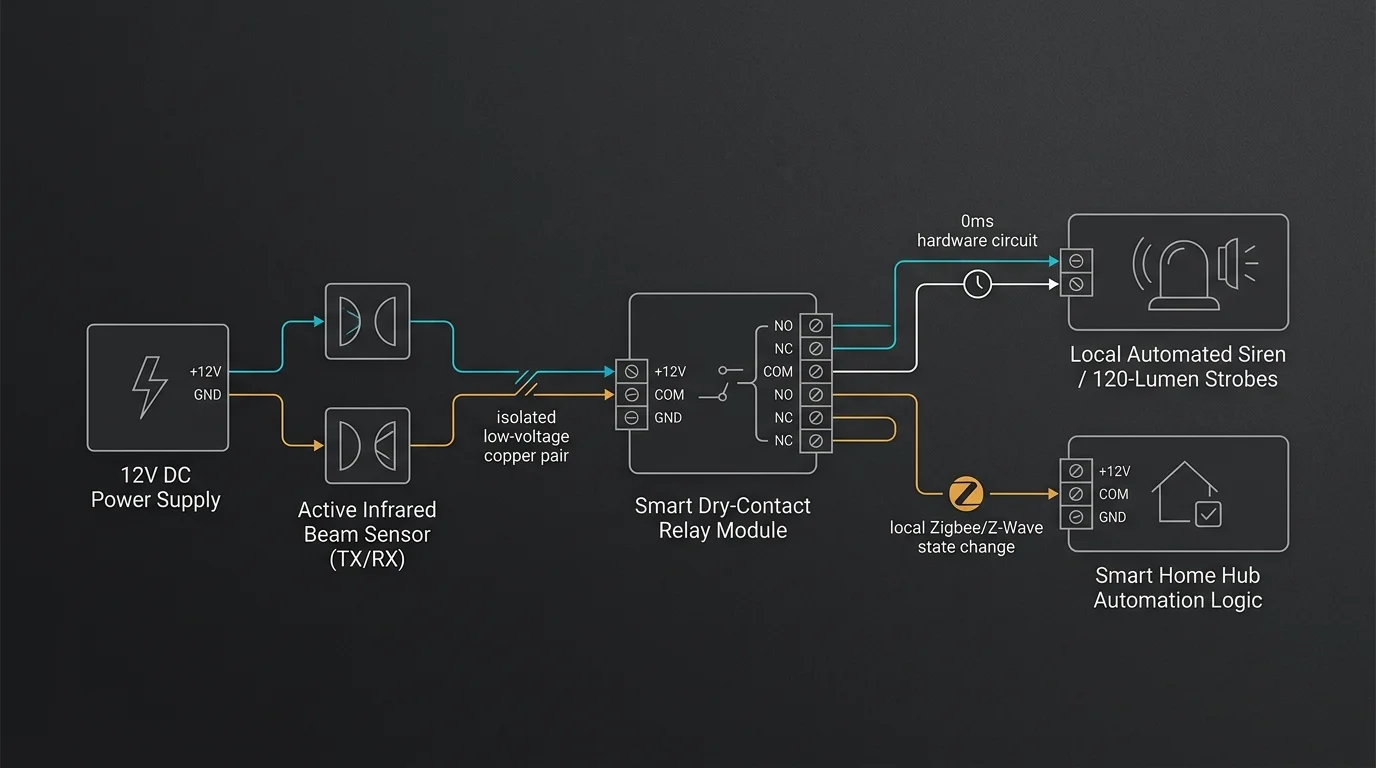
Building an under-vehicle perimeter alarm requires three core hardware components working in harmony. The system combines an active optical tripwire, an isolated dry-contact smart relay, and high-intensity strobe deterrents.
The optical sensor features an internal electromechanical relay with Normally Open (NO) and Normally Closed (NC) contacts. When an intruder breaks the beam, the sensor switches contact state within milliseconds.
An isolated smart relay module detects this contact closure and initiates automated defensive routines. By handling automation logic locally over Wi-Fi or Zigbee, the relay bypasses cloud servers and prevents network lag.
The primary physical deterrent consists of weatherproof 12V DC vehicle underbody strobes producing at least 120 lumens of amber or white light. Mounting these strobes along driveway boundaries floods vehicle undercarriages with disorienting flashes.
Pulsing at 60 to 120 flashes per minute, the strobes instantly strip away the criminal’s visual cover. You can also pair these lights with an outdoor 105 dB siren to maximize psychological impact.
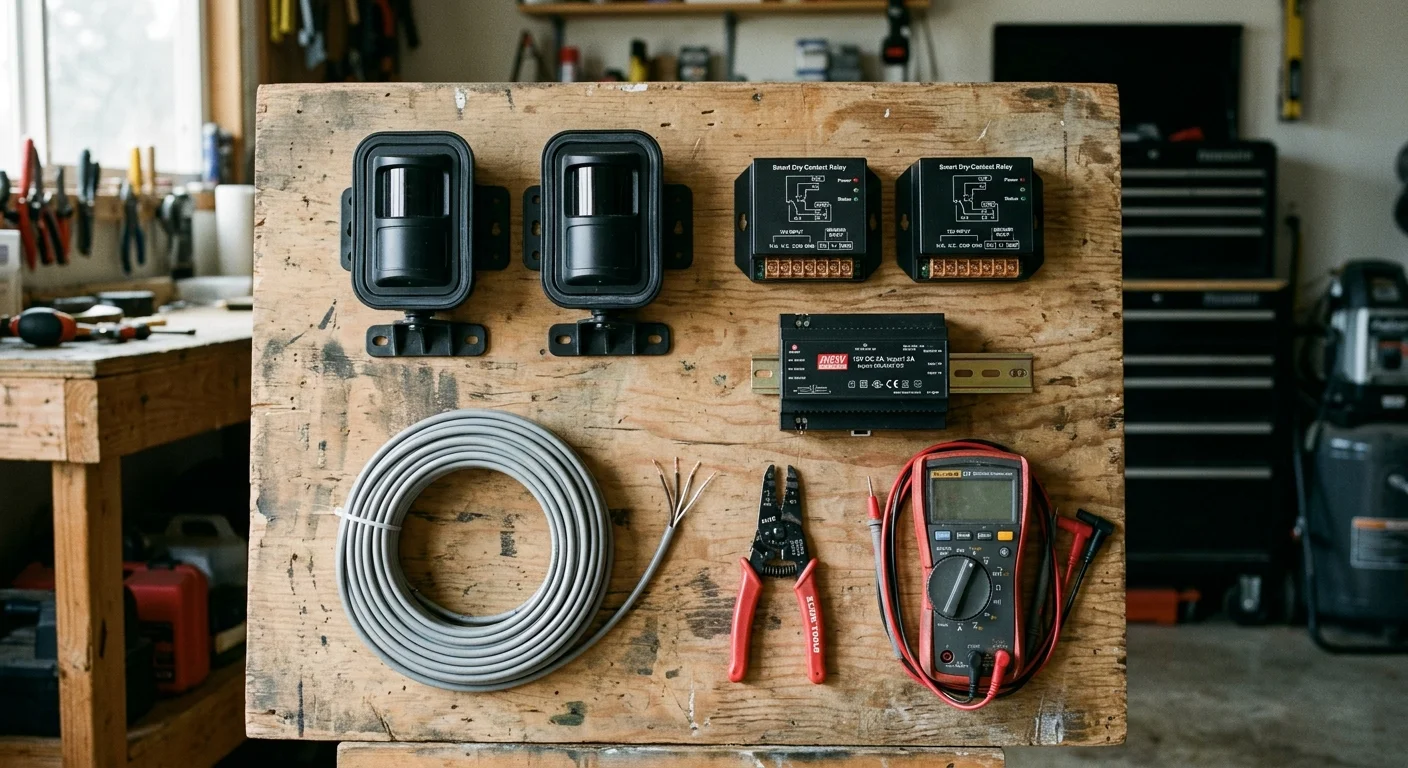
Hardware Comparison: Beam Sensors and Smart Dry-Contact Relays
Industrial sensor specifications determine how reliably your perimeter alarm operates under adverse weather conditions. The table below details tested specifications for low-elevation beam sensors and smart contact relays.
| Device Model | Hardware Category | Operating Range | Response Speed | Weather Rating | Retail Price |
|---|---|---|---|---|---|
| Seco-Larm Enforcer E-931-S35RRQ | Retro-Reflective Beam | 35 Feet | 10 Milliseconds | IP66 Weatherproof | $78.00 |
| Optex AX-100TFR | Point-to-Point Dual Beam | 100 Feet | 50 Milliseconds | IP55 Weatherproof | $145.00 |
| Shelly Plus 1 Relay | Wi-Fi Dry-Contact Relay | 100 Feet (LAN) | 15 Milliseconds | Requires Enclosure | $19.99 |
| YoLink LoRa Outdoor Contact | LoRa Wireless Transmitter | 1,000+ Feet | 25 Milliseconds | IP68 Waterproof | $29.99 |
Retro-reflective sensors like the Seco-Larm Enforcer simplify installation because they require wiring on only one side of your driveway. However, driveways wider than 30 feet benefit from point-to-point sensors like the Optex AX-100TFR.
For signaling, the Shelly Plus 1 provides local dry-contact execution over Wi-Fi, while YoLink sensors utilize long-range LoRa signals. Both options interface cleanly with local automation controllers without ongoing subscription fees.

Worked Example: Total Build Cost and Wiring for a Suburban Driveway
Consider a concrete suburban driveway measuring 22 feet wide where you park a high-target hybrid crossover. This worked scenario outlines the exact components, wiring schematics, and equipment costs required for complete protection.
The active sensor mounts on the garage wall at 9.5 inches above grade, aimed across the driveway at a prism reflector mounted on a wooden fence post. All power originates from an interior 12V DC supply.
- Seco-Larm Enforcer E-931-S35RRQ Retro-Reflective Beam: $78.00
- Shelly Plus 1 Wi-Fi Dry-Contact Relay: $19.99
- 12V DC 5A Regulated Weatherproof Power Supply: $24.50
- 120-Lumen Amber 12V LED Strobe Modules (Pair): $32.00
- 50 Feet 18/4 AWG Direct-Burial Shielded Cable: $18.50
- IP66 Weatherproof Exterior Junction Box: $12.75
- Total System Investment: $185.74
The total hardware expense of $185.74 costs less than one-tenth of a catalytic converter insurance deductible. The continuous standby electrical load measures just 5.8 watts, which adds roughly $0.55 to your monthly electric bill.
Total signal activation time measures 45 milliseconds: 10 milliseconds for the optical beam interruption, 15 milliseconds for the Shelly relay contact closure, and 20 milliseconds for strobe driver illumination.
This 45-millisecond reaction stops intruders before they can orient a tool. The thief faces intense flashing lights and sirens before their hands touch your vehicle’s exhaust piping.
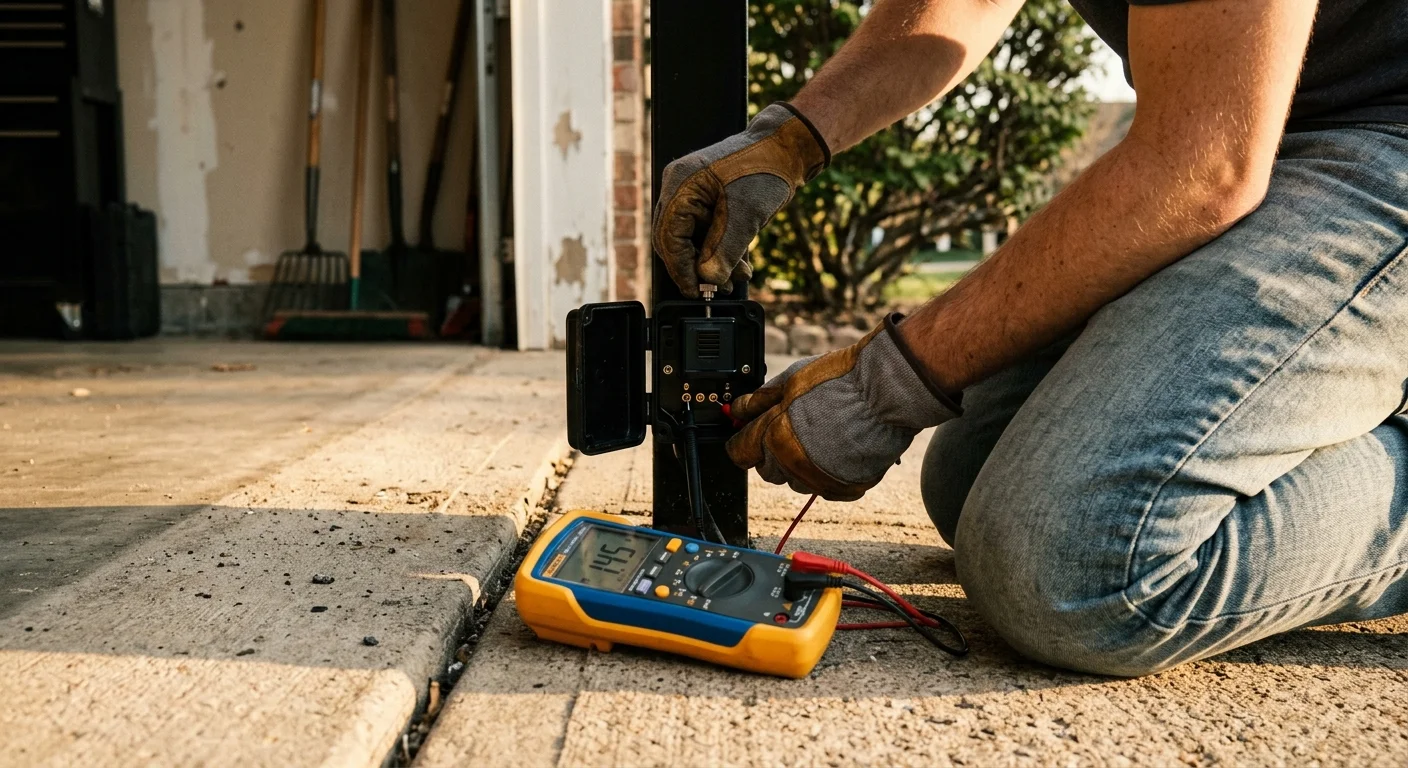
Step-by-Step Installation: Aligning and Wiring the Tripwire System
Installing low-voltage driveway perimeter hardware requires straightforward hand tools and careful elevation calibration. Follow this step-by-step procedure to establish your invisible vehicle perimeter.
- Establish the 9.5-inch elevation line. Measure exactly 9.5 inches vertically from the asphalt at the garage wall mounting location. Use a laser level or chalk line across your driveway to mark the exact corresponding height on the opposite boundary post.
- Mount the sensor housing and reflector. Secure the Seco-Larm sensor bracket to the garage wall using corrosion-resistant screws. Attach the three-inch prismatic reflector to the opposite post at your marked elevation, ensuring the reflector face sits parallel to the sensor lens.
- Route low-voltage field cabling. Run your 18/4 AWG direct-burial cable from your interior 12V DC power transformer through an exterior wall penetration into the weatherproof junction box. Use two conductors for 12V power and two conductors for signal switching.
- Wire the sensor and smart relay. Connect the 12V DC power leads to the sensor’s power inputs. Wire the sensor’s Common (COM) and Normally Open (NO) relay terminals directly into the switch terminal inputs of your Shelly Plus 1 relay.
- Mount and connect under-vehicle strobes. Install the 120-lumen LED strobes along the base of the garage wall or driveway perimeter curbing, aiming the lenses horizontally toward your vehicle’s undercarriage. Wire the strobes through the Shelly relay’s dry-contact output.
- Calibrate beam alignment. Power the 12V transformer and observe the alignment LED on the back of the sensor housing. Adjust the horizontal and vertical optical screws until the LED illuminates steady green, signaling peak infrared reflection.
Always verify electrical connections with a digital multimeter before closing exterior junction enclosures. If your installation requires cutting expansion joints across concrete or tapping into 120V household mains, consult a licensed electrical contractor.
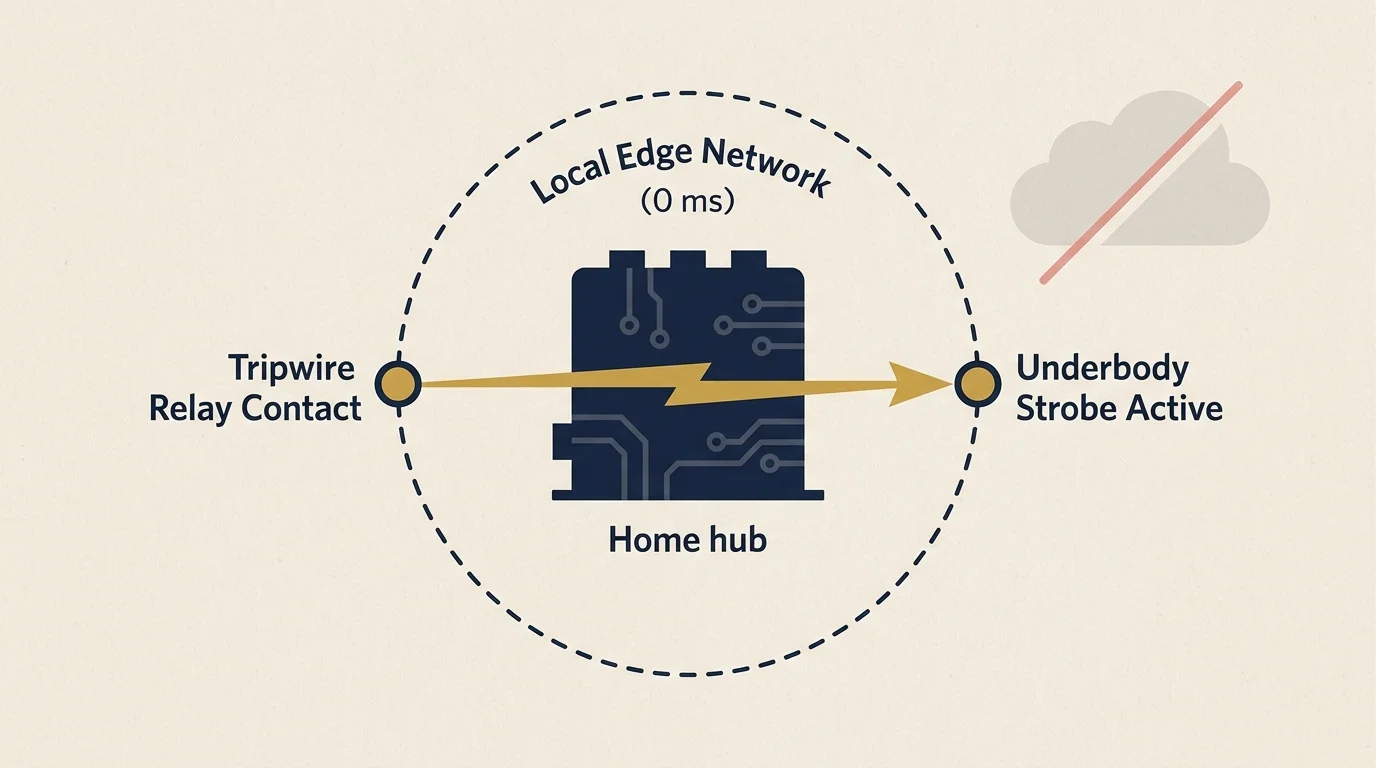
Automating the Deterrent: Local Hub Logic for Instant Triggering
Cloud-dependent automation ecosystems introduce fatal delays when responding to rapid criminal threats. Testing by PCMag smart home analysts highlights the reliability advantages of local execution over cloud processing.
Integrating your dry-contact relay with Home Assistant or Hubitat ensures triggering occurs within your local home network. Local automation logic fires physical deterrents in under 50 milliseconds without requiring active internet connectivity.
- Instant Strobe Activation: The Shelly relay energizes the 12V underbody strobes for 45 seconds, instantly blinding the area beneath your vehicle.
- Perimeter Floodlight Override: Driveway smart floodlights turn on at 100% output with a cool 5000K color temperature to illuminate the intruder.
- High-Decibel Siren Burst: An exterior 110 dB siren sounds for 15 seconds, creating an overwhelming auditory deterrent without violating local municipal noise ordinances.
- Internal Master Bedroom Alert: Smart speakers throughout your home announce a driveway breach at 80% volume, waking you immediately.
Automate your arming schedule to engage the tripwire between 11:00 PM and 6:00 AM automatically. You can also configure your home hub to disarm the beam when your family’s smartphones connect to local home Wi-Fi.
Add a bypass button near your front door or in your mobile dashboard for late-night dog walking. This manual mute switch prevents accidental false alarms when letting pets into the yard before bed.
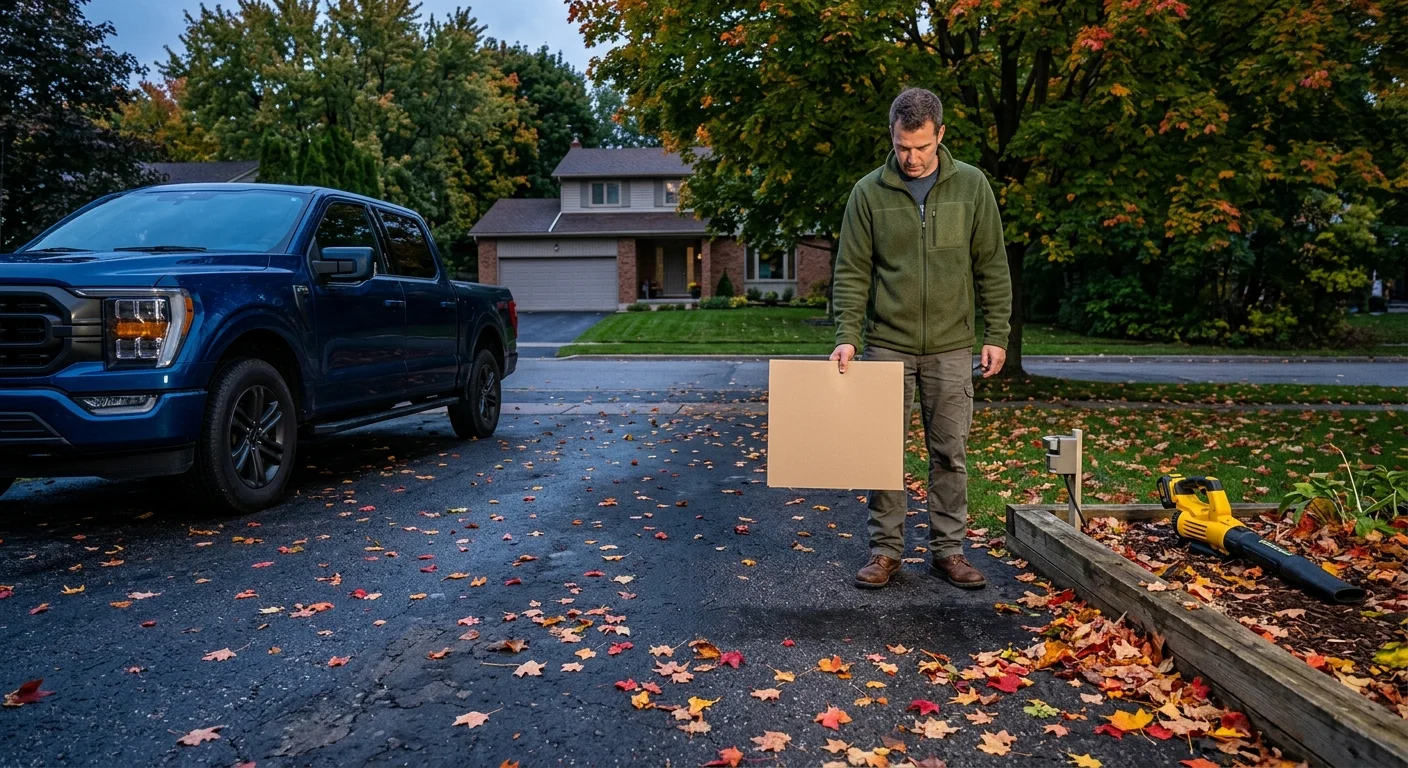
Testing, Maintenance, and False-Alarm Prevention
Outdoor optical tripwires operate in harsh environments subject to dirt, moisture, and temperature swings. Routine seasonal maintenance ensures your low-elevation beam remains crystal clear and operational throughout the year.
Clean both the optical sensor lens and the reflector target every ninety days using a soft microfiber cloth and isopropyl alcohol. Remove spider webs, dead insects, and road grime that reduce infrared beam strength.
In northern climates, winter frost and freezing fog can coat the sensor lens, causing optical scattering. Coat the sensor faceplate with an automotive hydrophobic glass treatment, or choose sensor housings with integrated 12V heating elements.
Conduct monthly validation drills by rolling an 8-inch ball through the beam path to confirm small animals pass unnoticed. Follow this by sliding a mechanic’s creeper across the driveway to verify immediate strobe activation.
Frequently Asked Questions
Will neighborhood cats or raccoons trip a low-elevation driveway beam?
Not if you calibrate the beam height between 8 and 10 inches off the ground. Most domestic cats and raccoons walk with torsos below 7 inches, passing cleanly beneath the active infrared light pencil.
How fast does an active infrared tripwire react compared to a smart security camera?
Active infrared beam sensors break dry contacts within 10 to 50 milliseconds. In contrast, cloud-connected smart security cameras typically take 3 to 10 seconds to analyze motion and send push notifications.
Can heavy rain or snow cause the perimeter alarm to trigger false alerts?
High-quality industrial beam sensors feature automatic gain control and multi-lens optics that pierce heavy precipitation. Positioning the sensor inside a hooded enclosure prevents raindrops or snowdrifts from blocking the transceiver face.
What happens if a catalytic converter thief notices the beam sensor and steps over it?
Thieves cannot reach your vehicle’s exhaust system from an upright position. Even if an intruder steps over the outer driveway boundary, they must crawl onto the ground to cut the converter, breaking the under-chassis perimeter.
Disclaimer: This article is for informational purposes only. Smart home devices involve electrical connections and data privacy. Always follow manufacturer instructions for installation. For complex wiring or HVAC work, consult a licensed professional.