
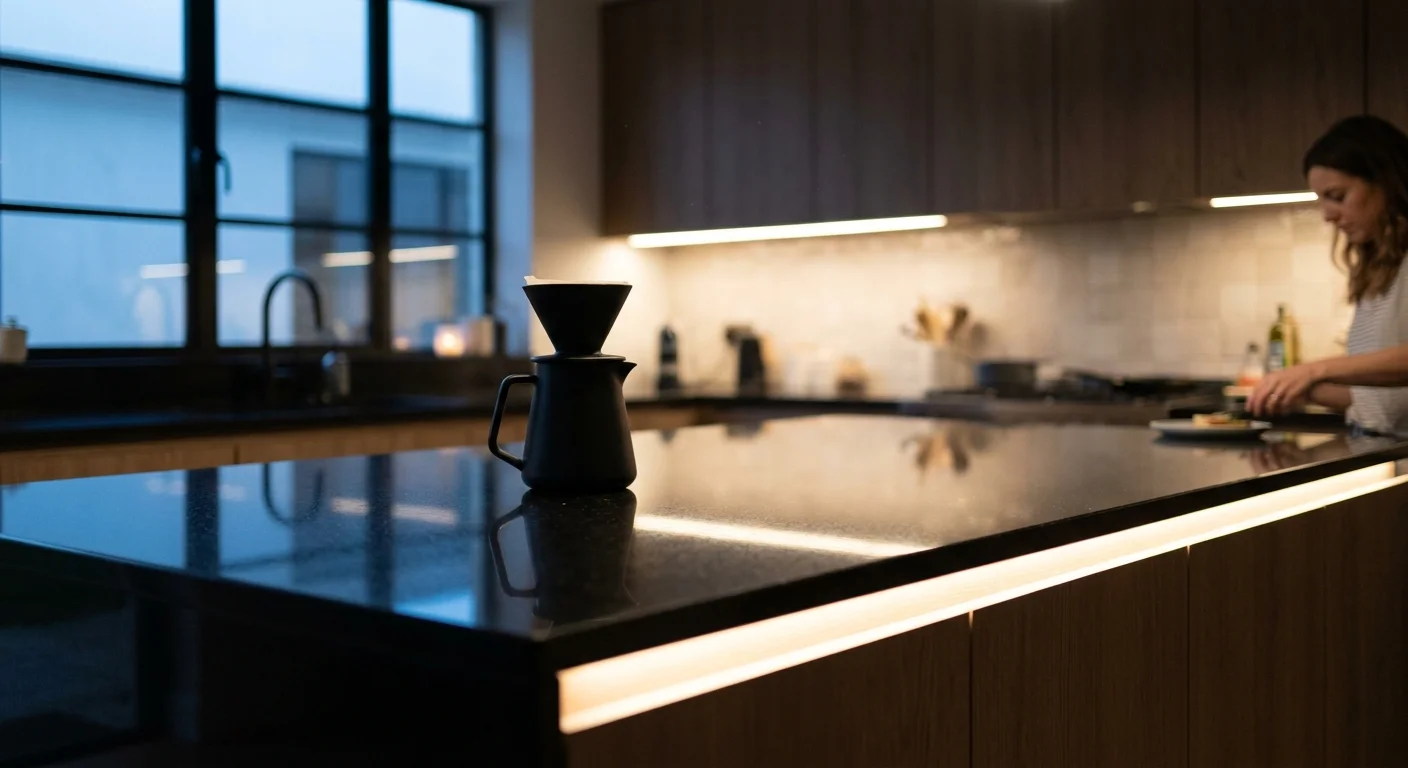
Polished Absolute Black granite turns kitchen countertops into dark mirrors that reflect individual LED diodes mounted above them. You can stop this harsh runway glare entirely by switching to high-density Chip-on-Board (COB) lighting.
Standard aluminum channel diffusers fail on high-gloss stone because traditional surface-mount diode (SMD) tape spaces its emitters too far apart. Glare elimination requires continuous phosphor arrays packing at least 528 diodes per meter alongside proper optical standoff spacing.
This guide demonstrates how to select, mount, and automate the right continuous under-cabinet lighting system for flawless, reflection-free task illumination.
The Physics of Specular Glare on Mirror-Finished Granite
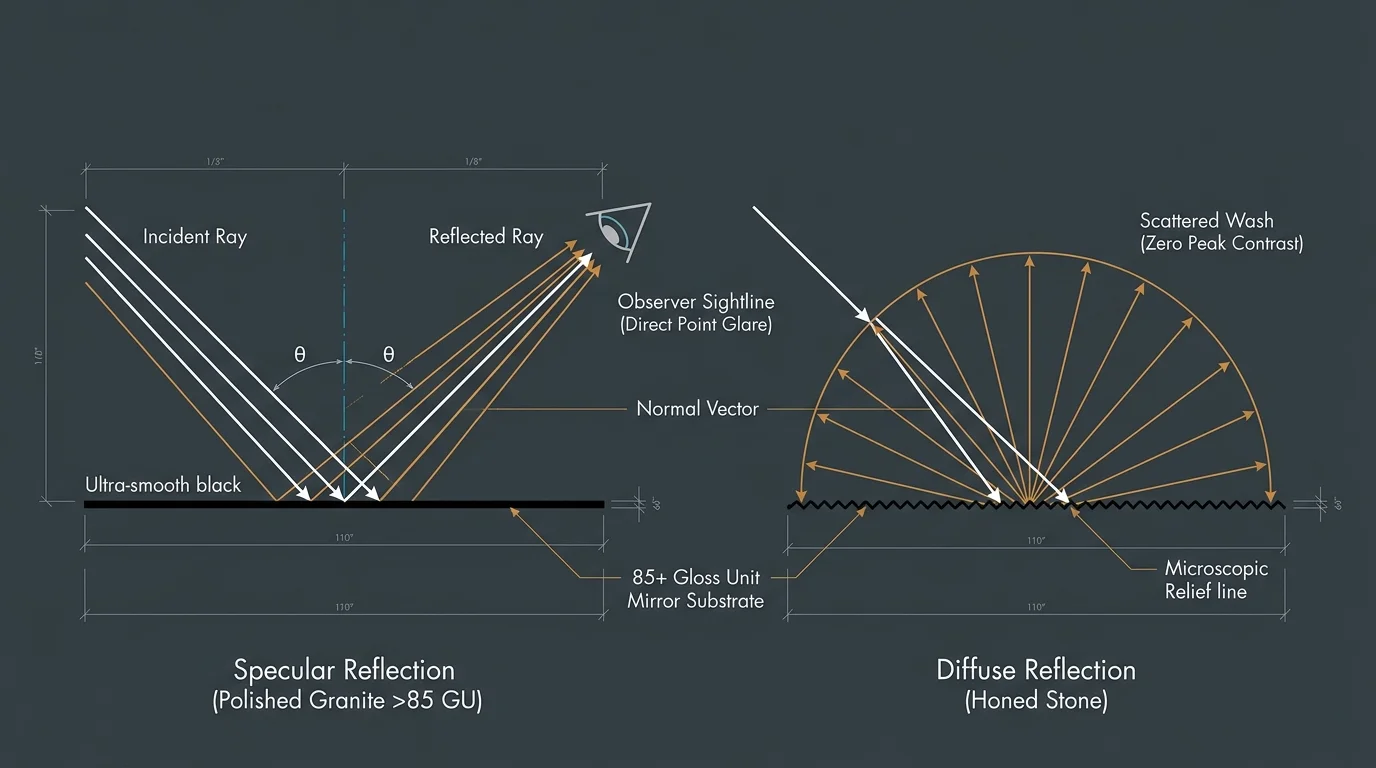
Polished stone surfaces behave like optical mirrors rather than matte diffusers. When incident light strikes glossy black granite, it produces specular reflection where the exit angle matches the entrance angle precisely.
Dark natural stone absorbs widespread ambient light while reflecting concentrated high-intensity point sources directly into your eyes. This dynamic causes the distracting under cabinet lighting reflection homeowners observe after remodeling with dark granite.
“Glare is not merely an inconvenience; it is excessive contrast that degrades visual performance and causes ocular fatigue.” — Illuminating Engineering Society (IES) Lighting Handbook
Honed marble and textured soapstone disperse light rays across microscopic surface textures to create soft, diffuse illumination. Conversely, factory-polished Absolute Black granite achieves an optical surface rating exceeding 85 on the standardized 100-point gloss scale.
When individual diode emitters reflect off an 85-gloss surface, each diode mirrors back at nearly full intensity. The high contrast between the deep black substrate and luminous diodes triggers severe ocular fatigue.
To stop granite countertop glare, you must replace discrete point-source diodes with an unbroken luminous band. Creating this continuous illumination eliminates contrast spikes across your stone worktop.
- Gloss Unit (GU) Rating: Polished black granite registers above 85 GU, creating direct specular reflections of unshielded overhead light sources.
- Diode Pitch Gap: Wide physical spacing between emitters creates isolated luminance peaks that appear as mirrored hot spots.
- Observer Sightlines: Standard seated and standing angles place your eyes directly along the specular bounce vector between cabinets and countertops.
- Substrate Absorption: Pure black granite absorbs lateral diffuse wash, leaving only the primary emitter reflection visible against a dark background.
COB vs SMD Architecture: Why Diode Density Solves Countertop Reflection
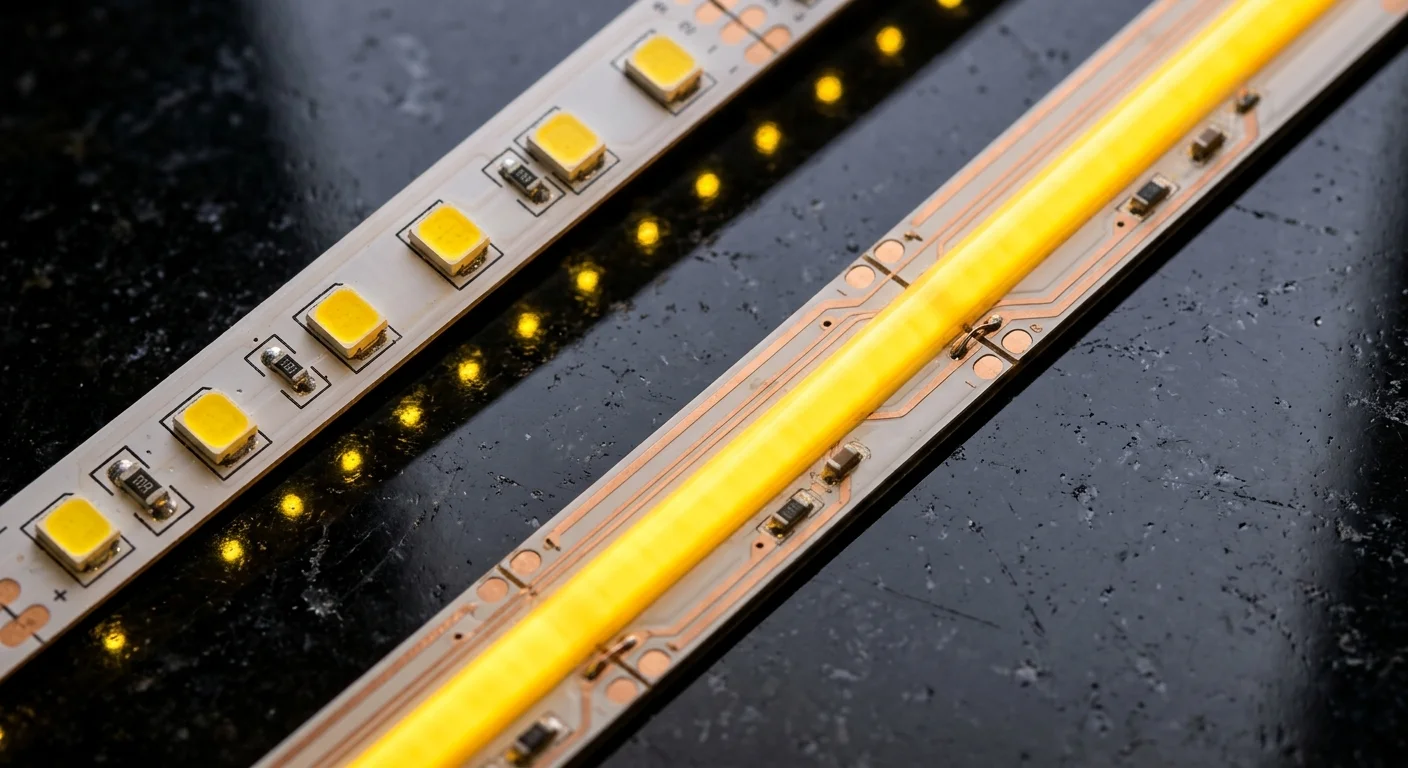
Traditional under-cabinet strip lights rely on Surface-Mount Device (SMD) architecture. Manufacturers solder individual plastic-encased LED chips onto a flexible printed circuit board at spaced intervals.
Entry-level SMD tape features 60 to 120 diodes per meter, leaving noticeable physical gaps between emitters. These gaps create the infamous dotted runway effect when reflected on glossy granite.
An under cabinet COB led strip uses Chip-on-Board engineering to eliminate discrete emitter packaging entirely. Technicians bond hundreds of microscopic LED flip-chips directly onto the copper circuit substrate.
A uniform coat of fluorescent phosphor covers the entire micro-diode line in a solid yellow ribbon. This layer blends the emissions into a single seamless light source before photons exit the strip.
While standard SMD tape emits 60 to 120 separate light cones, a 528-diode COB strip produces a continuous 180-degree beam. This seamless profile prevents individual hotspot beads from forming on reflective counters.
The continuous phosphor coating also mitigates micro-shadowing across countertop items. Knife blocks, cutting boards, and small appliances cast soft, unified task shadows rather than distracting overlapping patterns.
- Package Elimination: COB strips abandon bulky plastic SMD casings, allowing chips to sit edge-to-edge on the substrate.
- Phosphor Encapsulation: A shared silicone phosphor layer converts blue diode emissions into smooth, uniform white light before leaving the tape.
- Continuous Optical Plane: Emitter spacing drops from 16.6 millimeters down to fractions of a millimeter, removing optical dead zones.
- Wider Dispersion: COB tape casts light across a full 180-degree field compared to the restricted 120-degree cone of standard SMD tape.
Aluminum Channel Depths and Diffuser Ratios Explained
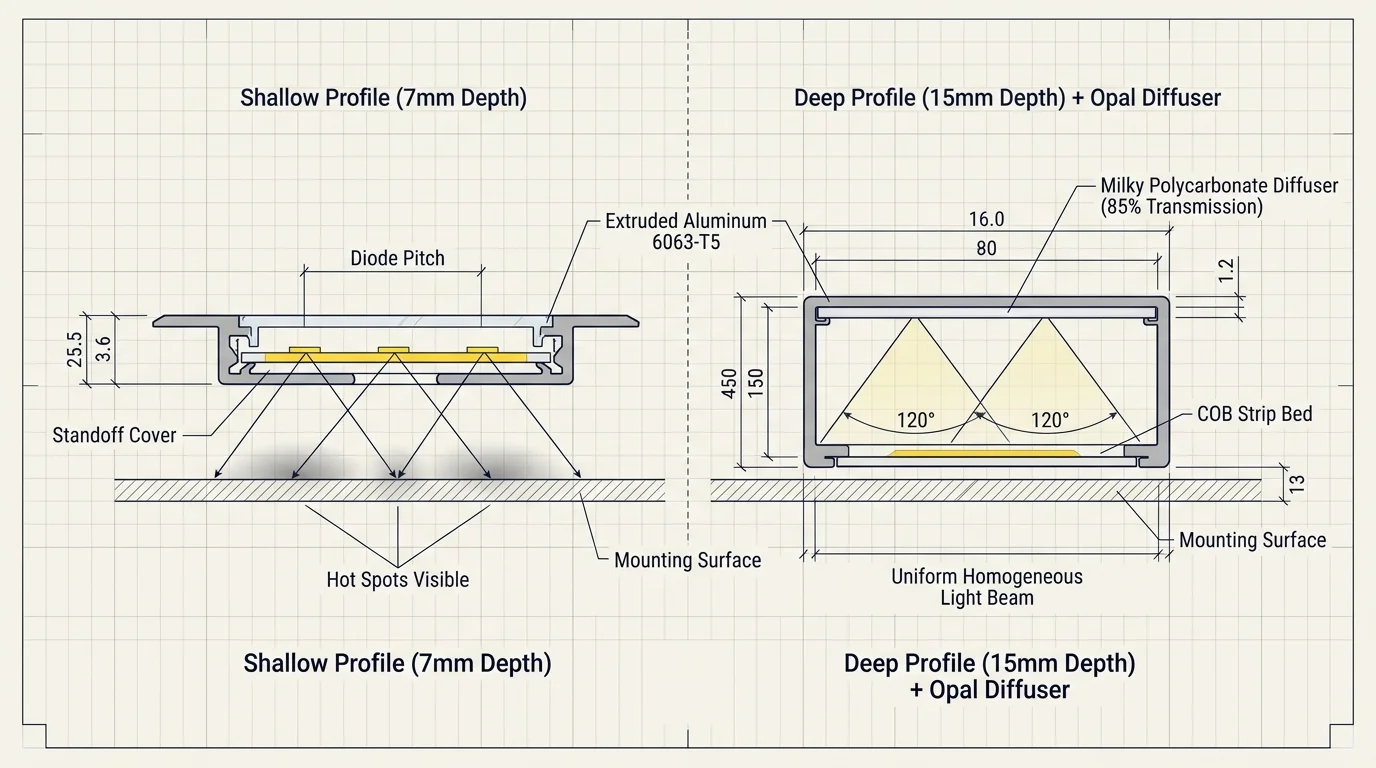
Aluminum extrusions serve two vital purposes: they wick away operational heat and establish optical standoff distance. Standoff distance defines the physical gap between the LED surface and the translucent diffuser cover.
Optical blending relies on a strict 1:1 ratio between diode pitch and diffuser standoff depth. If diodes sit 16 millimeters apart, you require a 16-millimeter channel depth to blend the light into a solid beam.
Most residential under-cabinet extrusions measure only 6 to 9 millimeters in depth to remain hidden beneath cabinet lips. Standard SMD tape inside these slim channels will always display visible hot spots on polished granite.
Frosted and opal polycarbonate diffusers absorb between 15 and 25 percent of total lumen output. Despite this transmission loss, diffusers cannot overcome the spacing flaws of low-density SMD tape.
COB LED strips resolve this geometric dilemma because diode spacing drops below 2 millimeters. This minuscule pitch allows even ultra-slim 7-millimeter aluminum channels to deliver completely spotless illumination.
Pairing high-density COB tape with an opal diffuser yields perfect beam uniformity without requiring bulky commercial channels under your cabinetry.
- 1:1 Optical Rule: Achieving dotless diffusion requires channel depth equal to or greater than the distance between individual LED emitters.
- Shallow Profile Compatibility: COB strips require only 6 to 8 millimeters of total channel depth to produce a flawless, bead-free reflection.
- Diffuser Transmission Losses: Opal lenses reduce brightness by 20 to 25 percent, while milky lenses reduce output by 15 percent.
- Lens Curvature Benefits: Curved or domed diffusers spread side-firing photons more effectively than flat snap-in covers.
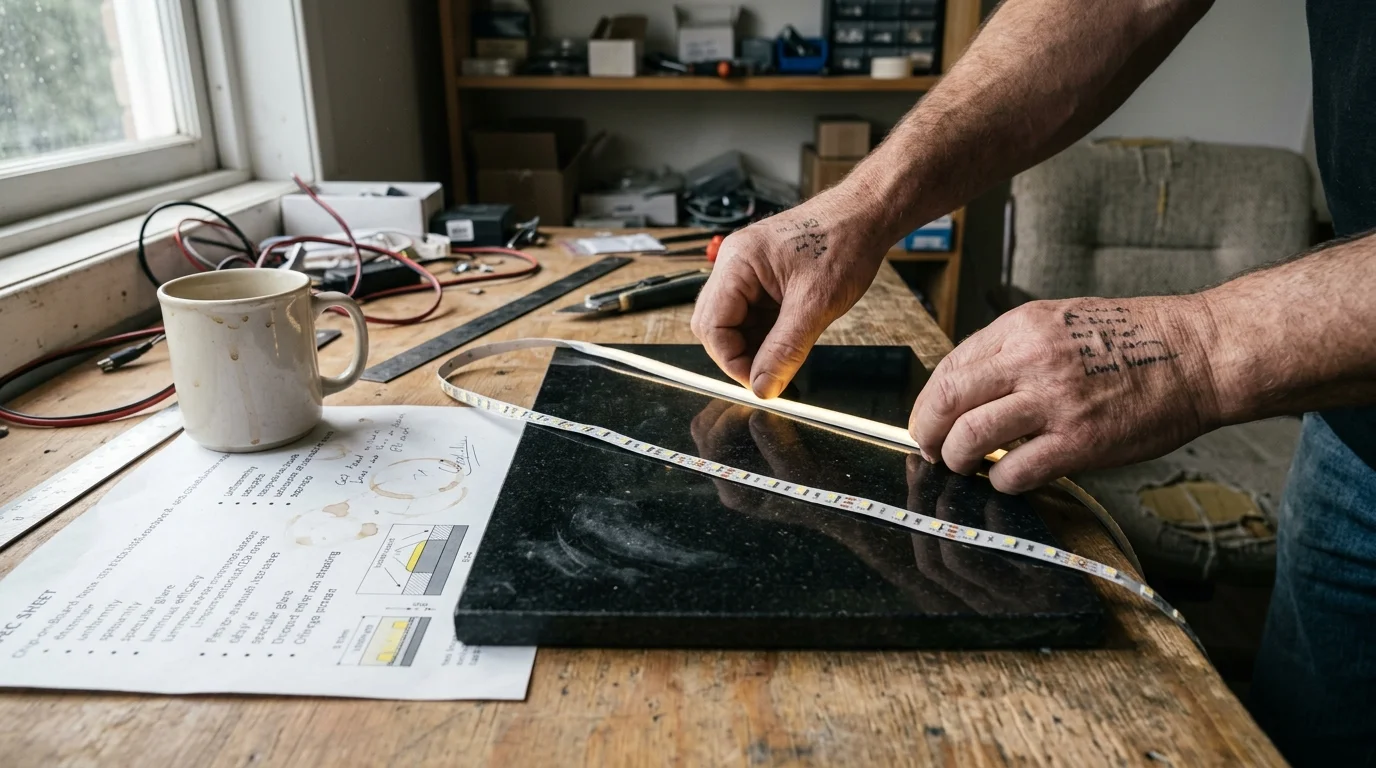
Spec Sheet Comparison: COB Tape vs Standard SMD Strips
Evaluating raw specifications reveals why low-density SMD strips struggle on mirror-like surfaces. The following table contrasts key performance metrics across current LED tape formats.
| Lighting Technology | Diode Density (LEDs/m) | Beam Angle (Degrees) | Minimum Channel Depth for Zero Spots | Typical Cut Interval | Hotspot Uniformity Rating | Average Cost per 5m Spool |
|---|---|---|---|---|---|---|
| Low-Density SMD 5050 | 60 | 120° | 22 mm | 50.0 mm | Poor (Visible Beads) | $18.00 |
| Standard SMD 2835 | 120 | 120° | 15 mm | 25.0 mm | Fair (Scalloped Edges) | $24.00 |
| High-Density SMD 2835 | 240 | 120° | 12 mm | 12.5 mm | Moderate (Slight Dots) | $34.00 |
| Continuous COB Strip | 528 | 180° | 6 mm | 45.5 mm | Flawless (Completely Dotless) | $42.00 |
High-density SMD tape with 240 diodes per meter approaches dot-free diffusion, but it concentrates severe electrical and thermal loads. That excess heat accelerates lumen depreciation unless paired with heavy extrusions.
Modern 528-diode COB tape distributes thermal energy across the full copper substrate. This even heat dissipation extends diode longevity while sustaining 450 to 550 lumens per linear foot.
Furthermore, COB architecture provides a genuine 180-degree optical spread compared to the 120-degree limit of SMD components. This expanded beam distribution reduces specular reflection peaks by diffusing light across a broader target zone.
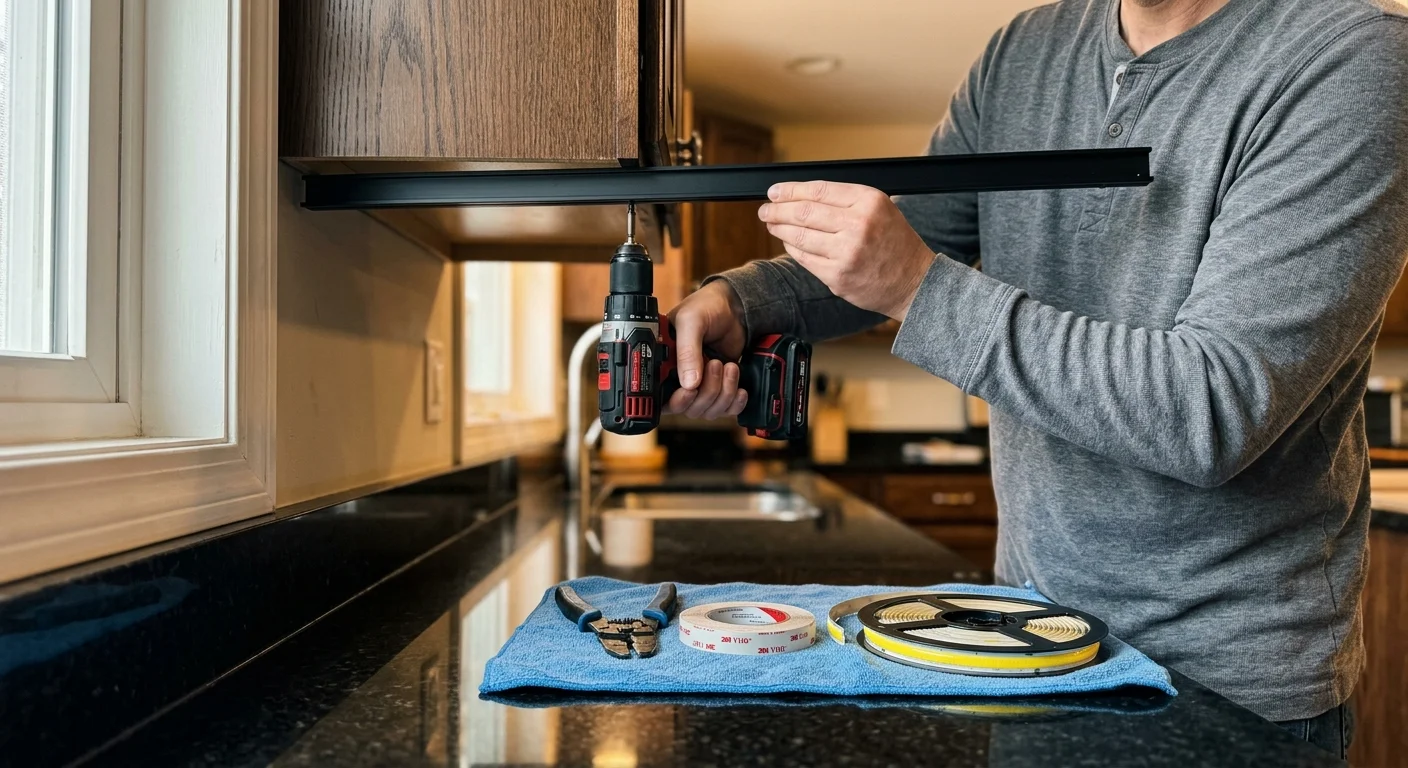
Step-by-Step Installation: Positioning for Maximum Glare Reduction
Proper extrusion placement is just as important as diode density for eliminating glare. Installing channels in the wrong spot bounces light directly into your eyes regardless of diffuser quality.
Mounting light tracks against the rear wall creates severe glare angles that bounce off the granite directly toward standing occupants. This rear positioning also casts harsh forward shadows over your primary prep area.
Always position your aluminum channels along the inner edge of the front cabinet face frame. Tucking the profile behind the front lip conceals the bare track while angling light down and slightly backward.
- Clean the underside of your cabinet frames thoroughly with 90 percent isopropyl alcohol to remove cooking grease and dust.
- Measure your cabinet underside spans and cut the aluminum channels to length using a fine-tooth carbide blade in a miter box.
- Drill pilot holes through the aluminum base and screw the extrusions into place directly behind the cabinet face frame lip.
- Measure your LED run length and cut the 24V COB tape strictly along the marked copper cut pads using sharp shears.
- Peel the high-bond thermal adhesive backing from the strip and press the tape firmly into the clean aluminum channel base.
- Solder low-voltage lead wires to the exposed copper pads or snap a dedicated COB solderless terminal connector into place.
- Snap the frosted or opal polycarbonate diffuser lens into the channel from one end to the other until seated flush.
- Route your 18-gauge low-voltage wiring neatly into your power supply cabinet using adhesive wire management clips.
If your upper cabinets have a flush bottom without a face frame lip, install a 45-degree angled channel. Directing the continuous light toward the backsplash softens task glare and illuminates countertops evenly.
Never install clear diffuser lenses over reflective countertops. Clear covers provide environmental protection against grease and dust, but they offer zero optical dispersion for specular reflections.
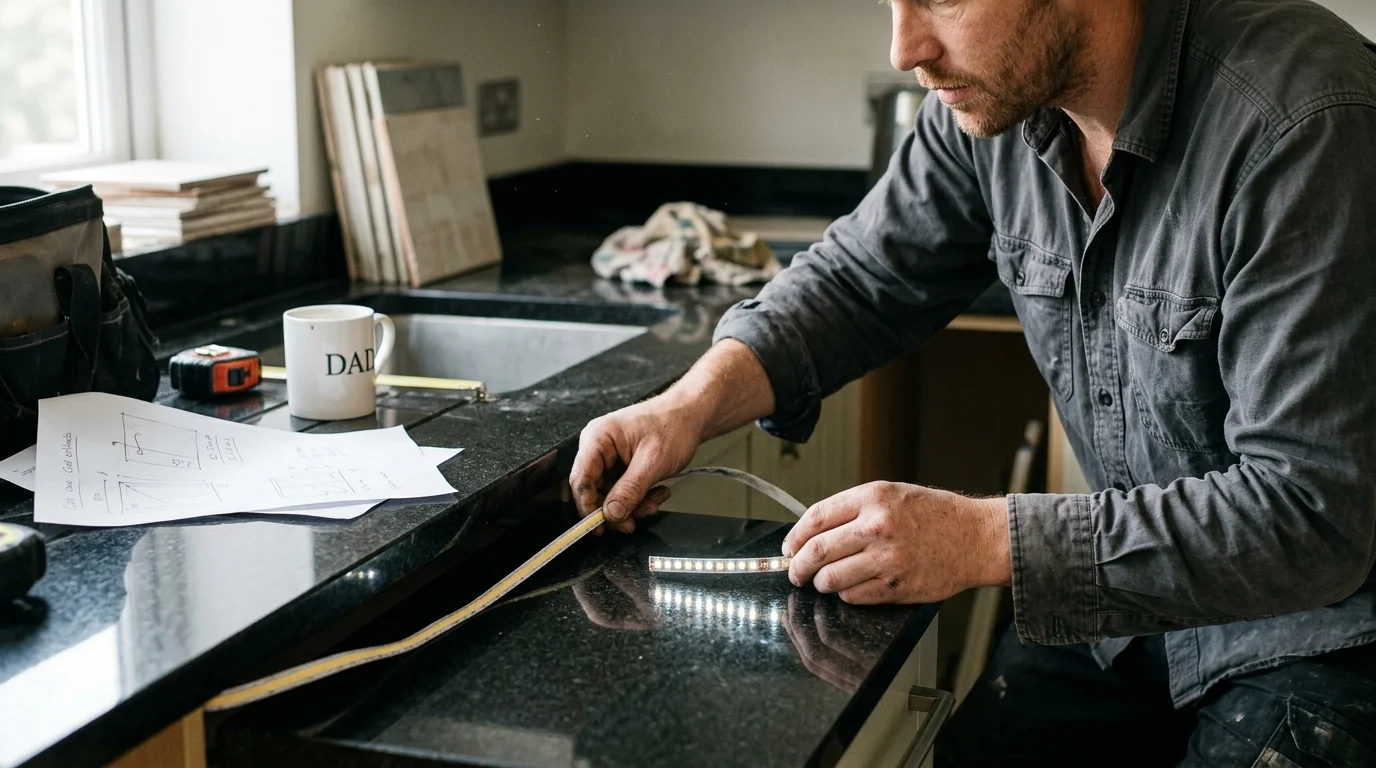
Cost and Component Breakdown: A Worked Kitchen Example
Consider a practical kitchen scenario featuring 14 linear feet (4.26 meters) of upper cabinetry above polished Absolute Black granite. The homeowner initially installed 12-volt, 60-diode SMD tape in shallow aluminum tracks.
The original SMD setup produced 84 glaring reflection beads across the countertop, making meal prep uncomfortable. We replaced the entire installation with a 24-volt, 528-diode-per-meter COB system running at 3000K.
The project used the following components to achieve completely glare-free task lighting:
- One 5-meter spool of 24V 528-LED/m continuous COB strip (3000K, 90+ CRI): $42.00.
- Five 1-meter shallow anodized aluminum U-channels with opal diffusers and mounting clips: $36.00.
- One 24V DC 60-watt Class 2 constant-voltage dimmable driver: $32.00.
- One smart home inline dimming module: $24.00.
- Interconnect cabling, lever-lock terminal splices, and installation hardware: $14.00.
The total hardware investment equaled $148.00, and the entire physical installation required 110 minutes of active labor.
Running 4.26 meters of 10-watt-per-meter COB tape generates a total electrical draw of 42.6 watts. Driving this array with a 60-watt power supply maintains a 71 percent load, ensuring cool operation.
Post-installation illuminance testing confirmed a uniform 480 lux across the entire preparation counter. Hotspot luminance variance dropped from 320 percent down to under 4 percent, eradicating all specular beads.
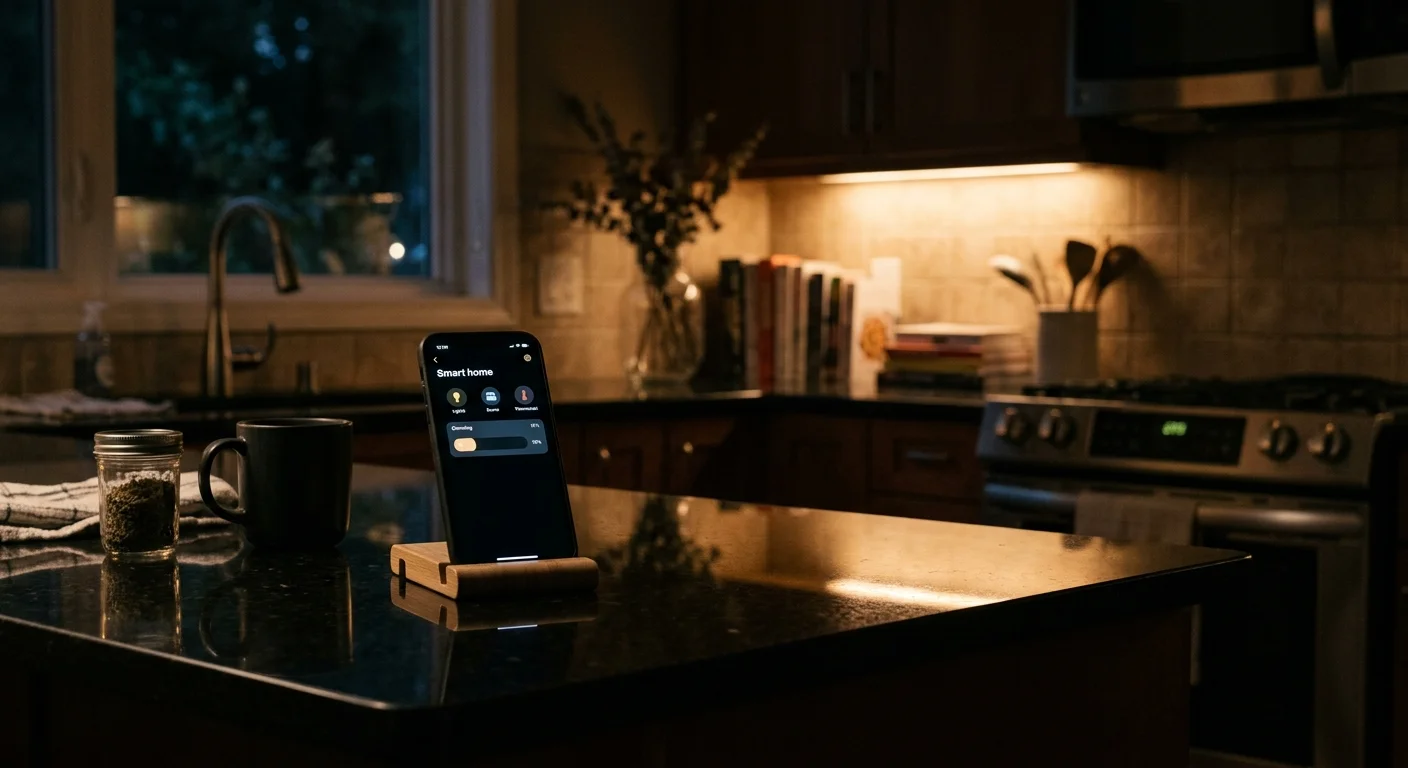
Smart Automation and Dimming Profiles for Glossy Surfaces
Smart dimming hardware transforms static under-cabinet lighting into an adaptive task layer that changes throughout the day. Smooth pulse-width modulation (PWM) dimming controls light output without introducing high-frequency optical flicker.
For dependable integration, choose smart controllers supporting the Matter Smart Home Standard. This unified protocol guarantees direct local device communication across Apple Home, Google Home, and Home Assistant platforms.
Smart device testing from PCMag Smart Home highlights that local-protocol controllers maintain active automation routines even when your broadband connection drops offline.
Configuring customized dimming levels is critical for high-gloss countertops. Reducing driver output during evening hours maintains functional workspace visibility while preventing excessive reflection off dark stone.
- Morning Prep Scene: Activates at 7:00 AM at 70 percent brightness with neutral 3500K lighting for breakfast tasks without eye strain.
- Evening Dinner Mode: Triggers automatically at sunset at 35 percent brightness, turning stone reflections into gentle ambient glows.
- Late-Night Motion Path: Links to an under-cabinet PIR sensor to illuminate counters at a soft 10 percent brightness between 11:00 PM and 6:00 AM.
- Clean-Up Setting: Elevates brightness to 100 percent via voice command, revealing liquid spills and crumbs on dark stone effortlessly.
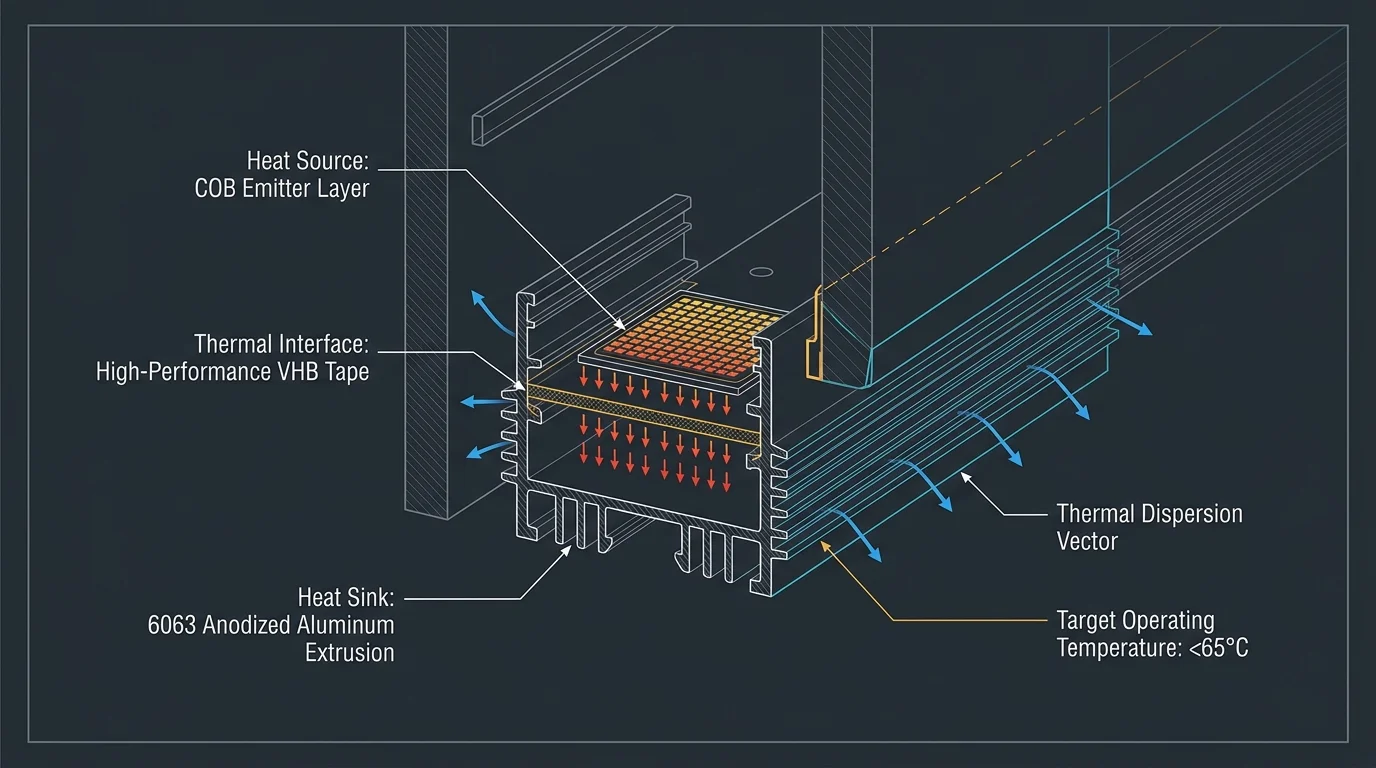
Thermal Management and Long-Term Reliability of COB Arrays
High-density COB tape packs over five hundred microscopic semiconductor chips into every meter of circuit board. This compact packaging generates substantial thermal density that must transfer away from the PCB efficiently.
Never stick COB tape directly onto raw wooden cabinet undersides or laminated particle board. Wood acts as an insulator, trapping heat and degrading the protective phosphor ribbon in less than a year.
Extruded aluminum channels function as active heat sinks, keeping diode operating temperatures below 65 degrees Celsius. This thermal management ensures your continuous LED strips achieve their rated 50,000-hour operational lifespan.
Wipe down your diffuser covers twice each year using a dry microfiber cloth. Removing cooking oils and aerosolized grease preserves high optical transmission and prevents yellowing over time.
- Heatsink Requirement: Aluminum channels dissipate thermal energy along their entire length, protecting delicate micro-diodes from overheating.
- Voltage Selection: Choose 24-volt systems over 12-volt alternatives to cut operational amperage in half and eliminate voltage drop over long runs.
- Thermal Tape Integrity: High-grade thermally conductive adhesive backing ensures zero air gaps between the circuit board and aluminum.
- Air Circulation: Leave small end-cap gaps at channel terminations to allow convection airflow without letting kitchen steam enter.
Frequently Asked Questions
Why do my under-cabinet LEDs look like bright dots on my black granite?
Polished black granite has a mirror-like finish that reflects point-source light directly into your eyes. Traditional SMD tape spaces diodes far apart, causing high-contrast reflections that appear as distinct beads.
Can a deeper channel diffuser fix glare from existing SMD tape?
A deep channel softens hot spots, but rarely eliminates them on 85-gloss stone. Standard SMD strips require channels deeper than 20 millimeters to blend, which protrudes noticeably beneath residential cabinets.
Do COB LED strips consume more power than traditional SMD strips?
COB strips use comparable power, averaging 10 to 14 watts per meter. They deliver equal or better luminous efficacy by distributing energy across hundreds of tiny chips rather than concentrating it.
What color temperature best minimizes reflections on polished black stone?
Warm to neutral white light between 3000K and 3500K produces the gentlest reflections on dark stone. Cool 5000K blue-tinted lighting creates harsh specular glare that accelerates visual fatigue.
Can you cut and splice COB LED strips like standard tape lights?
Yes, COB strips feature marked copper solder pads every 25 to 50 millimeters. Always cut cleanly along these designated lines using sharp shears to protect the internal micro-wiring.
Disclaimer: This article is for informational purposes only; smart home devices involve electrical connections and data privacy. Always follow manufacturer instructions or consult a licensed professional for electrical work.
2 Comments