
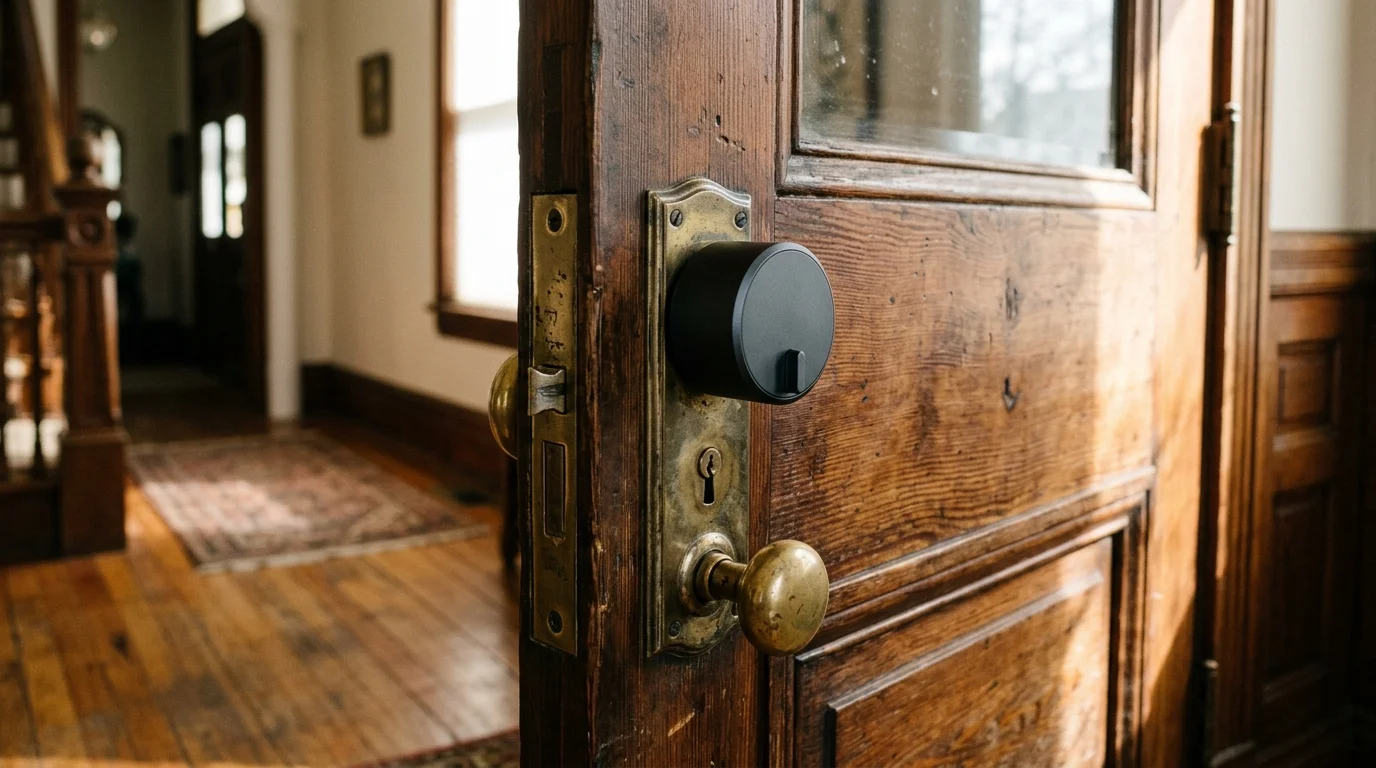
You can retrofit a motorized smart lock onto a century-old sagging mortise door without gouging historic jambs with a chisel. Most motor stalls stem from axial hinge drift and lateral latch friction rather than an undersized strike opening.
Preserving original woodwork while modernizing entry hardware is a foundational principle when learning how to add smart devices to an older home.
Instead of hacking irreplaceable heartwood molding, you can eliminate deadbolt binding entirely by re-aligning hinge pivot axes and choosing a retrofit chassis with high-torque gear reductions.
This technical guide shows you how to correct seasonal frame deflection, balance mechanical latch throw resistance, and automate your antique entryway cleanly.
The Physics of Mortise Alignment and Smart Motor Stall
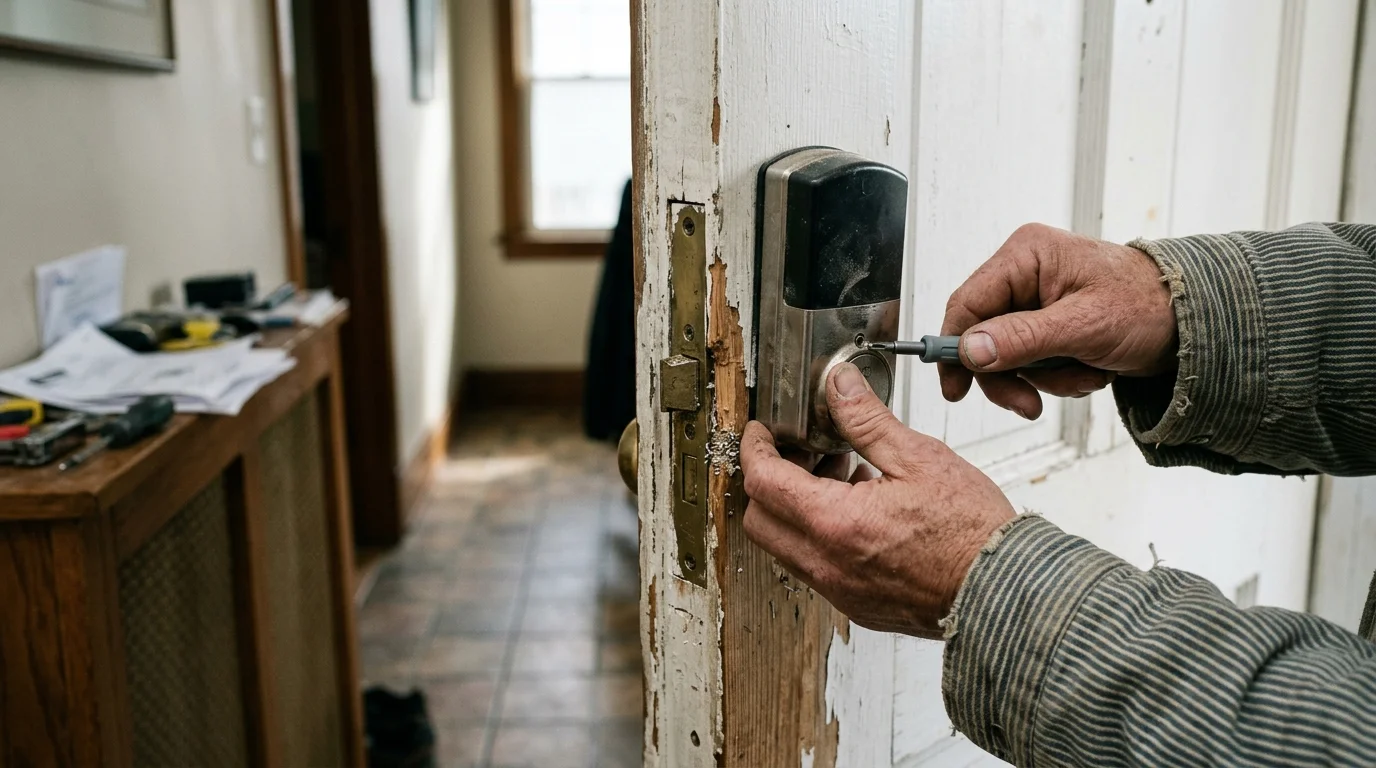
Historic mortise locks rely on heavy cast-iron internal cassettes and large mechanical linkages. When you turn a traditional skeleton key or thumb-turn manually, your wrist naturally exerts between 1.2 and 1.8 Newton-meters (Nm) of rotational torque.
Maintaining structural jamb integrity is essential for physical security, a key factor when considering whether smart locks are safe for your home.
You automatically compensate for sticking points by subconsciously pushing, lifting, or pulling the door handle while turning the key. That manual compensation masks severe mechanical misalignment between the mortise deadbolt and the jamb strike pocket.
Smart lock retrofit actuators operate under fundamentally different mechanical constraints. Compact consumer smart locks rely on tiny direct-current stepper or brushed motors running on small battery packs.
These miniature motors typically produce only 0.25 to 0.45 Nm of usable operating torque. When the bolt meets lateral resistance against the strike plate, friction spikes immediately.
According to hardware testing documentation published by Consumer Reports Smart Home evaluations, excessive latch friction drains smart lock batteries up to four times faster than normal operation. Severe resistance triggers an automatic motor stall shutdown.
When the internal microcontroller detects an amperage spike caused by a jammed bolt, it reverses direction to prevent gear stripping. The lock then reports a failure error to your phone.
Chipping out the historic wood jamb to widen the strike pocket is a destructive mistake. Widening the strike plate compromises the structural wood casing, mars antique finish coats, and leaves the door rattling loosely against weatherstripping.
The true solution requires understanding the eccentric travel path of the latch. By balancing the physical hinges and utilizing an adaptable retrofit chassis, you achieve effortless motor operation without removing a single shaving of antique trim.
Diagnosing Antique Jamb Deflection and Latch Run-Out
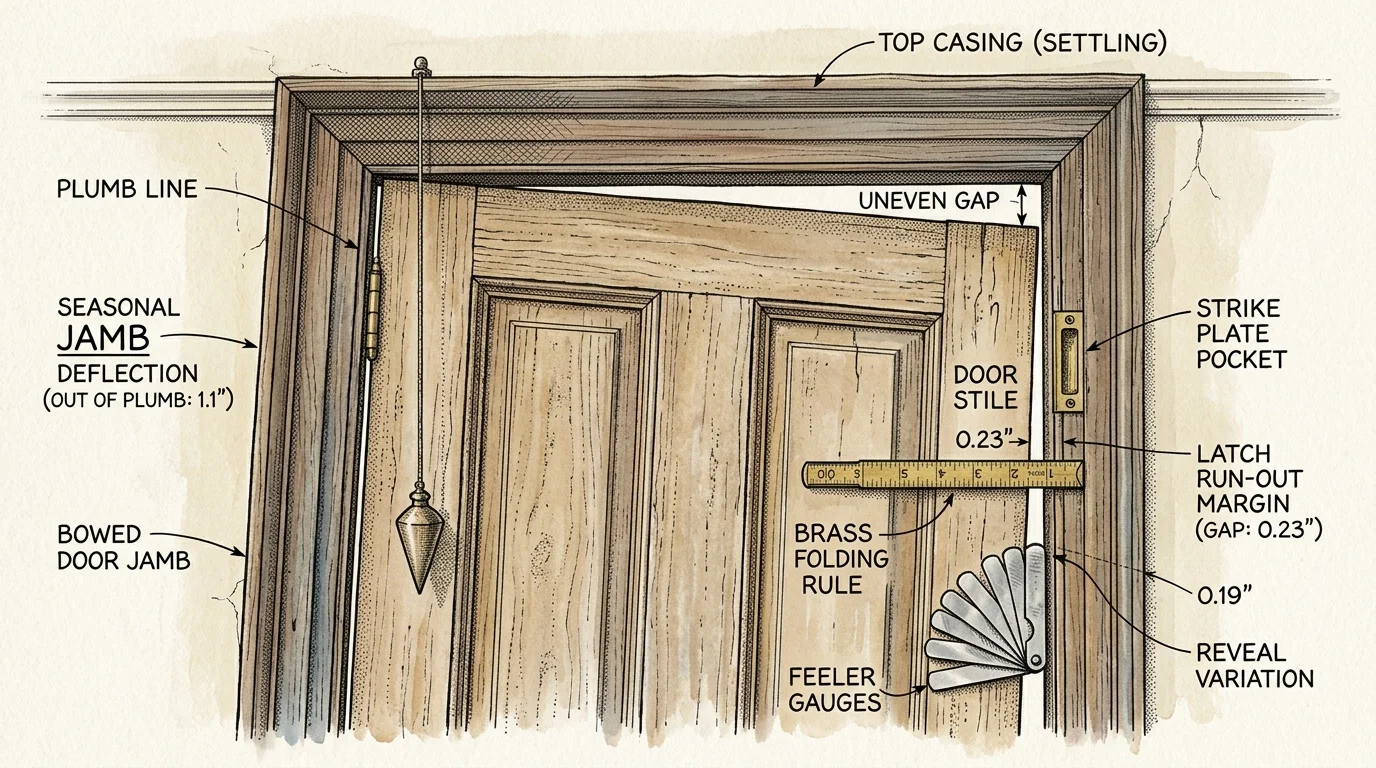
Before buying retrofit hardware, you must measure your door gap tolerances and pinpoint where binding occurs. Century-old door frames settle unevenly as foundation walls shift and seasonal humidity alters timber dimensions.
Ensuring the door rests plumb against the stop molding also simplifies integrating smart sensors for home security by preventing false open readings.
Begin by inspecting the margin around your door perimeter with a digital caliper or a standard automotive feeler gauge. A properly hung door requires a consistent reveal of 1/8 inch (3.175 mm) along both stiles and the head jamb.
On an out-of-square mortise door, this reveal often pinches to less than 1/16 inch at the top latch corner while widening near the threshold. That taper reveals rotational frame sag.
Perform these specific diagnostic checks to map contact friction before disassembling any hardware:
- The Dry-Erase or Lipstick Transfer Test: Coat the face and bevel edges of your mortise deadbolt with dry-erase marker or wax crayon. Close the door firmly and turn the thumb-turn; transferred pigment on the strike plate marks the exact friction point.
- The Free-Swing Threshold Test: Disengage the latch and let the door swing toward the jamb stop under gentle finger pressure. If the door bounces back or binds before flush contact, the hinge axis has pulled out of plumb.
- The Compression Deflection Check: Push the exterior face of the door inward while cycling the bolt manually. If turning effort drops significantly, your exterior weatherstripping is exerting excessive rebound pressure against the spring latch.
- Rotational Play Measurement: Insert a flathead screwdriver into the cylinder drive spindle and measure angular backlash. Worn antique internal gears with over 15 degrees of dead travel can prevent smart drives from completing full stroke cycles.
Take note of whether the friction occurs horizontally or vertically. Vertical friction indicates hinge knuckle sag, while horizontal friction indicates door leaf warpage or improper strike depth.
Document these contact marks carefully. Every mechanical adjustment you make next will target these exact physical contact points directly at the hinges.
Non-Destructive Door Alignment: Correcting Sag at the Hinges
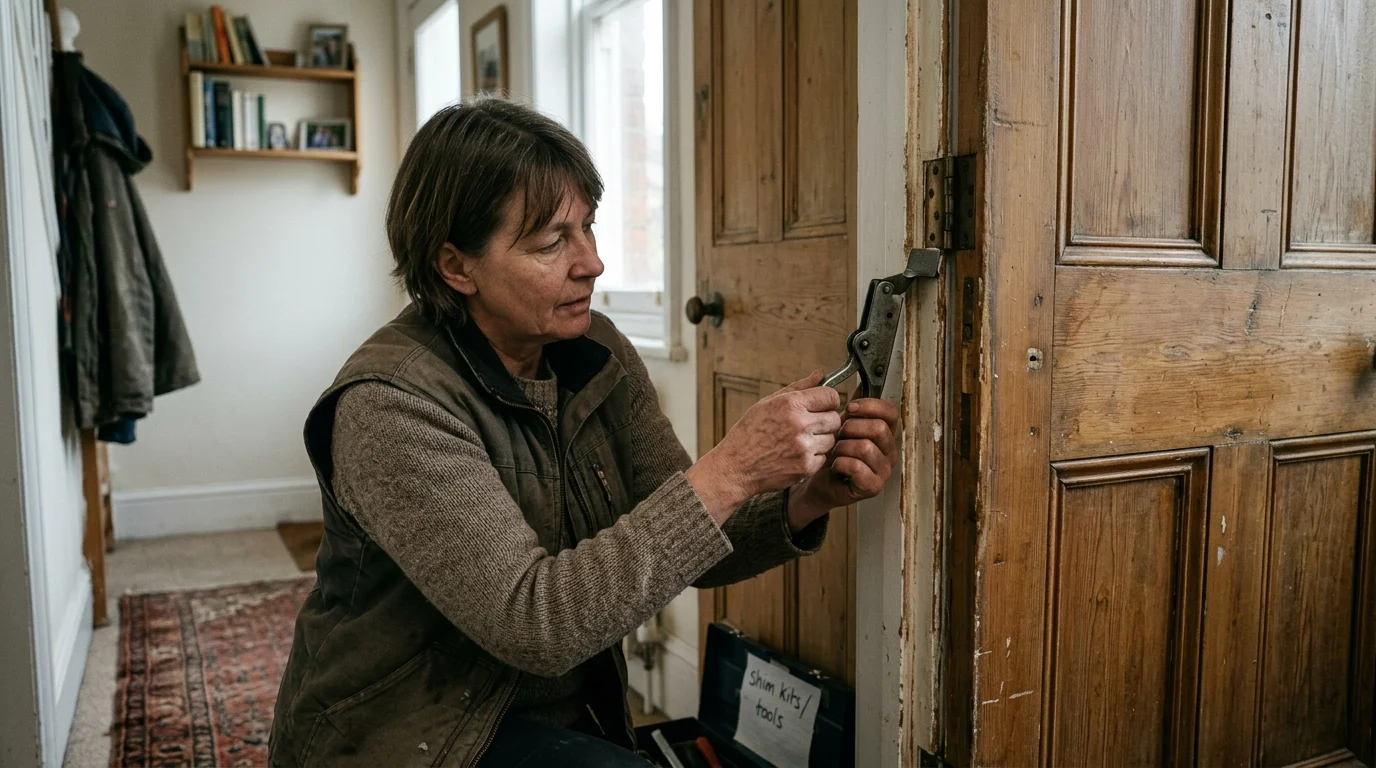
You can correct up to 3/16 inch of vertical door drop without touching the mortise pocket or jamb strike. The secret lies in re-aligning the door leaf pivot axis through targeted hinge adjustments.
Eliminating this mechanical resistance removes the root cause of deadbolt binding, one of the most frequent hurdles when troubleshooting common smart lock problems.
Over several decades, heavy solid-wood doors stretch their original mounting fasteners. The top hinge screws pull away from the framing studs under tension, allowing the lock-side edge to droop diagonally into the lower strike lip.
Follow this non-destructive mechanical process to restore square geometry to your historic door leaf:
- Open the door fully and place wooden wedges beneath the bottom rail to relieve mechanical strain on the hinges.
- Remove the center screw from the jamb-side leaf of the top hinge; in most 100-year-old homes, this screw measures only 3/4 inch into the soft casing.
- Drive a 3.5-inch #10 hardened steel structural screw through the vacant hinge hole directly into the rough 2×4 framing stud behind the jamb.
- Snug the structural screw gradually while observing the upper reveal; the screw draws the entire top hinge knuckle 1/16 to 1/8 inch closer to the wall framing.
- If the latch still drags on the bottom strike edge, loosen the screws on the jamb leaf of the bottom hinge.
- Slide custom-cut 0.040-inch brass shims behind the bottom hinge leaf to kick the lower pivot outward and elevate the latch side.
- Re-tighten all hinge screws firmly, cycling the manual lock mechanism to verify that the bolt enters the center of the strike pocket effortlessly.
This simple realignment lifts the lock-side edge, restoring the deadbolt to the exact horizontal centerline of the existing jamb strike plate.
If the antique hinge knuckles display visible vertical wear, install phosphor-bronze thrust washers onto the hinge pins. These precision washers eliminate vertical knuckle slop and instantly raise the door leaf another 1/32 to 1/16 inch.
You achieve a perfectly centered deadbolt travel without touching your antique woodwork. The smart lock motor will now drive against zero resting resistance.

Chassis Tolerances: Comparing Smart Locks for Antique Mortise Pockets
Not all retrofit smart locks tolerate the eccentric travel and mechanical resistance of an antique mortise lockset. Traditional cylindrical deadbolts use a simple horizontal tailpiece, but mortise cassettes demand specific drive-adapter geometry.
Both August and Yale options are consistently featured among the best smart locks that work with Alexa, making them popular for voice-controlled smart homes.
Smart home hardware testing detailed by The Verge Smart Home reporting shows that chassis gearbox ratios dictate whether a lock can overcome residual mechanical drag. A retrofit unit must offer ample stall torque and flexible tailpiece coupling.
The comparison table below outlines real-world specifications for retrofit smart lock hardware options compatible with historic mortise systems via conversion plates or direct adapters.
| Chassis Model / Setup | Peak Stall Torque (Nm) | Bolt Stroke Accommodation | Max Angular Misalignment | Power Profile | Approximate Hardware Cost |
|---|---|---|---|---|---|
| August Wi-Fi Smart Lock (4th Gen) + Mortise Plate | 0.32 Nm | 0.75″ – 1.00″ Travel | 3.5 Degrees | 2x CR123A (3V) Batteries | $229.00 |
| SwitchBot Lock Pro + Custom Tailpiece Clamp | 0.55 Nm | 0.50″ – 1.15″ Travel | 7.0 Degrees | 4x AA (1.5V) or Dual Li-Ion | $119.99 |
| Level Bolt + Custom Mortise Spindle Adapter | 0.28 Nm | 0.75″ Standard Travel | 2.0 Degrees | 1x CR2 (3V) Battery | $199.00 |
| Yale Assure Lock 2 + Interconnected Mortise Plate | 0.42 Nm | 0.80″ – 1.00″ Travel | 4.0 Degrees | 4x AA (1.5V) Batteries | $259.99 |
The SwitchBot Lock Pro provides the highest native stall torque in this category at 0.55 Nm. Its high-ratio gearbox and universal cross-shaped tailpiece clamp make it forgiving on unreinforced historic mortise locks.
The August Wi-Fi Smart Lock offers sleek styling and wide platform support, but its lower torque output requires near-perfect hinge balancing to prevent battery exhaustion.
Level Bolt requires full internal bore integration, which requires advanced machining if you adapt it to an antique mortise cassette. Choose August or SwitchBot for straightforward, non-invasive retrofits that retain exterior period aesthetics.
Worked Example: Real-World Retrofit on an 1895 Douglas Fir Door
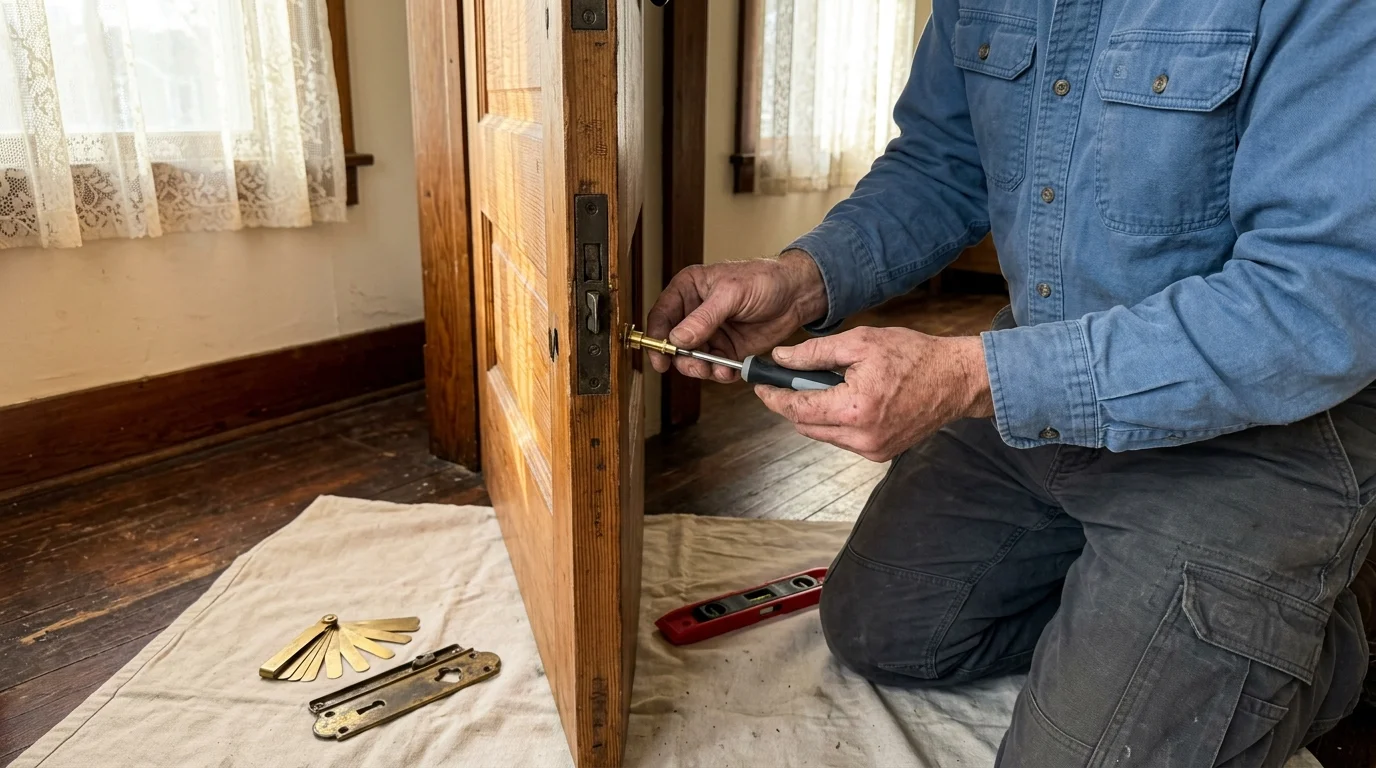
To understand the complete process, examine this real-world retrofit performed on an 1895 Victorian entryway in Portland, Oregon. The door is vertical-grain Douglas fir, measuring 36 inches wide, 84 inches tall, 1.75 inches thick, and weighing 78 pounds.
Once free latch travel is established, property managers can reliably set up smart locks for Airbnb guests without worrying about late-night door jamming.
The entry featured an original unreinforced cast-iron Corbin mortise lockset with an exterior brass cylinder and interior thumb-turn. Decades of settling created 3/16 inch (4.76 mm) of downward sag at the latch stile.
The homeowner could only turn the deadbolt by hauling inward on the cast-iron exterior pull handle with roughly 12 pounds of pulling force. A digital force gauge recorded a rotational resistance of 1.45 Nm on the thumb-turn—far exceeding any smart lock motor threshold.
The homeowner chose to fix the mechanical alignment rather than chisel the irreplaceable heartwood jamb. Here is the step-by-step resolution:
- Hinge Reinforcement: The installer removed the upper hinge casing screws and drove two 3.5-inch #10 steel screws into the framing stud, drawing the door leaf up by 0.080 inch.
- Hinge Shimming: The installer placed two 0.040-inch brass shims behind the jamb leaf of the bottom hinge, kicking the bottom of the door out and lifting the latch corner an additional 0.045 inch.
- Thrust Washer Addition: The installer slipped one 0.030-inch phosphor-bronze washer over the top hinge pin to eliminate knuckle end-play.
- Lubrication Overhaul: The installer injected dry micronized PTFE powder directly into the Corbin mortise body through the cylinder hole to clean out aged gummed animal fats.
Following hinge truing and dry lubrication, measured rotational thumb-turn resistance dropped from 1.45 Nm down to 0.18 Nm. The deadbolt slid cleanly into the existing jamb strike pocket without touching its brass perimeter.
The installer then mounted a SwitchBot Lock Pro over an aftermarket thumb-turn adapter plate on the interior face. The conversion preserved the historic exterior knob, keyed cylinder, and jamb intact.
Total time spent was 55 minutes. Total project cost came to $189.49 ($119.99 smart lock, $18.50 brass shims, $12.00 structural screws, $39.00 cylinder adapter plate).
Smart Mortise Retrofit Adapters and Offset Hardware Solutions
Most smart locks on the market are engineered exclusively for modern standard 2-1/8 inch cross-bore tubular deadbolts. Historic mortise doors lack cross-bores entirely; their locking mechanisms sit inside an internal mortised pocket.
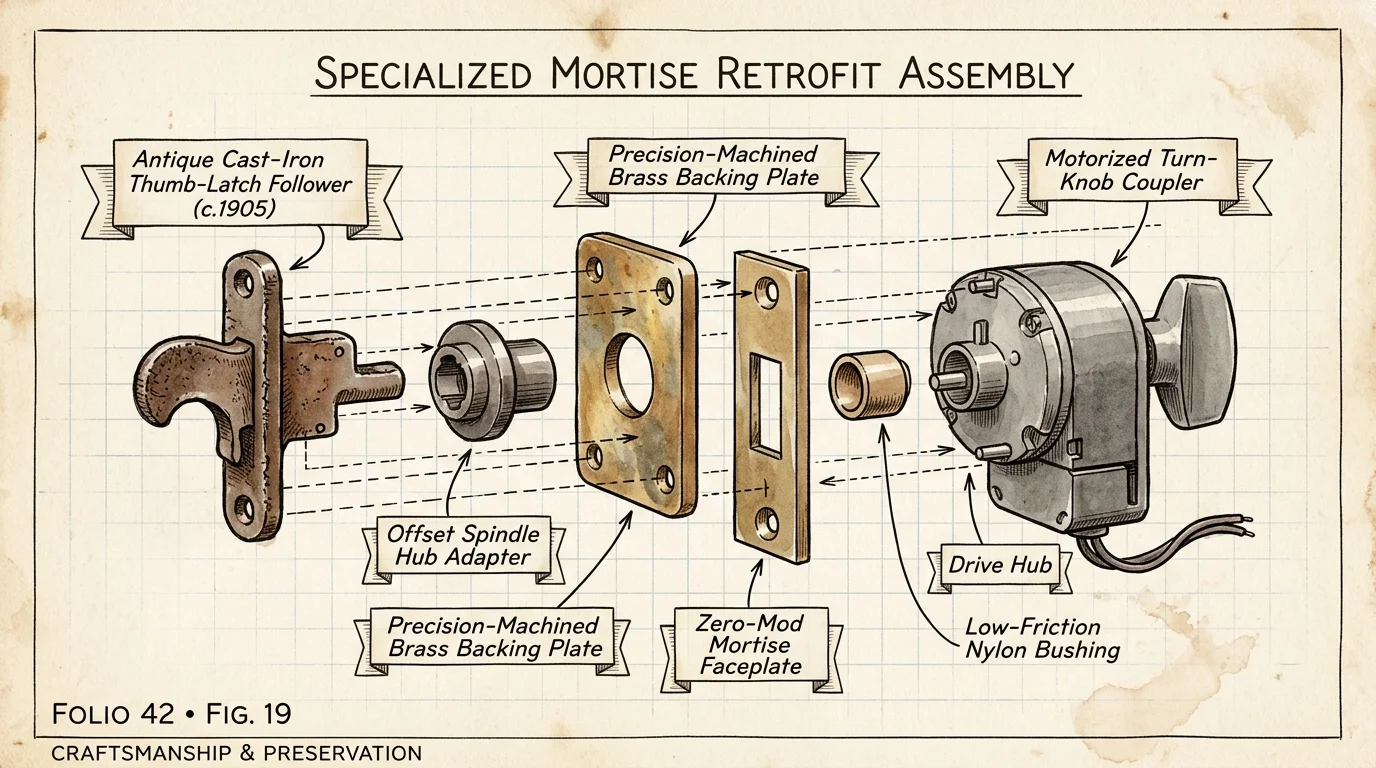
To bridge this mechanical gap, you need a specialized conversion mounting plate or retrofit adapter kit. These adapters mount over the antique interior escutcheon plate using the original machine screw holes.
A precision-machined spindle adapter converts the mortise lock’s square thumb-turn drive into a standard flat tailpiece that mimics a modern deadbolt. This lets modern smart lock chassis grip the antique drive shaft cleanly.
When selecting your conversion hardware, verify these critical physical dimensions:
- Spindle Profile: Antique American mortise thumb-turns usually operate on either a 3/16-inch or 1/4-inch square spindle shaft; measure yours with a vernier caliper before ordering.
- Center-to-Center Spacing: Measure the exact distance between the doorknob spindle hub and the deadbolt cylinder hub; antique locks vary between 2-1/4 inches and 3-5/8 inches.
- Escutcheon Clearance: Ensure the smart lock chassis backplate sits flat against the door face without overlapping decorative raised-relief patterns on historic brass plates.
- Tailpiece Depth Engagement: The flat drive spindle must penetrate at least 1/2 inch into the smart lock motor clamp to avoid cam slippage under torque loads.
If your mortise cassette uses a single combined knob-and-deadbolt faceplate, consider an offset mounting plate. Offset plates shift the smart motor body vertically by 15 to 25 mm, preventing interference with the lower entry knob.
Never spray standard wet lubricants like petroleum-based WD-40 into an antique mortise lock box. Wet lubricants collect ambient dust and coagulate into a sticky sludge that stalls miniature electric motors within months.
Always use dry micronized graphite or PTFE spray lubricant inside the lock cassette. These dry compounds reduce friction across internal levers without attracting lint or grime.
Step-by-Step Installation Without Jamb Surgery
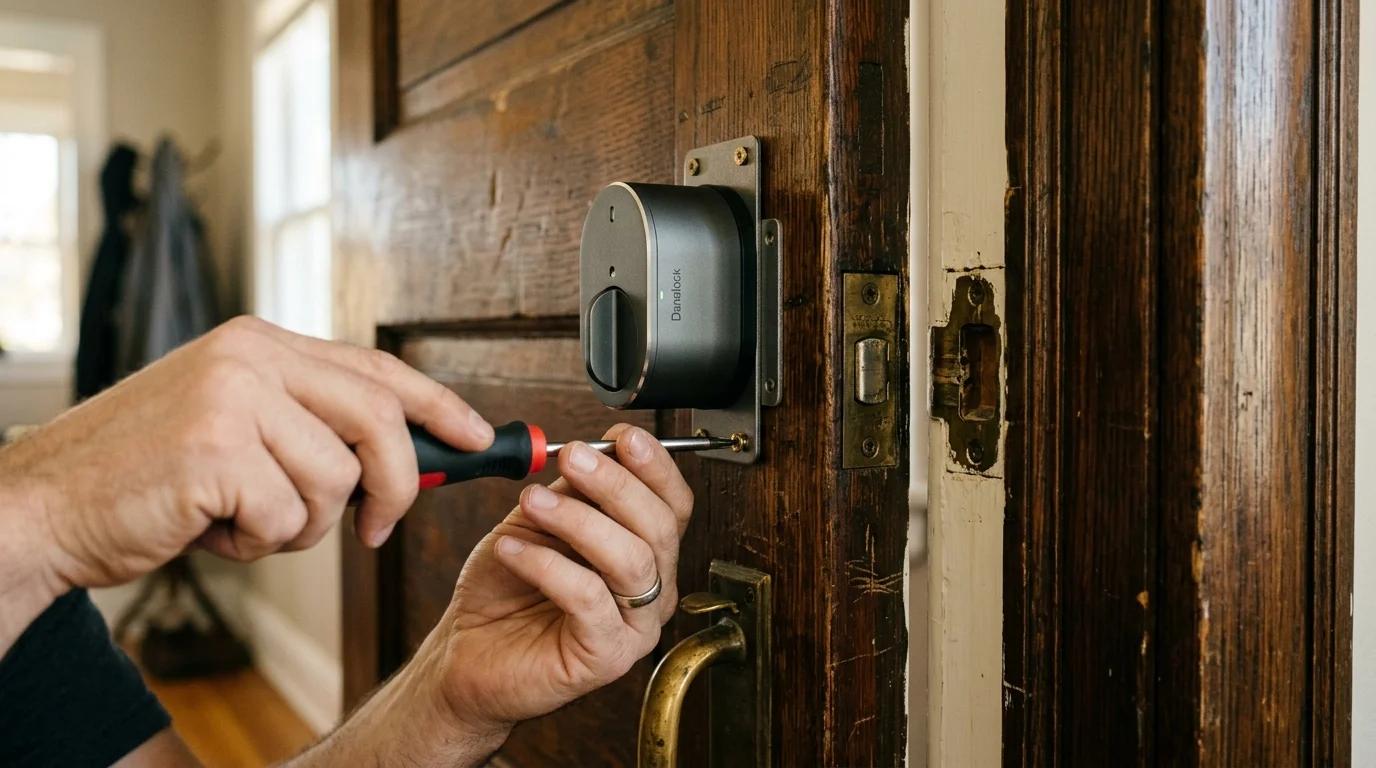
Once you have balanced your hinges and verified that the deadbolt glides freely, begin hardware installation. Follow this careful installation sequence to protect your door’s wood and secure your entry.
- Unscrew and remove the existing interior thumb-turn lever and decorative washer from the interior escutcheon plate.
- Insert your caliper into the mortise hub to determine the square drive dimension; fit the matching square-to-flat adapter spindle into the mortise mechanism.
- Secure the adapter baseplate onto the door leaf using the original interior escutcheon screw holes, tightening the screws evenly with a manual hand driver.
- Slide the smart lock mounting plate over the adapter spindle, verifying that the central drive bushing spins freely by hand through a complete 90-degree throw.
- Install the elastomer isolation gasket between the mounting plate and the door leaf to damp motor vibration and prevent marring the historic wood patina.
- Align the smart lock motor body with the adapter tailpiece, sliding the chassis flush against the mounting bracket.
- Fasten the chassis retaining bolts, tightening them in an alternating top-and-bottom sequence to prevent cocking the motor off its mechanical center.
- Insert fresh alkaline or lithium batteries into the battery sled, listening for the unit’s startup diagnostic chime.
- Open the door to a 45-degree angle and run the manufacturer’s automatic calibration sequence while the bolt throws into empty air.
- Close the door fully and run the manual latch verification test through your smartphone app to confirm smooth lock engagement.
If the smart lock motor emits a high-pitched whine during the final closing phase, your spindle is slightly off-center. Loosen the chassis retaining bolts by a quarter turn to allow the self-aligning bushing to find its center, then retighten.
Cycle the motorized deadbolt ten consecutive times while monitoring app status. The motor should complete every cycle in under 1.5 seconds without any audible pitch drops.
Your antique mortise door is now fully automated. The exterior appearance remains completely unchanged, preserving your home’s historic curb appeal and architectural integrity.

Ecosystem Integration and Motor Stall Automation Safeguards
Connecting your retrofit mortise lock to a wider home automation ecosystem introduces advanced safety features and convenience. When selecting your hub, look for native support for the Matter Smart Home Standard over Thread or local Z-Wave Plus protocols.
Local communication protocols ensure your front lock functions reliably during internet outages. They also deliver immediate status reporting to your smart home controller without cloud delays.
Antique doors remain vulnerable to seasonal humidity shifts that can slowly alter clearances between autumn and spring. You can configure smart automation safeguards to catch binding issues long before a motor stalls completely.
Implement these automation routines to protect your lock and home:
- Motor Resistance Notifications: In platforms like Home Assistant or Apple Home, create a diagnostic notification rule that alerts your phone if a lock cycle takes longer than 2.0 seconds to finish.
- Auto-Unlock Arrival Lighting: Program an entry hall light to switch on instantly to 100% brightness whenever the smart lock completes an authorized unlocking cycle after sunset.
- Lock Jam Fallback Routine: Configure an automated push notification via Pushover or native app alerts to ping your household if the lock reports an obstruction error code.
- Auto-Lock Delay Extension: Set your auto-lock timer to at least five minutes rather than 30 seconds; this gives occupants plenty of time to pull the heavy historic door firmly shut against the weatherstrip.
- Contact Sensor Verification: Pair an independent magnetic door sensor on the upper door frame to prevent the smart lock from firing its deadbolt while the door is ajar.
The magnetic door sensor is critical for antique doors. If an unmonitored door rests a quarter-inch open and the auto-lock fires, the extended deadbolt will slam against the jamb face when the wind catches the door.
A dual-state automation ensures the deadbolt only extends when the contact sensor verifies that the door leaf is resting securely against the door stop.
This setup delivers commercial-grade access control and peace of mind while treating your historic property with the respect it deserves.
Frequently Asked Questions
Can I install a smart lock on an antique door without removing the original mortise cassette?
Yes. By using an interior retrofit smart lock with a mortise-compatible conversion spindle, you replace only the interior thumb-turn. The original interior mortise gearbox and exterior period hardware remain completely intact.
Why does my smart lock battery drain in less than three weeks on my historic door?
Rapid battery drain is almost always caused by mechanical binding between the deadbolt and the jamb strike plate. When the motor encounters friction, it draws maximum stall current throughout its entire throw cycle, depleting batteries rapidly.
Will driving 3.5-inch screws into antique hinges split the wood jamb?
Long structural screws will not split the jamb if you drill a proper pilot hole first. Remove the old screw, use a 1/8-inch drill bit with a stop collar to drill into the rough framing stud, and drive the screw by hand.
What if my antique door expands during humid summer months and begins sticking again?
If seasonal humidity causes wood expansion, adjust your hinge shims slightly rather than chiseling the wood jamb. Adding a 0.020-inch shim behind the middle or bottom hinge will quickly compensate for summer swelling.
Disclaimer: This article is for informational purposes only. Smart home devices involve electrical connections and data privacy. Always follow manufacturer instructions for installation. For complex wiring or HVAC work, consult a licensed professional.



1 Comment