Protecting your home and loved ones stands as a top priority. A smart security system gives you comprehensive control over your home’s safety, offering peace of mind whether you are home or away. It integrates various devices, allowing you to monitor your property, receive alerts, and even respond to incidents directly from your smartphone.
This comprehensive guide walks you through the process of setting up a complete smart security system. You will learn how to choose components, plan your installation, implement privacy best practices, and automate your defenses for a truly secure home environment. By understanding each step, you gain the confidence to build a robust home protection strategy tailored to your specific needs.
Assessing Your Home’s Security Needs
Before you purchase any devices, evaluate your home’s unique vulnerabilities. This initial assessment helps you prioritize what to protect and select the right components for your DIY security setup. Understanding your specific situation ensures you invest wisely in effective home protection.
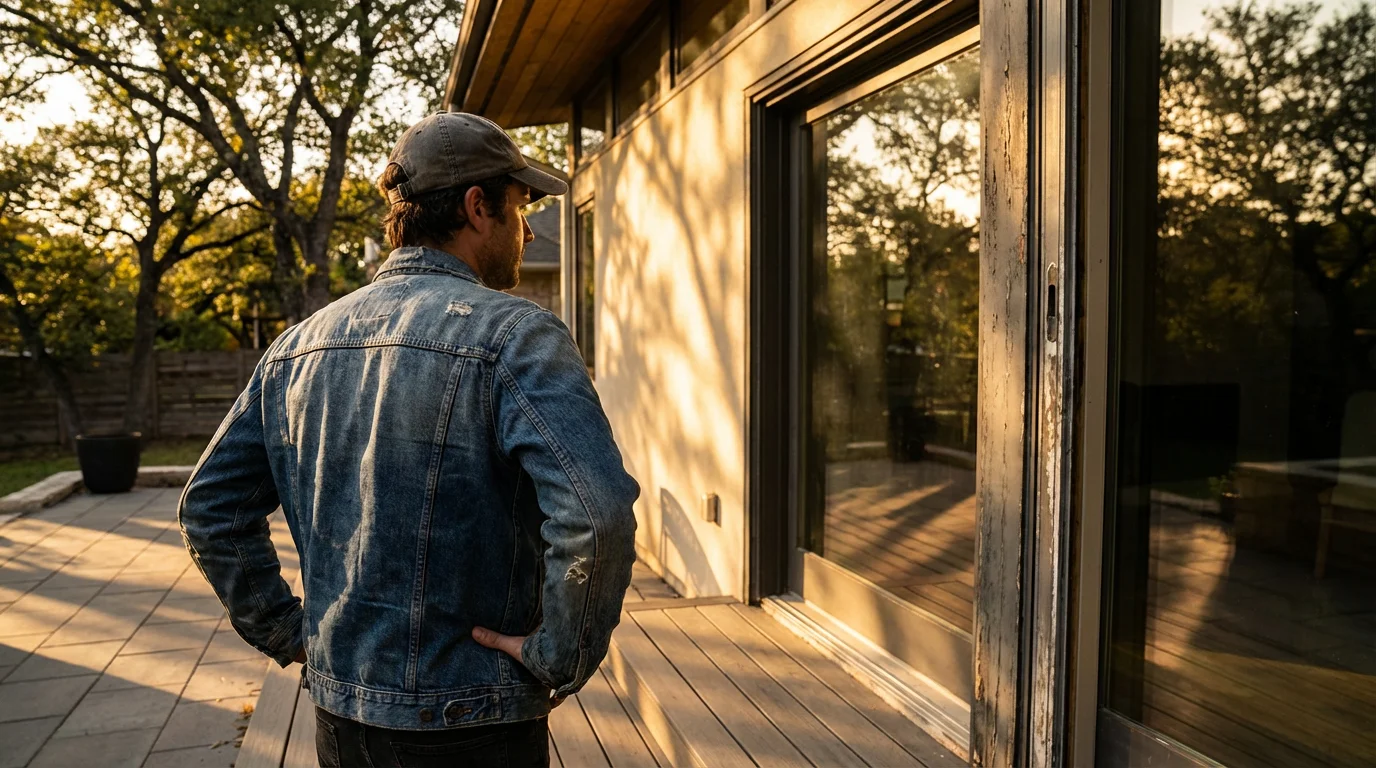
Identify Vulnerable Entry Points
Walk around your home, inside and out. Look for areas that an intruder might target. This includes all doors, ground-floor windows, and any easily accessible higher windows.
- Main Entry Points: Front door, back door, garage door, sliding glass doors.
- Windows: All first-floor windows, easily accessible second-story windows, basement windows.
- Basement and Garage Access: Doors leading from the garage into the house, and any exterior basement entries.
- Hidden Areas: Side doors or windows that are not easily visible from the street.
Consider Your Lifestyle
Your daily routine and living situation significantly influence the type of security system you need. A family with young children has different needs than a single professional, for example.
- Presence at Home: Do you work away from home for long hours? Travel frequently?
- Pets: Large pets can trigger motion sensors, requiring pet-friendly sensors or strategic placement.
- Children or Elderly Residents: Do you need smart locks with remote access for caregivers or a system that alerts you if a child opens a specific door?
- Delivery Management: Do you often receive packages and want to monitor deliveries?
Budgeting for Your Smart Security System
Smart security systems range widely in price, depending on the brand, features, and number of devices. Plan your budget, recognizing that costs include not only hardware but also potential ongoing fees for cloud storage or professional monitoring.
- Hardware Costs: Cameras, sensors, smart locks, and the central hub.
- Subscription Fees: Monthly or annual fees for video cloud storage, advanced features, or professional monitoring services.
- Installation Costs: While this guide focuses on DIY security, complex installations like hardwired cameras may incur professional installation fees.
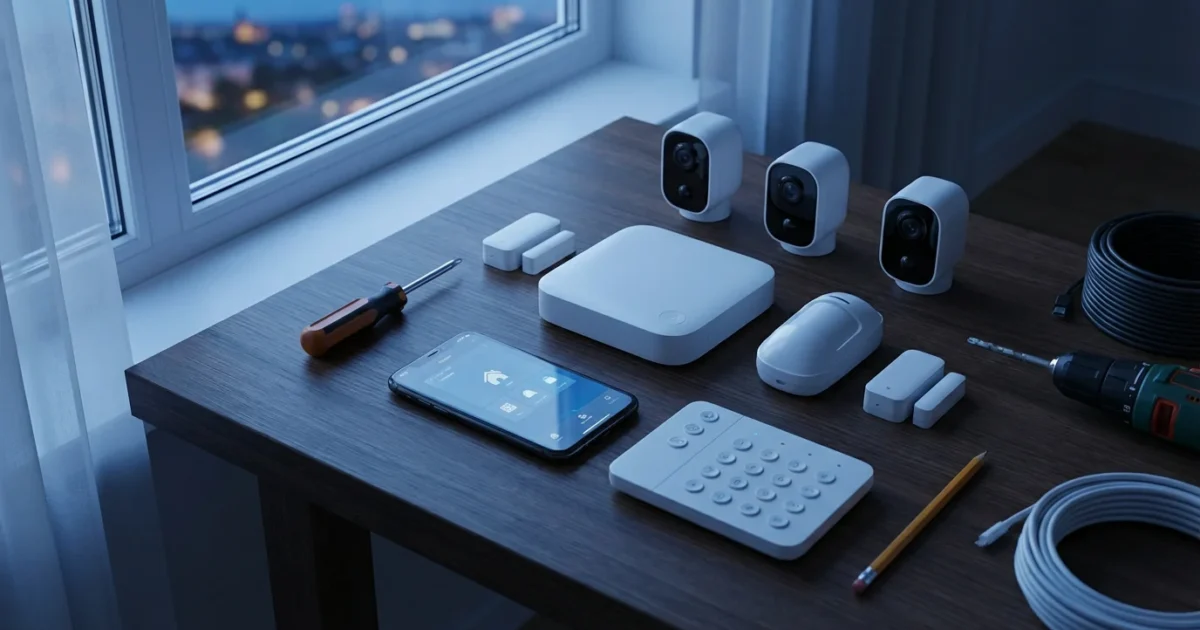
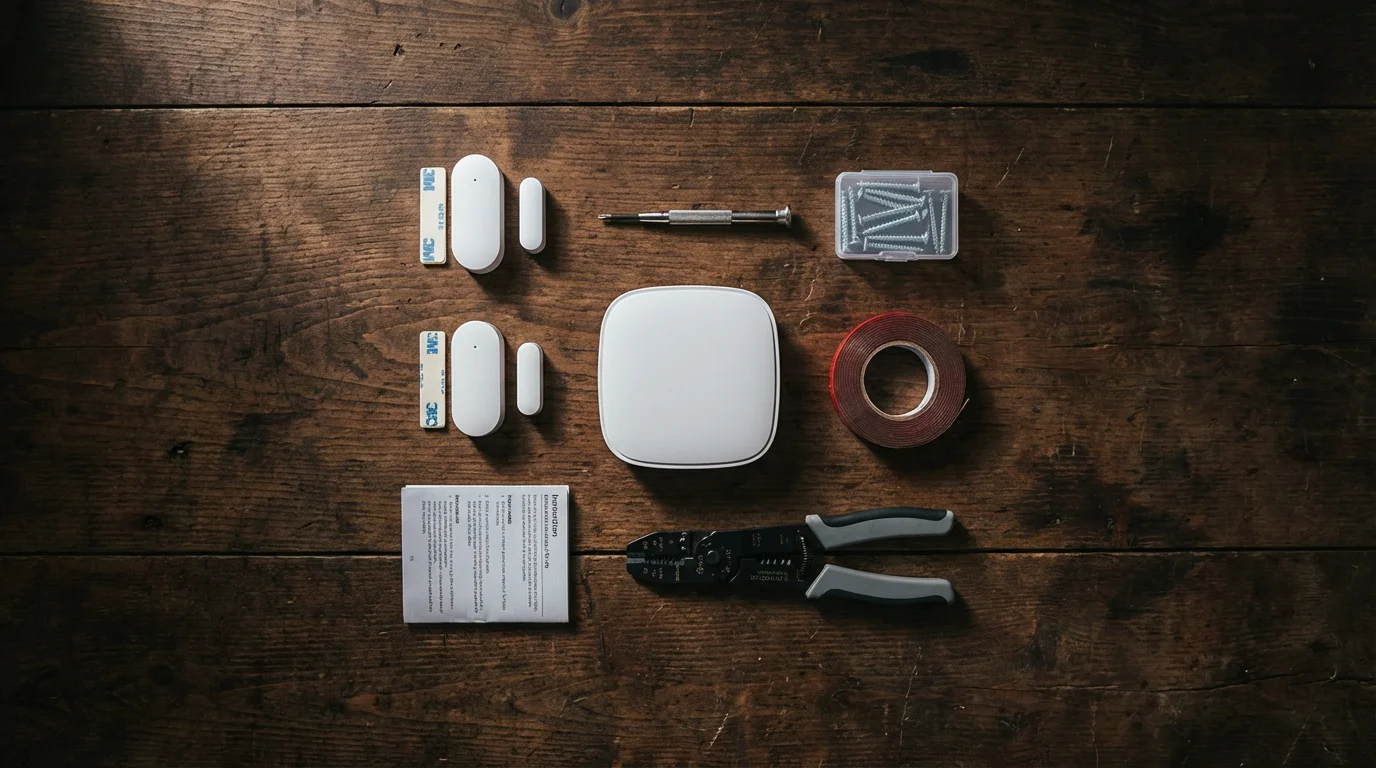
Core Components of a Smart Security System
A complete smart security system comprises several interconnected devices that work together to provide comprehensive home protection. Each component plays a crucial role in monitoring, detecting, and deterring threats.
The Central Control Panel or Hub
The hub acts as the brain of your smart security system. It connects all your devices, allowing them to communicate and function as a unified security system. Many hubs also feature a siren for immediate alerts.
- Functionality: Receives signals from sensors, triggers alarms, sends alerts to your phone, and facilitates automation rules.
- Connectivity: Uses Wi-Fi, Zigbee, Z-Wave, or the newer Matter standard to communicate with devices. Choosing a hub compatible with a wide range of devices offers flexibility.
- Power: Most hubs plug into a wall outlet and often include battery backup for power outages.
Door and Window Sensors
These small devices detect when a door or window opens or closes. They are fundamental for securing entry points.
- Detection: Consist of two pieces, one on the door/window and one on the frame. When separated, they trigger an alert.
- Installation: Typically attach with adhesive or small screws, making them easy for DIY security setup.
- Types: Some include additional features like vibration detection to alert you to attempted forced entry.
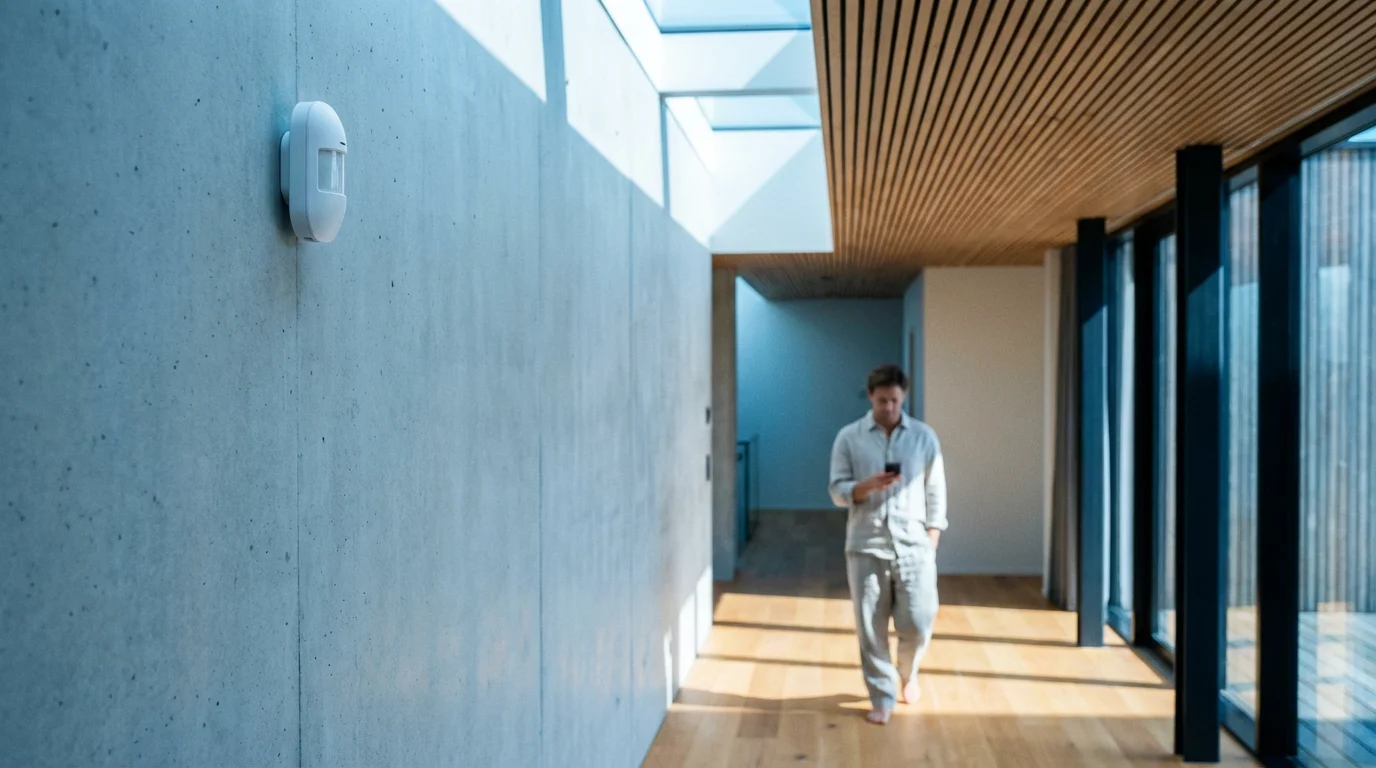
Motion Detectors
Motion sensors detect movement within a designated area, covering larger spaces than door or window sensors. This makes them ideal for living rooms, hallways, or basements.
- Technology: Most use Passive Infrared (PIR) technology to detect body heat.
- Pet Immunity: Many modern motion sensors offer “pet immunity,” reducing false alarms from pets weighing below a certain threshold (e.g., 40-80 pounds).
- Placement: Install them in corners or high-traffic areas, avoiding direct sunlight or heat vents which can cause false triggers.
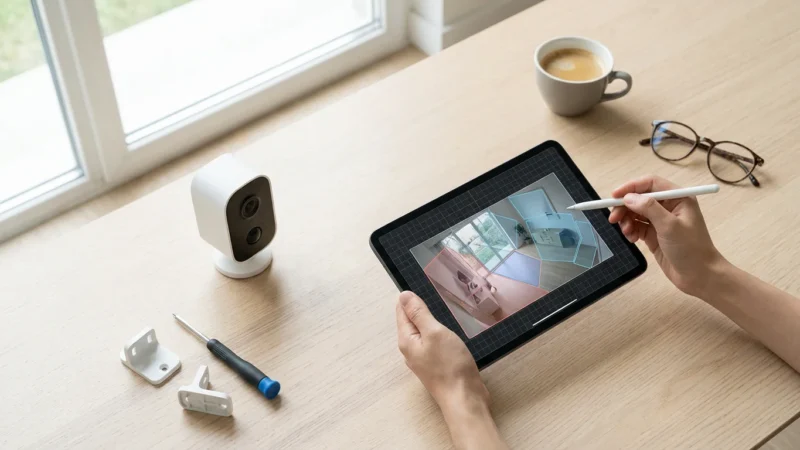
Smart Security Cameras
Cameras provide visual surveillance, allowing you to see what happens at your property. They come in various forms, each suited for different monitoring needs.
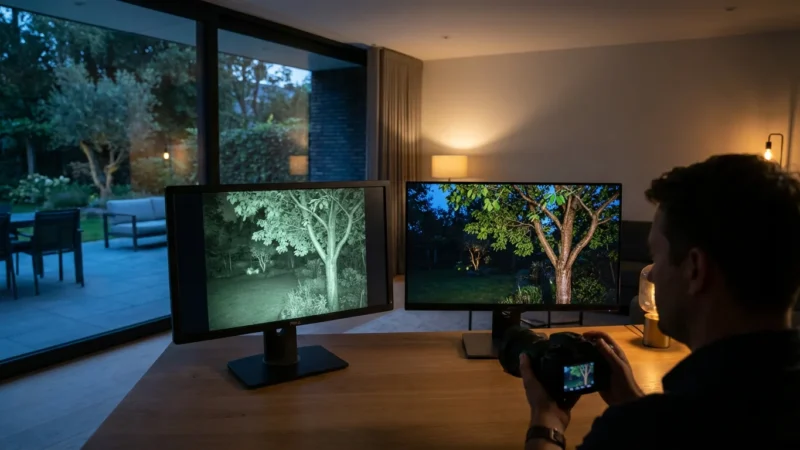
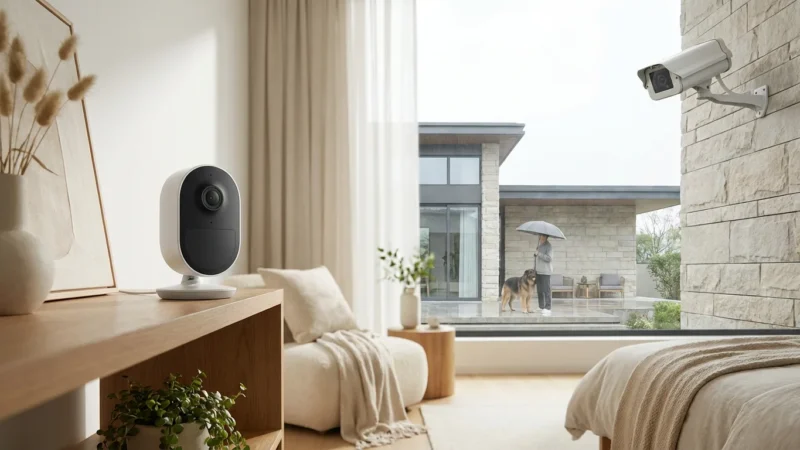
- Indoor Cameras: Monitor interior spaces, check on pets, or watch children. Many offer two-way audio and night vision.
- Outdoor Cameras: Built to withstand weather, these monitor perimeters, driveways, and yards. Features often include spotlights, sirens, and advanced motion detection.
- Video Doorbells: A specialized outdoor camera for your front door. It lets you see and speak to visitors, even when you are not home. It also records motion events near your doorstep, deterring package theft.
- Storage Options:
- Cloud Storage: Footage uploads to remote servers, accessible from anywhere. This often involves a subscription fee. It provides protection against camera tampering.
- Local Storage: Footage saves to an SD card or network attached storage (NAS) device. No recurring fees, but if the camera is stolen, the footage is lost.
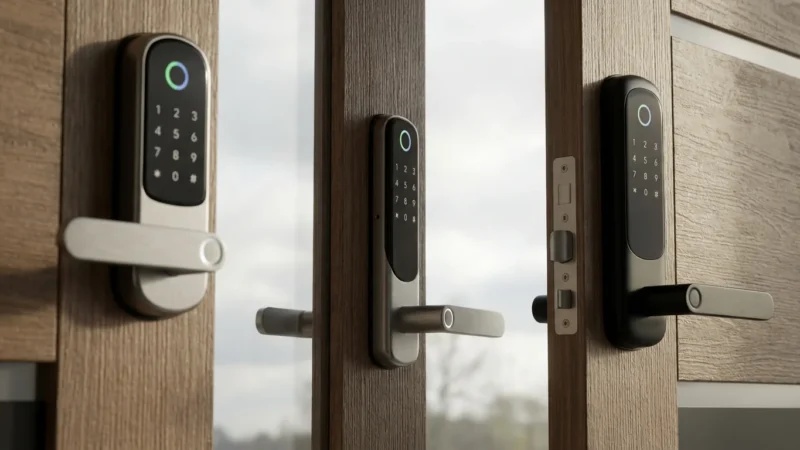
Smart Locks and Keyless Entry Systems
Smart locks replace traditional deadbolts, offering keyless entry and remote control. They enhance convenience and security for your home protection strategy.
- Keyless Entry: Use keypads, smartphone apps, or even fingerprints to unlock doors.
- Remote Control: Lock or unlock doors from anywhere, provide temporary access codes for guests or service providers.
- Integration: Many smart locks integrate with security systems, allowing you to set rules, such as locking doors automatically when you arm the system.
- Installation: Some smart locks are simple DIY replacements, while others, particularly full-mortise locks, may require professional installation.
“The best smart home is the one you don’t have to manage. Automation takes security from reactive to proactive, ensuring your home protection is always active.”
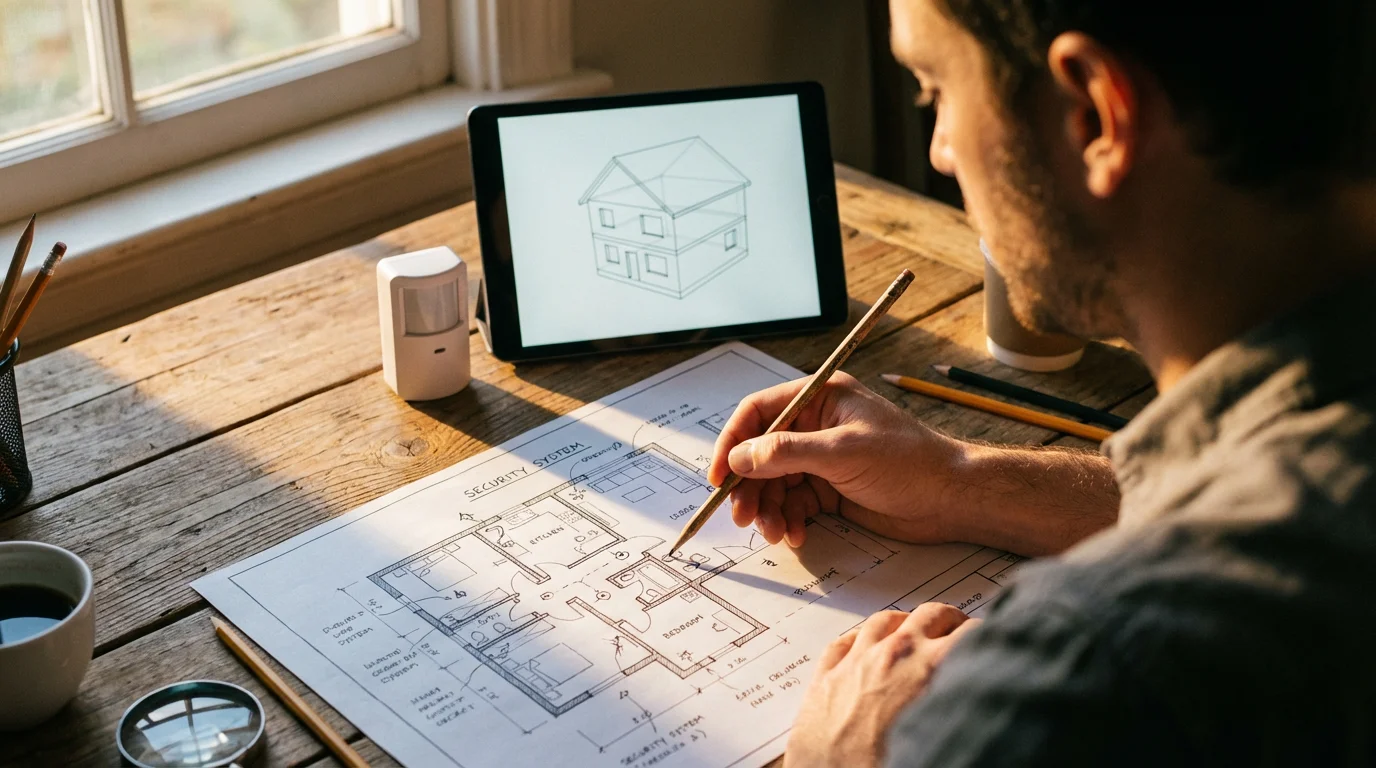
Planning Your System Layout
Strategic placement of your smart security devices maximizes their effectiveness and minimizes blind spots. A well-planned layout ensures comprehensive coverage and reliable performance for your complete smart security setup guide.
Strategic Placement for Cameras and Sensors
Carefully consider where to install each device to get the best coverage and detection.
- Exterior Cameras: Place cameras to cover all main entry points: front door, back door, garage, and any large windows. Aim for a height of 8-10 feet to provide a wide field of view while remaining out of easy reach.
- Video Doorbells: Install these directly on your door frame or near your main entry door. Ensure they have an unobstructed view of anyone approaching.
- Interior Cameras: Position indoor cameras in central areas like living rooms or hallways to cover large spaces. Avoid pointing them directly at windows, as glare can impair image quality.
- Door/Window Sensors: Install these on every exterior door and ground-floor window. Also, consider placing them on valuable cabinet doors or safe doors if desired.
- Motion Detectors: Place motion sensors in high-traffic areas or at the top of staircases. Avoid areas with direct heat sources like radiators or air vents, which can cause false alarms.
Network Considerations for Your Smart Security System
Your smart security devices rely on a stable network connection to communicate effectively. Strong Wi-Fi is essential, but also understand other common smart home protocols.
- Wi-Fi Strength: Ensure your Wi-Fi signal reaches all device locations, especially outdoor cameras. Consider Wi-Fi extenders or a mesh network for larger homes.
- Zigbee and Z-Wave: Many sensors and smart locks use these low-power protocols. They create their own mesh networks, extending range as you add more devices. Your hub typically acts as the bridge to your Wi-Fi network.
- Matter: This emerging standard aims to unify smart home devices, allowing different brands to communicate seamlessly. Check for Matter compatibility to future-proof your system, as noted by organizations like the Connectivity Standards Alliance.
- Ethernet Connections: For critical devices like the main hub or primary outdoor cameras, a wired Ethernet connection offers the most stable and secure connection.
Power Sources and Battery Life
Consider how each device will receive power. This affects both installation ease and ongoing maintenance.
- Wired Devices: Video doorbells and some outdoor cameras often require existing doorbell wiring or an outdoor electrical outlet. Always consult a licensed electrician for complex wiring tasks.
- Battery-Powered Devices: Most door/window sensors and many motion detectors operate on batteries. Check battery life estimates and plan for periodic replacements.
- Solar Power: Some outdoor cameras offer solar panel attachments, providing continuous power without constant battery changes.
Step-by-Step Installation Guide
Installing your smart security system can be a straightforward DIY project. Follow these steps for a smooth setup, ensuring each component integrates correctly into your complete smart security setup guide.
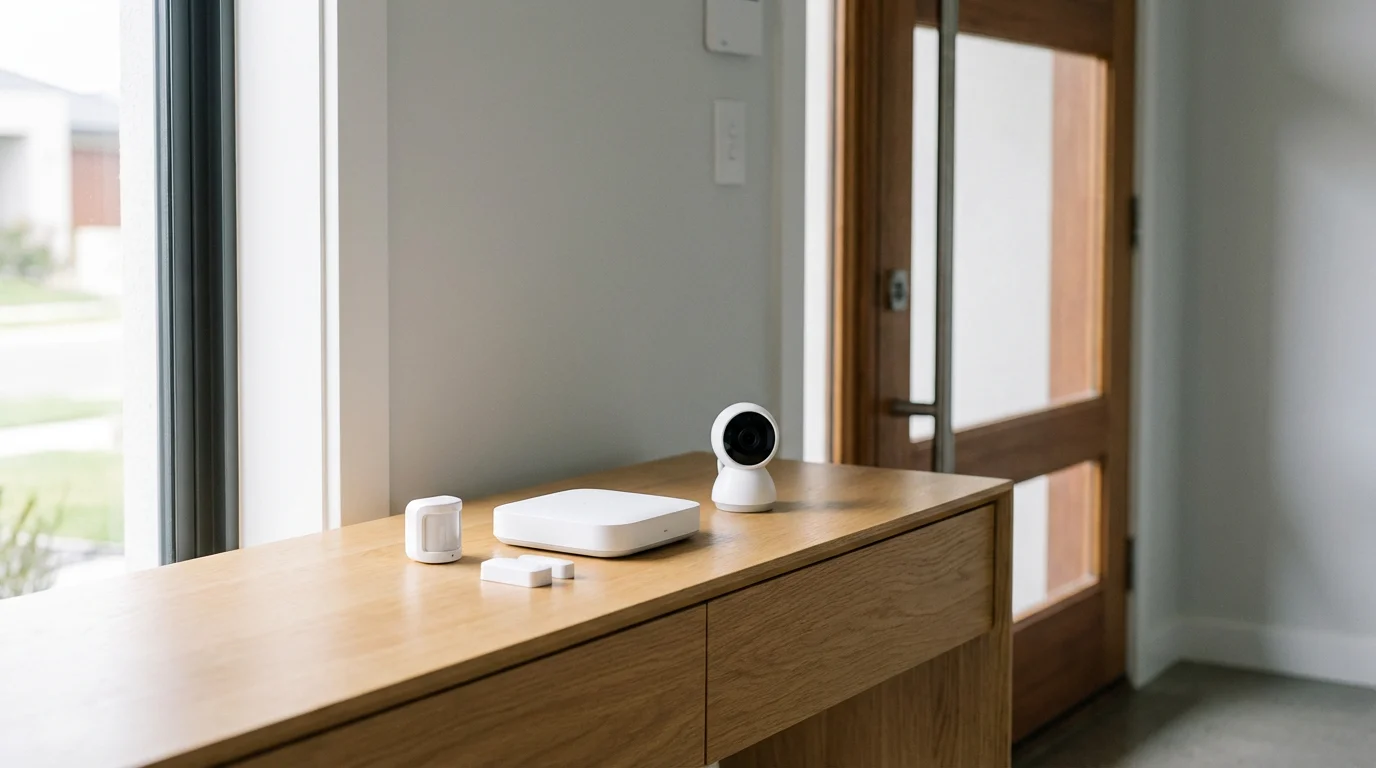
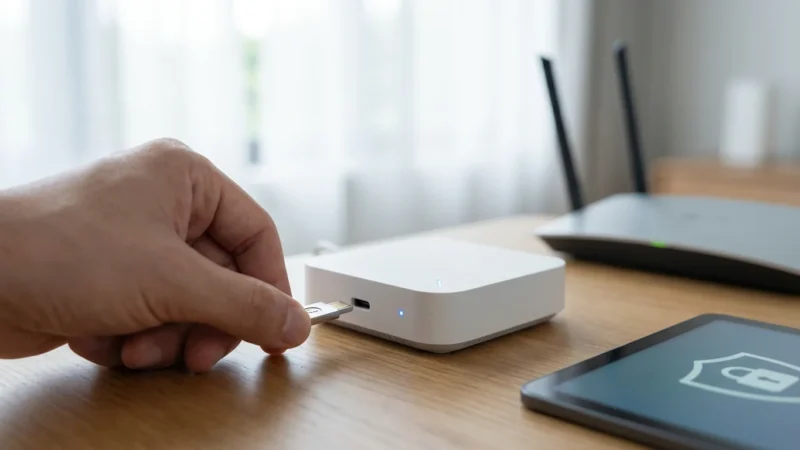
1. Set Up Your Smart Home Hub
The hub is the central point of your system. Install it first to prepare for connecting other devices.
- Choose a Location: Place the hub in a central location in your home, ideally near your Wi-Fi router for optimal connectivity.
- Connect to Power and Network: Plug the hub into a power outlet. If it has an Ethernet port, connect it to your router. Otherwise, follow the instructions for Wi-Fi setup.
- Download the App: Install the manufacturer’s dedicated app on your smartphone or tablet.
- Pair the Hub: Follow the app’s instructions to connect the hub to your home network and create your account.
2. Install Door and Window Sensors
These are typically the easiest components to install.
- Clean Surfaces: Ensure the door/window frame and the door/window itself are clean and dry for optimal adhesive adhesion.
- Mount the Main Sensor: Affix the larger sensor piece to the stationary door or window frame using adhesive strips or screws.
- Mount the Magnet: Attach the smaller magnetic piece to the moving part of the door or window, aligning it with the main sensor so they are no more than half an inch apart when closed.
- Pair with Hub: Open the app, select “Add Device,” and follow the instructions to pair each sensor with your hub. Test each sensor by opening and closing the door/window.
3. Mount Motion Detectors
Strategic placement ensures effective coverage without false alarms.
- Choose Location: Select a corner of a room, a hallway, or at the top of a staircase. Mount it at the manufacturer-recommended height (usually 6-8 feet).
- Avoid Obstacles: Ensure no large furniture or curtains block the sensor’s field of view.
- Mount the Sensor: Use the provided adhesive or screws to fix the motion detector to the wall.
- Pair and Test: Pair the sensor with your hub via the app. Walk through the monitored area to test its detection range and sensitivity. Adjust settings in the app if needed (e.g., pet immunity).
4. Install Smart Cameras and Video Doorbells
Installation varies depending on whether they are wired or wireless.
- Wireless Cameras:
- Charge the battery, if applicable.
- Mount the camera in its desired location using the provided bracket and screws.
- Open the app, select “Add Device,” and follow the pairing instructions.
- Adjust the camera angle for optimal viewing.
- Wired Cameras/Video Doorbells:
- Safety First: Turn off power to the doorbell circuit or relevant electrical outlet at your breaker box before handling any wires.
- Remove your existing doorbell or light fixture.
- Connect the new smart doorbell/camera wires according to the manufacturer’s instructions.
- Securely mount the device.
- Turn power back on and follow the app instructions to connect and configure the camera.
- For complex outdoor camera wiring, consider consulting a licensed electrician for safety.
5. Install Smart Locks
Many smart locks replace existing deadbolts, simplifying DIY security installation.
- Remove Old Deadbolt: Follow the instructions for your specific smart lock to remove your existing deadbolt assembly.
- Install New Components: Insert the new exterior keypad/touchpad, interior thumb-turn assembly, and the strike plate according to the smart lock’s manual.
- Connect Wires/Batteries: If applicable, connect any internal wires and insert the required batteries.
- Test Mechanical Operation: Before pairing, manually test the lock to ensure it operates smoothly.
- Pair with Hub/App: Open the smart lock’s app or your security system’s app, select “Add Device,” and follow the pairing process.
- Calibrate and Test: Most smart locks require calibration. Test the lock using the app and keypad to ensure remote and manual operation.
6. App Setup and Configuration
The app is your control center for your smart security system.
- Customize Settings: Adjust sensor sensitivity, notification preferences, and alarm sounds.
- Create Zones: Group sensors into zones (e.g., “downstairs,” “upstairs,” “garage”) for easier management and arming.
- Set Up Users: Add family members or trusted individuals, granting them appropriate access levels.

Advanced Security Features and Automation
Beyond basic monitoring, smart security systems offer advanced capabilities. These features enhance your home protection and integrate seamlessly with your smart home ecosystem, creating a more responsive and efficient environment.
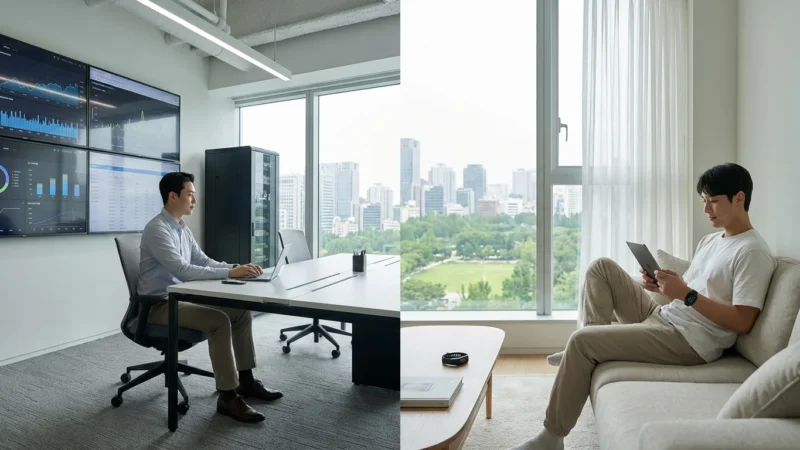
Professional Monitoring vs. Self-Monitoring
Decide whether you want a security company to monitor your system or if you will handle alerts yourself.
- Professional Monitoring: A central station receives alerts from your system and dispatches emergency services (police, fire, medical) if needed. This typically involves a monthly subscription fee. For example, some services dispatch emergency responders faster than self-monitoring allows.
- Self-Monitoring: You receive alerts directly on your smartphone. You are responsible for contacting emergency services if an event occurs. This option avoids monthly fees but requires you to be consistently available to respond.
Integration with Other Smart Devices
One of the biggest advantages of a smart security system is its ability to integrate with other smart home devices, creating powerful automations.
- Smart Lighting:
- Turn on interior lights automatically if a motion sensor is triggered.
- Flash exterior lights when an alarm sounds to draw attention.
- Program lights to mimic occupancy when you are away.
- Smart Sirens: Supplement your hub’s built-in siren with additional, louder sirens placed strategically around your home.
- Smart Speakers: Receive audible alerts through your smart speakers or use voice commands to arm/disarm your system.
- Environmental Sensors:
- Smoke and CO Detectors: Integrate smart smoke and carbon monoxide detectors to send mobile alerts and potentially trigger connected sirens, even if you are not home.
- Water Leak Sensors: Place these in basements, near water heaters, or under sinks. They alert you to leaks, preventing costly water damage.
Customizable Alerts and Rules
Personalize how your system responds to events and how it notifies you.
- Specific Notifications: Receive alerts only for specific events, such as “front door opened” or “motion detected in the backyard.”
- Automated Responses: Set rules such as “if a window opens after 10 PM, turn on the bedroom light and send an alert.”
- Geofencing: Use your phone’s location to automatically arm your system when you leave home and disarm it when you return.
Ensuring Privacy and Cybersecurity
Your smart security system collects sensitive data, including video footage and activity logs. Protecting this information is as crucial as protecting your physical property. Implement these best practices to secure your digital home protection.
Beyond physical security, it is vital to learn how to secure your smart home from hackers by implementing strong network protocols and regular firmware updates.
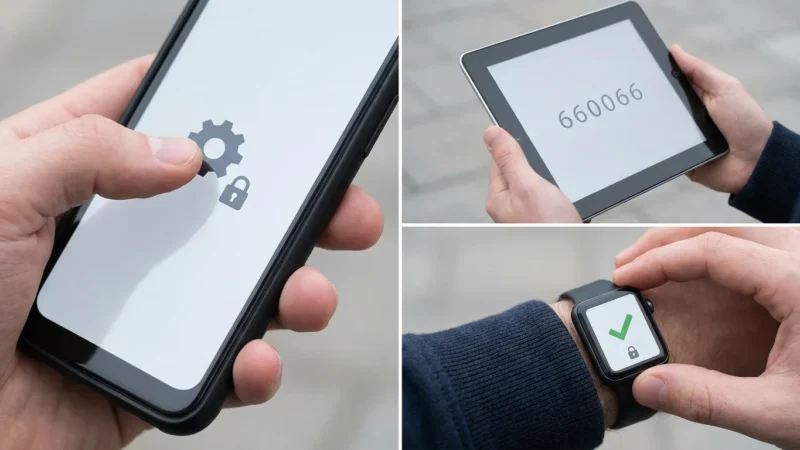
Strong Passwords and Two-Factor Authentication (2FA)
These are your first lines of defense against unauthorized access.
- Unique, Complex Passwords: Create strong, unique passwords for all your smart home accounts. A password manager can help you manage these. Avoid using the same password across multiple services.
- Enable 2FA: Always enable two-factor authentication (2FA) if your smart home devices or apps offer it. This adds an extra layer of security, requiring a second verification step (like a code from your phone) in addition to your password.
Secure Your Wi-Fi Network
Your home network is the backbone of your smart security system. A compromised network puts all your devices at risk.
- Change Default Router Credentials: Immediately change the default username and password for your Wi-Fi router.
- Use WPA3 Encryption: Ensure your router uses WPA3 or at least WPA2 encryption. WPA3 offers stronger encryption than older standards.
- Guest Network: Consider setting up a separate guest Wi-Fi network for visitors and less critical smart devices. This isolates them from your main network where your security system operates.
Regular Firmware Updates
Device manufacturers frequently release firmware updates to fix bugs and patch security vulnerabilities. Staying up-to-date is vital.
- Check for Updates: Regularly check your device apps for firmware updates. Many devices can be set to update automatically.
- Benefits: Updates often include security enhancements that protect against new threats and improve device performance.
Understanding Cloud vs. Local Storage and Data Privacy
Your choice of video storage affects privacy and security. Understand the implications of each.
- Cloud Storage:
- Pros: Footage is safe even if cameras are stolen or damaged. Accessible from anywhere.
- Cons: Relies on the security of the service provider. Potential privacy concerns if data is not encrypted or handled responsibly. Often involves subscription fees.
- Local Storage:
- Pros: Full control over your data. No recurring fees. Footage remains within your home network.
- Cons: Footage is lost if the camera or storage device is stolen or destroyed. Limited remote access unless you set up a secure VPN.
- Encryption: Prioritize devices that offer end-to-end encryption for video streams and recorded footage, whether stored locally or in the cloud.
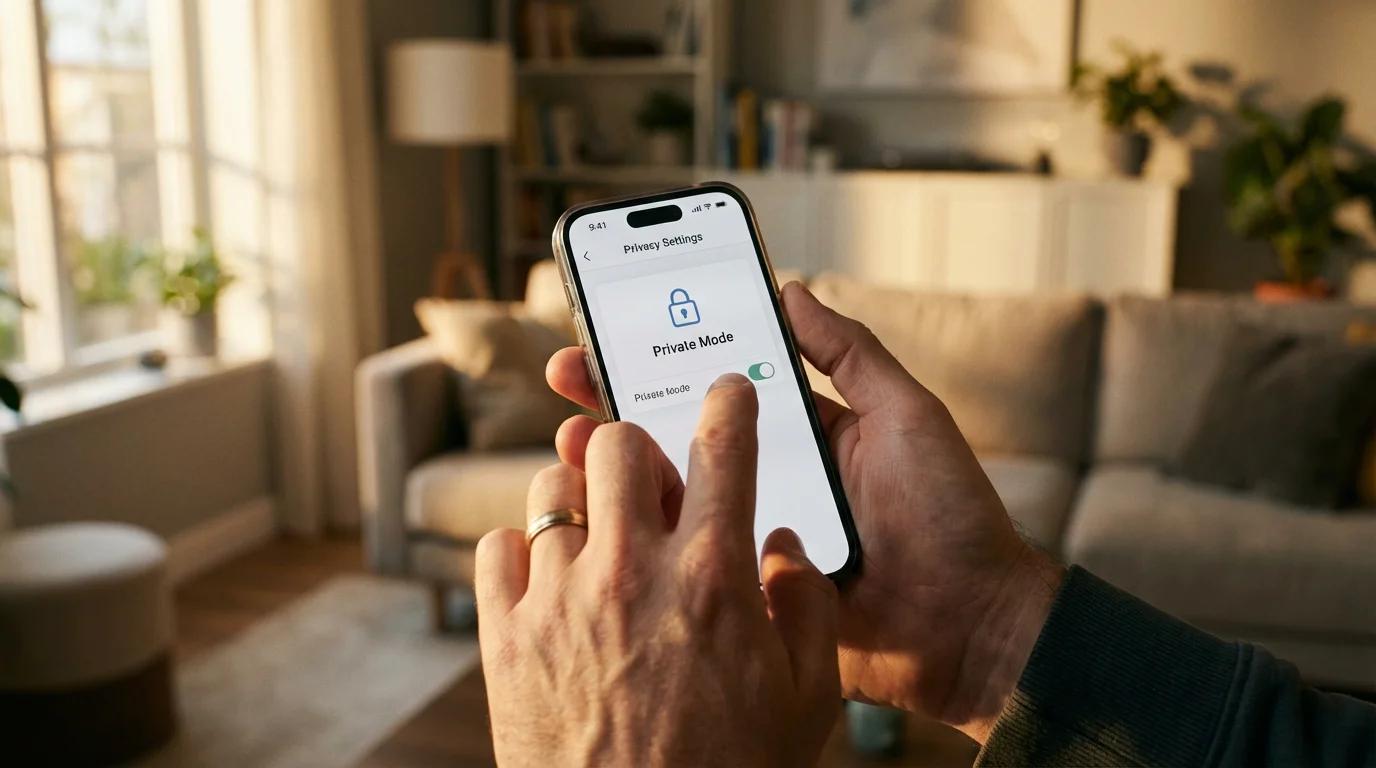
Camera Privacy Settings and Best Practices
Be mindful of where and how you use cameras to respect privacy.
- Strategic Placement: Avoid pointing outdoor cameras directly into neighbors’ windows or public areas where privacy expectations are high. Focus on your property.
- Privacy Zones: Many cameras offer privacy zones, allowing you to black out specific areas within the camera’s field of view that you do not want to record.
- Motion-Activated Recording: Configure cameras to record only when motion is detected, reducing unnecessary footage and potential privacy intrusions.
- Inform Others: If you have houseguests or hire service providers, inform them that security cameras are in use. Transparency builds trust.
Testing Your Smart Security System
After installation, thoroughly test your complete smart security setup guide to ensure everything functions correctly. Regular testing provides confidence in your home protection and helps you identify any issues before an actual emergency occurs.
Regular Checks and Maintenance
Make testing a routine part of your home maintenance. This ensures ongoing reliability.
- Battery Checks: Regularly monitor battery levels for all battery-powered sensors and devices. Replace batteries proactively before they die.
- Sensor Functionality: Periodically open each door and window with a sensor to confirm that your app registers the event and that alarms trigger if the system is armed.
- Camera Feed Review: Check live camera feeds weekly to ensure they are online, have clear video, and cover the intended areas.
- Network Connectivity: Confirm all devices remain connected to your network. Address any Wi-Fi dead zones or connectivity issues promptly.
Simulating Security Scenarios
Run through various scenarios to understand how your system responds in real-world situations.
- Arming and Disarming: Practice arming and disarming your system using the app, keypad, and any integrated smart assistants. Ensure entry and exit delays are appropriate for your habits.
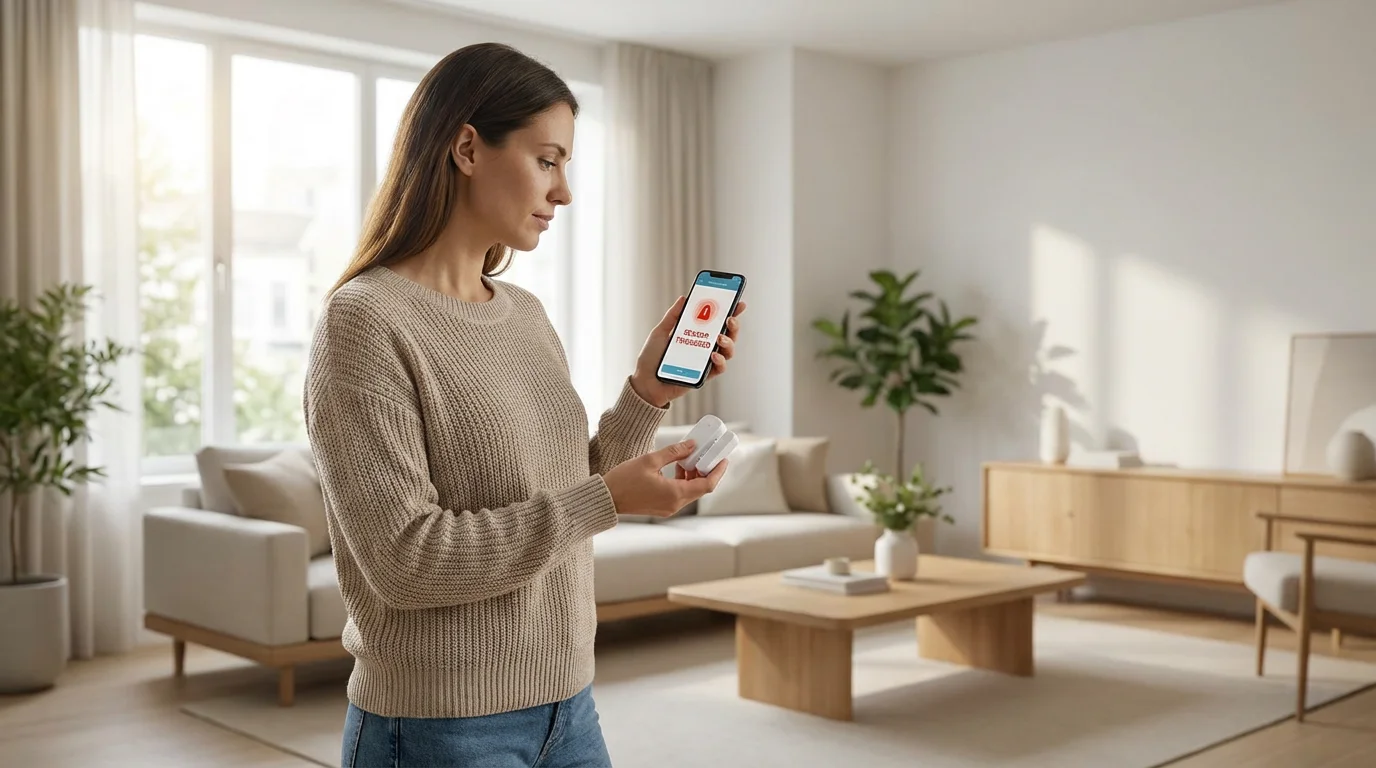
- Alarm Triggers: Arm your system and intentionally trigger a sensor (e.g., open a door, walk in front of a motion detector). Verify that the siren sounds, and you receive instant notifications on your phone.
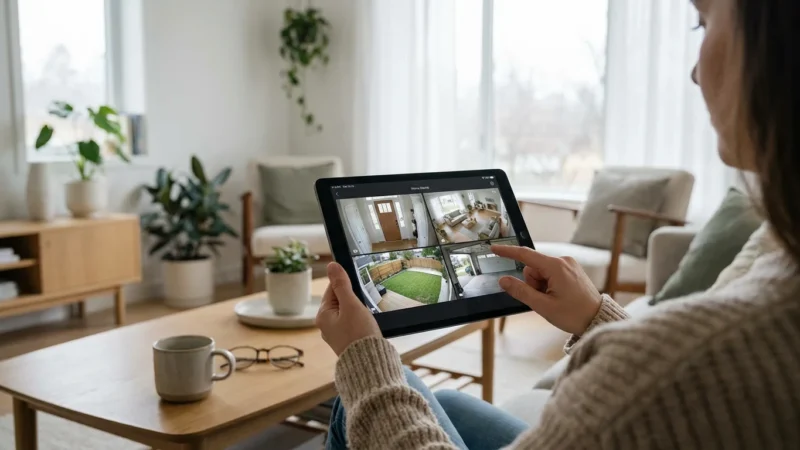
- Remote Monitoring: While away from home, check your camera feeds and system status from your smartphone to confirm remote access works.
- Two-Way Audio: Test the two-way audio feature on your video doorbell or indoor cameras to ensure clear communication.
Troubleshooting Common Issues
Even with careful planning, you might encounter minor issues. Knowing how to troubleshoot helps maintain an effective home protection system.
- False Alarms:
- Cause: Pet motion, direct sunlight on sensors, objects moving in camera view (e.g., flags, branches).
- Solution: Adjust sensor sensitivity, reposition sensors/cameras, enable pet immunity, use privacy zones on cameras.
- Connectivity Problems:
- Cause: Weak Wi-Fi signal, device too far from hub, network congestion.
- Solution: Move devices closer to the router/hub, install Wi-Fi extenders or a mesh network, restart router/hub.
- Notifications Not Sending:
- Cause: App permissions, notification settings disabled, poor internet connection.
- Solution: Check app notification settings on your phone, verify internet connection, restart app.
Frequently Asked Questions
What is the difference between a smart security system and a traditional alarm system?
A smart security system integrates connected devices, allowing you to monitor and control your home remotely via an app. It offers advanced features like video surveillance, smart locks, and automation rules. Traditional alarm systems typically rely on a centralized control panel, sensors, and often professional monitoring, with less remote control or integration with other smart devices.
Can I integrate my existing smart devices with a new security system?
Yes, often. Many smart security systems are designed to integrate with popular smart home platforms and devices that use standards like Wi-Fi, Zigbee, Z-Wave, or Matter. Check the compatibility lists of the security system you are considering to ensure your existing smart lights, thermostats, or speakers can work together.
How much does a complete smart security system cost?
The cost varies significantly. A basic DIY setup for a small apartment might start from a few hundred dollars. A comprehensive system for a larger home with multiple cameras, smart locks, and professional monitoring can cost over a thousand dollars upfront, plus monthly subscription fees ranging from $10 to $60 for cloud storage and monitoring services. PCMag offers insights on various systems and their pricing.
Is DIY installation safe, or should I hire a professional?
Many smart security systems are designed for straightforward DIY installation, especially battery-powered sensors and wireless cameras. However, tasks involving existing electrical wiring, such as hardwired video doorbells or outdoor cameras, may require comfort with basic electrical work. If you are uncertain or uncomfortable, hiring a licensed professional ensures safety and proper functionality.
What happens if my internet goes out?
Most smart security systems include backup options for internet outages. Many hubs have cellular backup, allowing the system to continue sending alerts and communicating with professional monitoring services. Battery backup in the hub ensures the system remains powered during power outages. However, cameras relying solely on Wi-Fi for streaming will typically lose functionality until the internet connection is restored.
Disclaimer: This article is for informational purposes only. Smart home devices involve electrical connections and data privacy. Always follow manufacturer instructions for installation. For complex wiring or HVAC work, consult a licensed professional.
Once your cameras are positioned, consider setting up motion detection zones on security cameras to reduce false notifications from passing cars or swaying trees.
Leave a Reply